
Review: Contax AX

Background
By the mid-1990s, autofocusing tech was in full swing. Canon, Nikon, and Minolta had been integrating it into their 35mm cameras since the early '80s, and by now, pretty much every brand was chasing faster, smarter lenses that could focus themselves.
Autofocus works by using an electronic motor to shift specific internal glass elements, adjusting the plane of focus. Simple in theory, but it changes everything about how a lens is designed and built.
This posed a real problem for Contax. How do you move forward with autofocus without abandoning the lineup of beautifully built, manual-focus Zeiss lenses people already loved?
To zoom out for a second: Zeiss, the German optics giant, had sold the Contax brand to Kyocera, a Japanese company looking to modernize the system. Kyocera wanted full-blown autofocus, but Zeiss wasn’t ready to ditch their Contax/Yashica-mount lenses, or the loyal user base that came with them. They feared the potential backlash if they suddenly made all that legacy glass obsolete.
So what did they do? They devised a workaround that was so wild and beautifully overengineered that it became one of the most fascinating film cameras ever made.
Instead of putting autofocus functionality in the lenses, they added it to the camera body.
Released in 1996, the Contax AX remains the only film camera ever made that can autofocus manual lenses. While most manufacturers introduced entirely new autofocus lens systems, Contax chose to keep their existing Zeiss lens lineup compatible by building the autofocus mechanism into the camera body.
The AX achieves this by physically moving the entire film plane and mirror box assembly back and forth to shift the plane of focus, leaving the lens itself completely untouched. This clever workaround allows full autofocus functionality without changing the optical design of the lenses. Contax dubbed this technology the Automatic Back Focusing System.
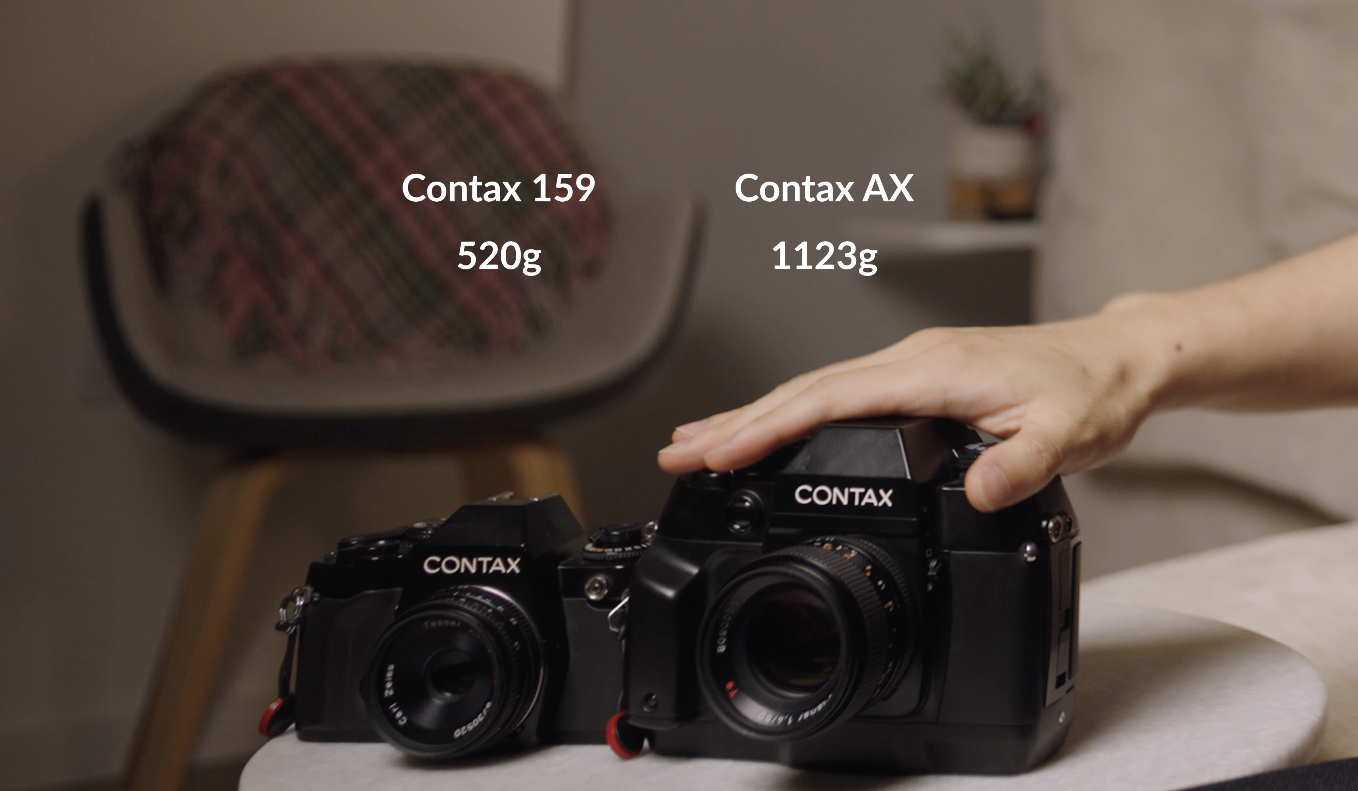
The result is a camera body that’s noticeably large, closer in size to a medium format system than a typical 35mm SLR.
Specs
Camera: Contax AX
Release Date: April 1996
Type: 35mm Film SLR
Mount: Contax/Yashica (C/Y)
Focus: Automatic Back Focusing
System: Electronic
Shutter Speeds: 4s - 1/4000s Manual + AV & P Modes: 4s - 1/6000s + Bulb
Motor Drive: Automatic Film Advance
Metering: Center-weighted Average + Spot Metering
Film Speeds: DX Code: ISO 25 - 5000; Manual ISO: 6 - 6400
Exposure Modes:
(AV) Aperture Priority
(TV) Shutter Priority
(P) Auto
(M) Manual
(X) Flash
(B) Bulb
Weight: 1123g (With Battery)
Power: (1) 2CR5 Battery
Weather Sealing: None
Price: $200 - $300 USD Used (Initially released at $2795 USD in 1996, $5730 today)
Body

By the 1990s, the Contax SLR system was firmly established. Earlier cameras like the Contax RTS, 137 MD, 159MM, and the Yashica FX-3 had earned a solid reputation for being both reliable and well-designed. The Contax/Yashica lineup stood out as a thoughtful collaboration between German and Japanese engineering: Yashica (and later Kyocera) handled the electronics, Zeiss supplied the optics and overall engineering, and the camera designs themselves were styled by Porsche. It was a rare blend of technical performance and beautiful aesthetics.
While the initial Contax cameras of the 1980s were minimal and sleek, the cameras in the latter years of the Contax SLR system were becoming larger and larger, with added technology such as an integrated motor drive for automatic film advancing.
The Contax AX looks like an absolute behemoth compared to its predecessors.
There’s a lot to cover in terms of the functions and capabilities of the Contax AX’s camera body.
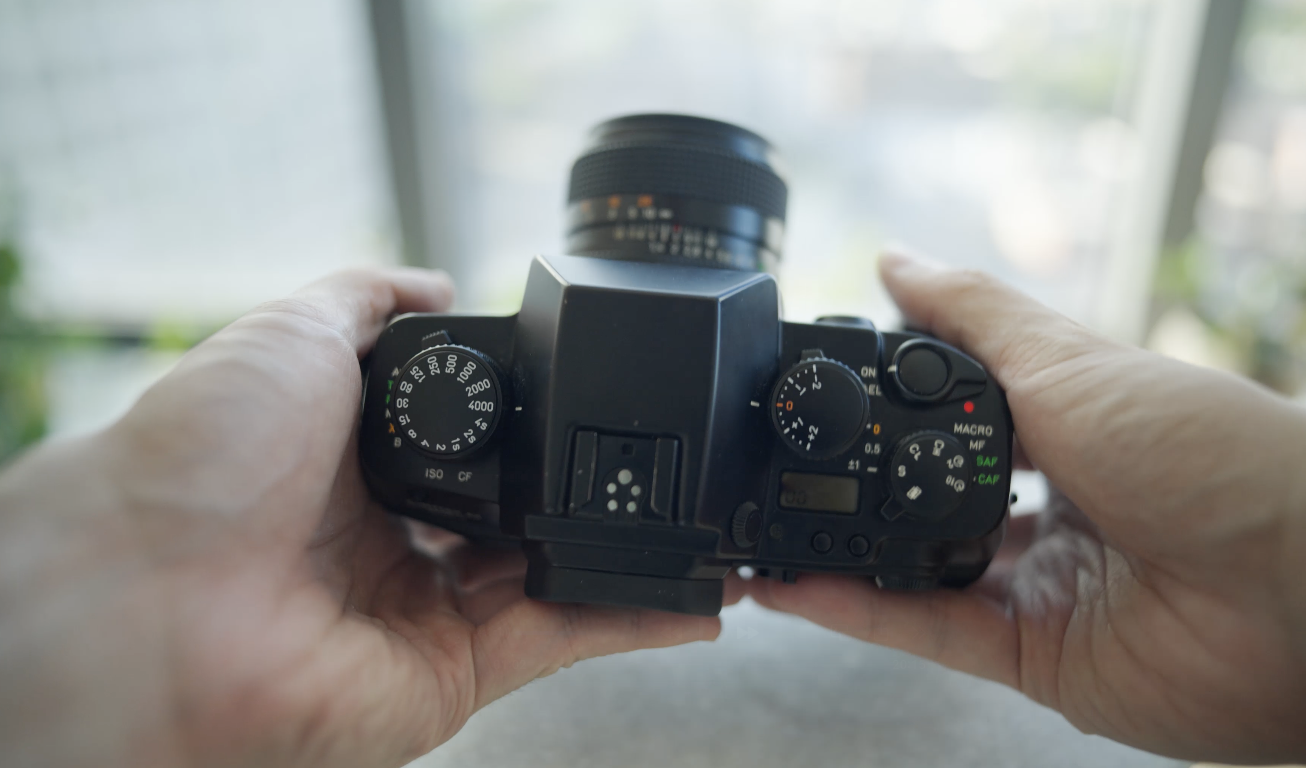
Let’s start with the top plate…
Starting on the left side of the top plate, you’ll notice the shutter speed dial, unlike most 35mm SLRs, where it’s typically on the right, Contax places it on the left. The AX offers a full range of shutter speeds from Bulb, 4 seconds, all the way up to 1/4000s. In Aperture Priority or full Program modes, it even extends to 1/6000s.
Just to the left of the shutter dial is a mode selector. You’ll need to press a small button below the “ISO” label to unlock and rotate this switch. The available modes are:
AV – Aperture Priority
TV – Shutter Priority
P – Program/Auto
M – Manual
X – Flash Sync
B – Bulb
Continue turning the switch past the shooting modes, and you’ll land on ISO. Here you can set your ISO manually, from 6 to 6400. The AX also includes a DX code reader to automatically detect ISO from most standard film canisters, but if you're using bulk-rolled film or non-coded third-party stocks, manual ISO control is easy to access.
In addition to the ISO setting, there’s also a “CF” option on the dial—short for Custom Functions. I’ll go into more detail about those further down, but for now, let’s move over to the right side of the top plate, where most of the camera’s controls live.

Exposure Mode Dials

ISO & Custom Function
At the top right corner, you’ll find the main power switch, which also includes an AEL (Auto Exposure Lock) function to lock your exposure. Left to that is the Exposure Compensation dial, allowing for adjustments in ±2-stop increments. Attached to it is a small lever called ABC (Auto Bracketing Control), which lets you shoot three frames in a row with either ±0.5 or ±1-stop exposure differences. This is especially useful for landscape work or situations where you want to make sure you nail exposure, something common in modern digital bodies, but relatively advanced for film cameras in the '90s.
Below the Exposure Compensation dial on the right is the shutter speed and drive mode dial. Pulling up on the dial lets you switch between different shooting modes: Double Exposure, Single Shot, Continuous Low (3 fps), Continuous High (5 fps), 2-second self-timer, and 10-second self-timer. While it’s not quite as fast as a Nikon F5, the 5 fps option is still capable for sports or action.
A small switch for adjusting the focus mode is built into the same dial. Your options are CAF (Continuous Autofocus), SAF (Single Autofocus), MF (Manual Focus), and a unique Macro mode. This Macro mode takes advantage of the AX’s internal focusing mechanism, which physically shifts the film plane forward, essentially acting like a built-in extension tube. You lose autofocus in this mode, but thanks to the bright, clear viewfinder, manual focus is still very usable for close-up photography.
Lastly, on the lower left side of the top plate, there’s a small digital display showing your frame count, ISO, and a few other basic readouts.
Now, back to the Custom Function (CF) setting mentioned earlier. This lets you tweak deeper settings, though it’s not the most intuitive system. When you enter CF mode, the camera displays a pair of numbers: one from 1 to 8 (representing the function), and one from 0 to 1 (to toggle that function on or off). Here’s a breakdown of what those settings control:
| Function | 0 | 1 |
|---|---|---|
| 1. Exposure Check Buttom | Display Exposure | Auto Exposure Lock (AV, TV, P Mode) |
| 2. Multiple Exposure | 2-9 Number of Exposures | Set multiple exposures according to drive dial |
| 3. Shooting order of ABC | Standard -> Over -> Under | Over -> Standard -> Under |
| 4. Stop-Down Buttom | Stopped down when button is pressed | Stopped down when button is pressed and aperture fully opens when pressed a second time |
| 5. Film Leader | Film is completely rewound back into the cassettte | Film leader remains outside the cassette after rewind |
| 6. Rewind | Rewinding with the rewind lever | Automatic rewind when film is finished |
| 7. AF Assist Lamp | AF Assist Lamp On | Off |
| 8. AF Sound | AF Beep when focus aquired | Off |
As you can see, the Custom Function settings offer a fair amount of flexibility. Personally, I only make a few adjustments: I disable auto film rewind (6-0), turn off the AF assist lamp (7-1), and mute the autofocus confirmation beep (8-1). I appreciate that Contax gave users the option to toggle these features off. The viewfinder provides clear focus confirmation, so there’s really no need for an audible beep or a glowing assist light, both of which can be distracting, especially when shooting in quiet or low-light environments.

The rear of the Contax AX is much simpler than the top plate, with fewer buttons but all the essentials in the right places. On the left side, you’ll find the button used to adjust the left dial—this needs to be held down when switching between exposure modes.
At the center is the viewfinder, which is easily one of the best I’ve used on an SLR. It’s bright, clear, and includes a built-in diopter adjustment. Just to the left of the eyepiece is a viewfinder blind switch, useful for preventing light leaks during long exposures.
To the right of the viewfinder is the film rewind lever. You’ll need to press a small button first before toggling the lever. This is something I really appreciate, since it prevents accidental rewinds mid-roll.
Further to the right is the autofocus control button. It’s paired with a surrounding dial that lets you choose between standard autofocus or AF lock, which is helpful when you want to recompose your shot without shifting focus.

Looking through the viewfinder, you’ll see an LED information bar along the bottom that displays everything you need while shooting.
On the far left is the frame counter showing your current position on the roll. Next to it is the metering mode indicator. In the center is the Automatic Back Focusing scale, which shows how much the internal mirror box is shifting to achieve focus. On the far right, you’ll see your exposure readout indicating aperture and shutter speed values, so you can quickly confirm your settings without taking your eye away.

Automatic Film Loader
The left side of the camera gives you access to the film compartment. When you open the back, you’ll see the Automatic Back Focusing system reset, and the mirror box slides back to its default position to make room for loading.
Loading film is straightforward. Just drop in the film cassette, pull the leader across to the green marker, and close the back. The camera takes care of the rest, automatically advancing the film to the first frame.
The bottom plate of the camera is easily removable using a simple plastic locking tab. Unlike the rest of the camera’s solid, metal construction, the plate itself is made from thin plastic and feels noticeably more delicate. It also covers the battery compartment, so it’s worth being careful not to misplace it.
Not sure if this is present on every Contax AX, but my version also has a plastic film with the table displaying all the Custom Function information.
The front of the camera is fairly minimal. There’s a modest grip, a prominent AF assist lamp, and a few essential controls: an exposure check button, a lens release button, and an aperture stop-down button. Everything is cleanly laid out and easy to access without cluttering the design.
Just opposite the lens mount is a small but important metering lever. It lets you switch between Center-Weighted Average and Spot Metering. It’s easy to overlook, so it’s worth checking regularly to make sure you’re metering the way you intend.
All things considered, there’s a lot happening on the Contax AX body, but after spending time with it, everything becomes second nature. If you’re used to working with button-heavy systems like cinema cameras or modern pro mirrorless bodies, you’ll probably find the layout pretty intuitive.

Custom Function Table

Exposure Metering Mode Lever
The biggest challenge with the AX is its sheer weight and somewhat awkward ergonomics. It’s not the most uncomfortable camera I’ve used, but the sharp edges and bulk make it tough to handhold for extended periods. A solid camera strap is a must if you plan to carry it around for a full day.
For context, it weighs about the same as a medium format Mamiya 7.
Let’s move onto the lens options for the Contax AX…
Lenses
Click to expand images.
One of the biggest reasons to invest in the Contax AX and the Contax/Yashica SLR system is the incredible lineup of Zeiss and Yashica lenses available.
The Contax Zeiss glass, in particular, ranks among the best SLR lenses ever made. These lenses remain popular today, whether photographers adapt them to modern mirrorless cameras or videographers seek lenses with unique character. The Zeiss Planar 50mm f/1.4, for example, is a favorite for adapting to digital bodies. These lenses share heritage with the legendary Zeiss Super Speed cinema lenses used on iconic films like The Shining, The Terminator, Full Metal Jacket, and Lost in Translation.
Here’s a full database of Contax/Yashica lenses for reference.
You’ll notice some lenses are marked AE (Auto Exposure) or MM (Multi Mode), usually you’ll see them followed by a third letter indicating manufacturer origin, (J) Japan or (G) Germany. AE lenses were the original Zeiss offerings for the system. They don’t have a mechanical link to the camera body and are known for a distinctive “Ninja Star” bokeh, caused by aperture blades that don’t form a perfect circle, creating unique out-of-focus highlights.
MM lenses came later and include a mechanical connection that enables shutter priority and program auto-exposure modes. These lenses don’t have the Ninja Star bokeh, making them more popular with videographers. You can spot MM lenses by their green aperture markings. On the Contax AX, you’ll also see the shutter priority (TV) and program (P) modes marked in green, reminding you that MM lenses are required to use these modes.
While many say there’s no optical difference between AE and MM lenses, I’ve noticed the coatings and glue used in MM lenses are different, affecting their durability and image quality.
A couple of popular MM lenses, like the Contax 50mm f/1.4 Planar and the Contax 100-400mm zoom, are known to have lens fogging issues. If you come across a fogged lens on eBay, I recommend reaching out to a Taiwanese lens repair specialist I trust. He’s repaired two of my Contax lenses without any problems.
You can find him here: https://lens-cla.blogspot.com/ or contact him by email at lin0975165383@gmail.com.

Cinestill 800T. The Contax AX’s metering modes favors the center of the image.
Another great feature of the Contax AX is its ability to use a wide range of lenses beyond just the Contax Zeiss lineup. If you’re looking for a more budget-friendly option, the Yashica ML lenses are worth considering. These were the higher-end lenses from Yashica and offer surprisingly good image quality, often approaching that of the Contax Zeiss lenses. That said, they’re not built to the same standard. The ML lenses rely more on plastic and glue in their construction, so while the optics hold up well, the build feels noticeably cheaper. On the plus side, they’re much lighter, which can be a welcome relief given how heavy the Contax AX is.
Just a heads-up: avoid the Yashica DSB lenses. These were the lower-tier versions and are known for poor optical performance. Stick with the ML versions if you're looking for quality at a lower price.
In addition to Yashica ML lenses, the Contax AX can also mount and autofocus M42 screw-mount lenses with the right adapter. This opens up access to a huge library of classic lenses, including well-known options like the Helios 44 series and Carl Zeiss Jena lenses.
I’ve personally adapted my Helios, Biotar, and Carl Zeiss Jena lenses to the AX, and being able to autofocus with these vintage lenses is a real bonus. It’s one of the few ways to give old manual-focus glass modern autofocus functionality, without losing the character that makes those lenses special! In my opinion, this is the most beautiful benefit of shooting with the Contax AX. You can keep all of your Contax Zeiss lenses and M42 lenses on one film camera.
Images


In order to autofocus with manual lenses on the Contax AX, you’ll need to first set the lens to infinity, then tap the AF button to let the camera do the work.
That said, autofocus on the AX is somewhat limited by today’s standards, with its one autofocus point. While it’s generally responsive, it doesn’t quite hold up to contemporaries like the Nikon F5 (released in 1996 with 5 autofocus points) or the Canon EOS 3 (1998, with 45 autofocus points and an innovative Eye-Control system that let you select focus points just by looking).
Still, the AX’s autofocus is perfectly usable if you’re comfortable working with a single focus point. In low-light or challenging situations, you can always let the AX get close by tapping the AF button, then fine-tune the focus manually. It’s a unique hybrid experience, but one that works surprisingly well once you get used to it.
Final Thoughts
Pros:
Unique Autofocus
Very customizable functions
3-5 FPS burst
Macro functionality
Ability to adapt C/Y and M42 lenses
Auto film advance and rewind
Aperture Priority, Shutter Priority, and Auto
Cons:
Incredibly heavy
New photographers may be overwhelmed with functionality
Custom Function system can be confusing
Over-engineered
At the end of the day, the Contax AX is the most over-engineered 35mm film camera I’ve ever used. It was designed as a bold solution to a problem Contax couldn’t fully avoid. Despite the AX’s attempt to preserve the legacy of manual Zeiss lenses, Kyocera eventually moved on to the Contax N system with dedicated autofocus lenses. Not long after, the Contax brand was shuttered in the early 2000s, and the name returned to Zeiss.
Another downside to owning a Contax AX, or really, most Contax SLRs, is their heavy reliance on electronics. If something goes wrong, repairs can be difficult, if not impossible. There are very few technicians who still work on these cameras, and parts are increasingly hard to come by.
My own Contax AX developed a mechanical issue with the lens mount ring, and I had to send it to Nippon Photo Clinic, the only certified Contax repair center in the U.S. Fortunately, they were able to fix it, but it’s a reminder that owning one of these cameras comes with some risk.
Rating: 4/5
While the AX is definitely a luxury 35mm film camera, its ability to autofocus with a wide range of manual lenses gives it a truly unique place in the market. It may not be as practical or battle-ready as something like the Nikon F5 or Canon 1V, but it’s still very usable and in my view, deserves recognition as one of the most unusual and ambitious film cameras ever made.

Review: Rollei 35 AF
Background
2024 was an exciting year for film photographers. While the past five years have witnessed a resurgence in film photography and the release of new film stocks, the market had yet to see the arrival of any serious new film cameras. That changed over the past 12 months with the introduction of two exciting models: the half-frame Pentax 17 and the much-anticipated autofocus Rollei 35 AF.

Cinestill 800T

Delta 3200
While the Pentax 17 generally received a warm welcome from the film community, the Rollei 35 AF had some mixed reactions from photographers. The Rollei 35 AF is produced by Hong-Kong based MiNT Camera, a company largely known for it’s production of modern instant film cameras with vintage designs. This is their first forray into a serious autofocus 35mm camera and their design for the new camera was inspired by the classic Rollei 35 zone-focus film cameras that were produced from 1966 - 1981. The original Rollei 35 cameras are somewhat cult-classics within the film community for their incredible compact size, zone-focusing system, and beautifully engineered German-optics. There was a high expectation for those who loves the classic Rollei 35.

Pro Image 100

Pro Image 100
To avoid confusion in this review, I’d like to clarify that MiNT Camera bought the rights to use the German “Rollei” brand and are not the original manufacturers of the classic Rollei 35. While the Rollei 35 AF shares visual resemblance in camera body structure as the vintage Rollei 35, that’s where the similarities end.
Specs
Camera: Rollei 35 AF
Release Date: September 2024
Type: 35mm Film Point-and-Shoot
Mount: Fixed Lens 35mm f/2.8
Focus: LIDAR Autofocus
System: Full-Electronic
Shutter Speeds: 60s - 1/500s; 10s Self-Timer
Motor Drive: Manual Film Advance
Metering: Center-weighted Average
Film Speeds: ISO 25 - 3200
Exposure Modes: Aperture Priority; Manual
Weight: 242g (Without Battery)
Power: (1) 2CR5 Battery
Weather Sealing: None
Price: $799.00 USD
Body

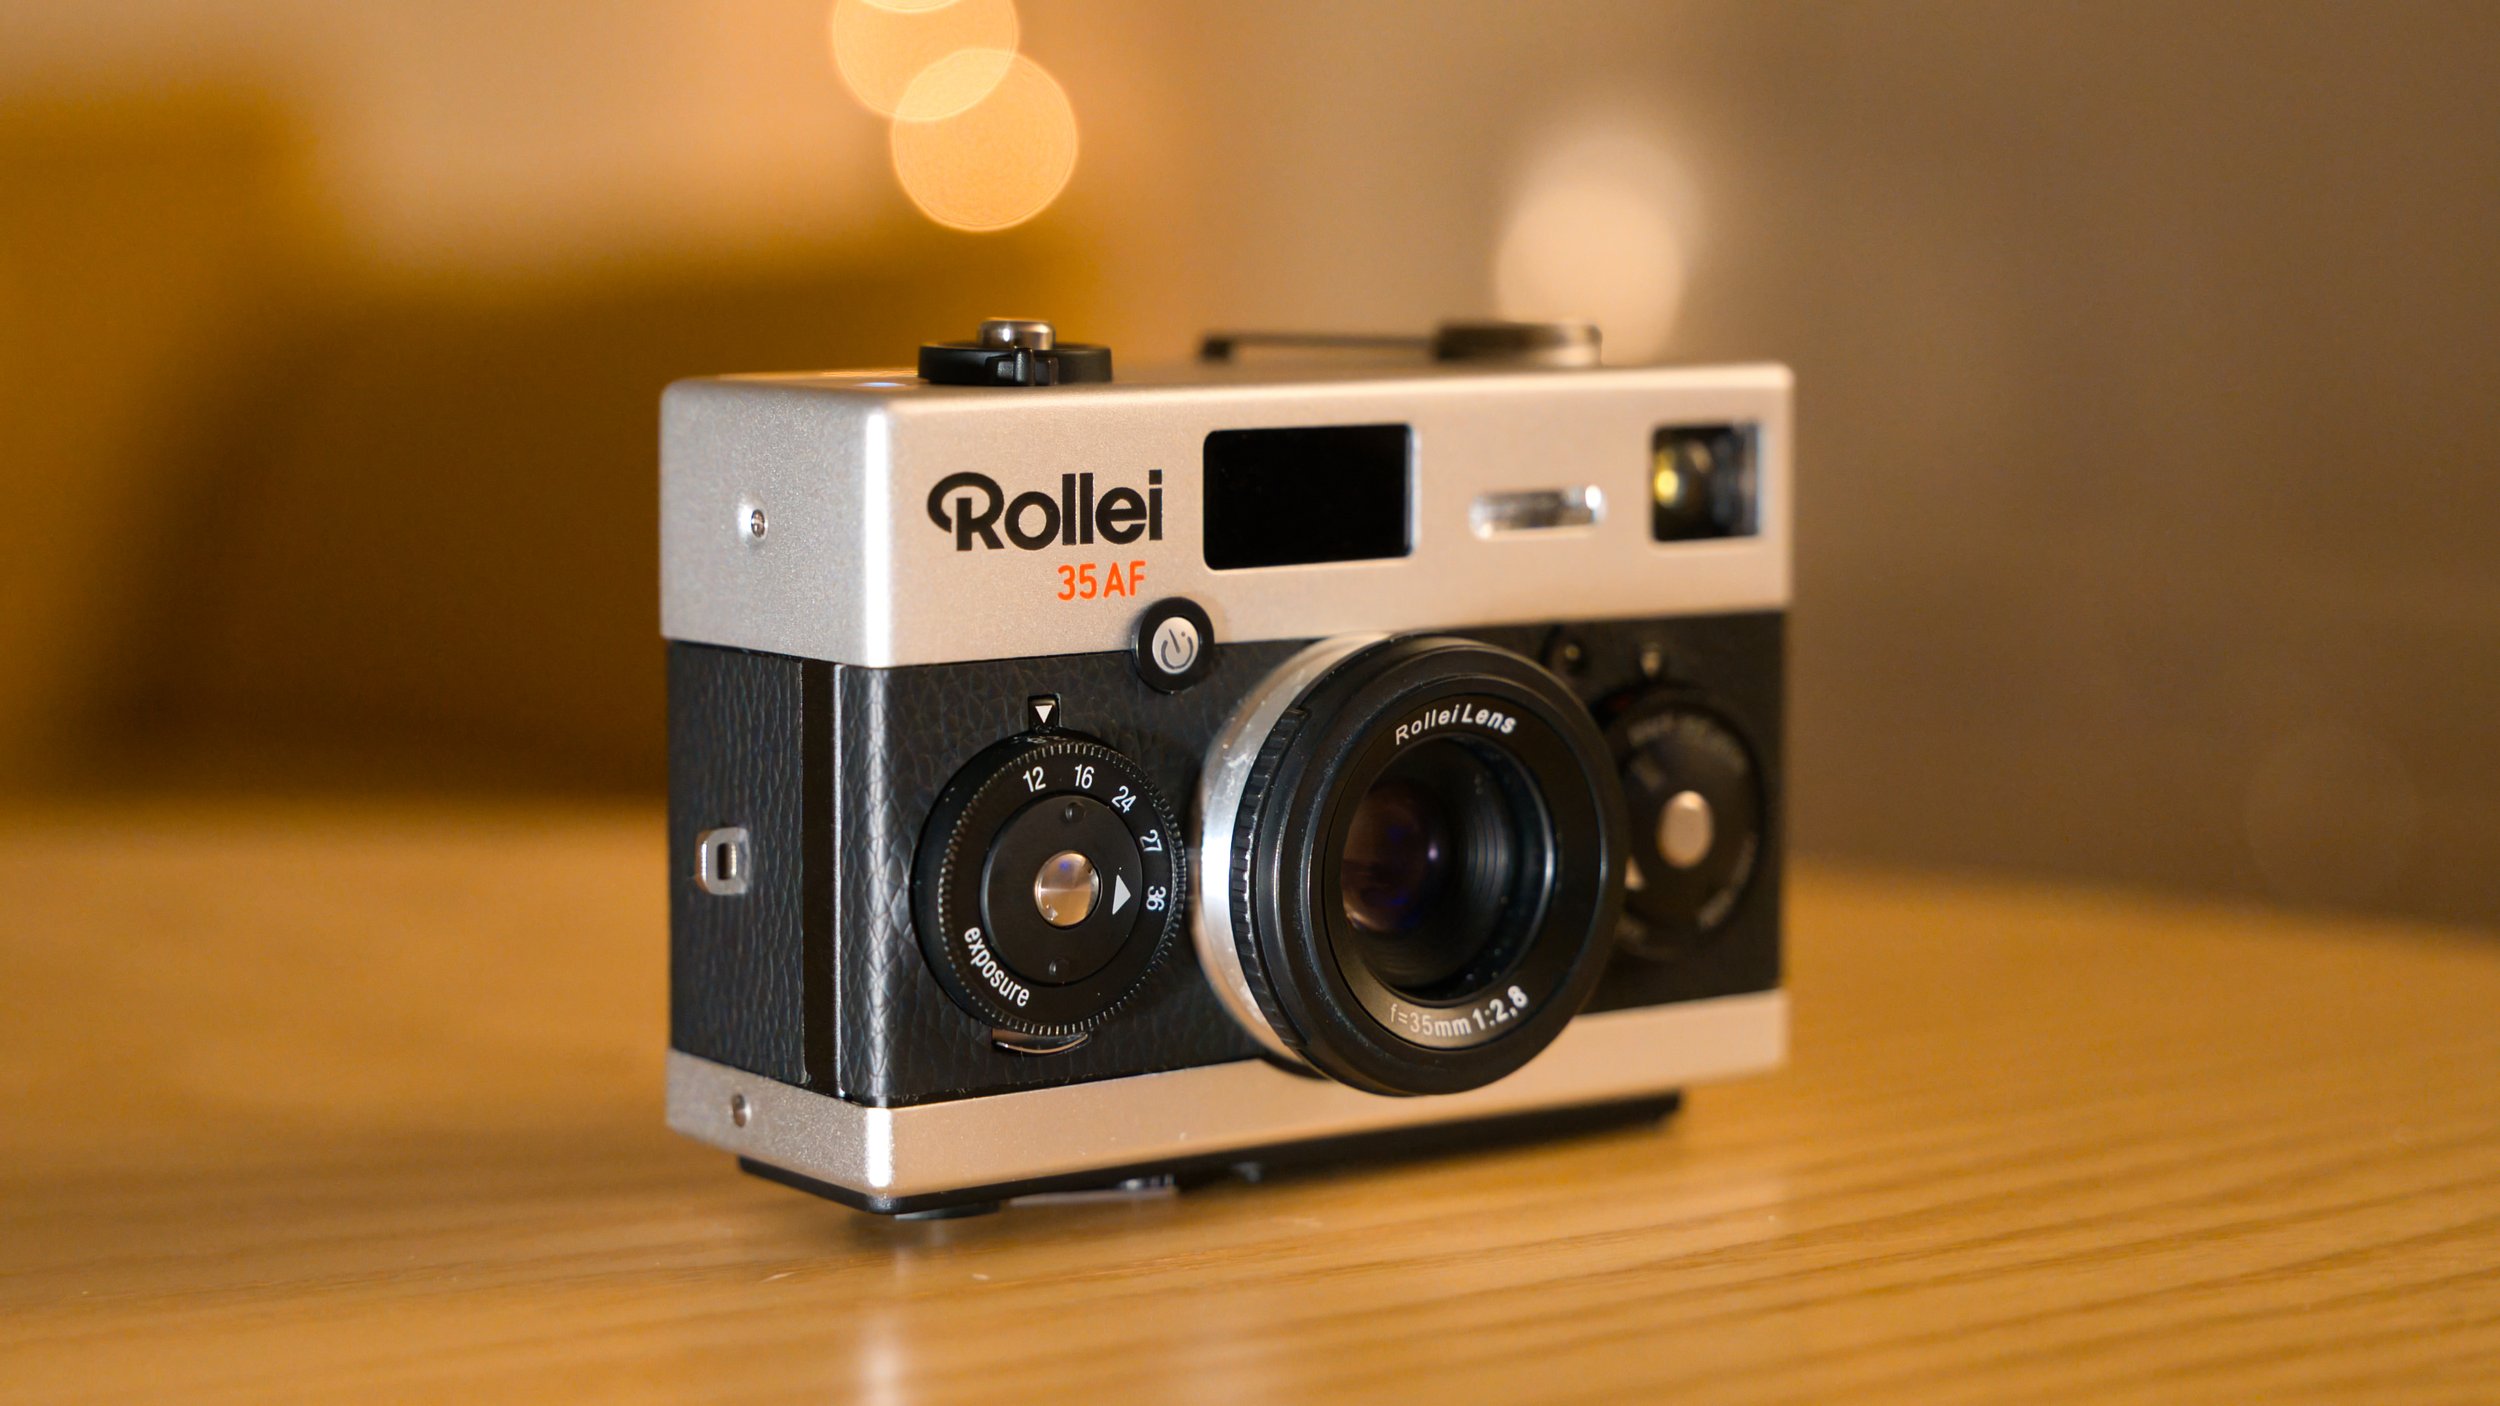
The Rollei is designed and built from the ground up by Gary Ho of MiNT Camera. He and MiNT spent about 5 years of Research and Development into this new camera design and spent most of 2024 with marketing the camera and teasing its eventual release. Gary and the MiNT team remained faithful to the original Rollei 35 aesthetic but the inner workings and photo-taking process is completely different from the classic German Rollei experience.
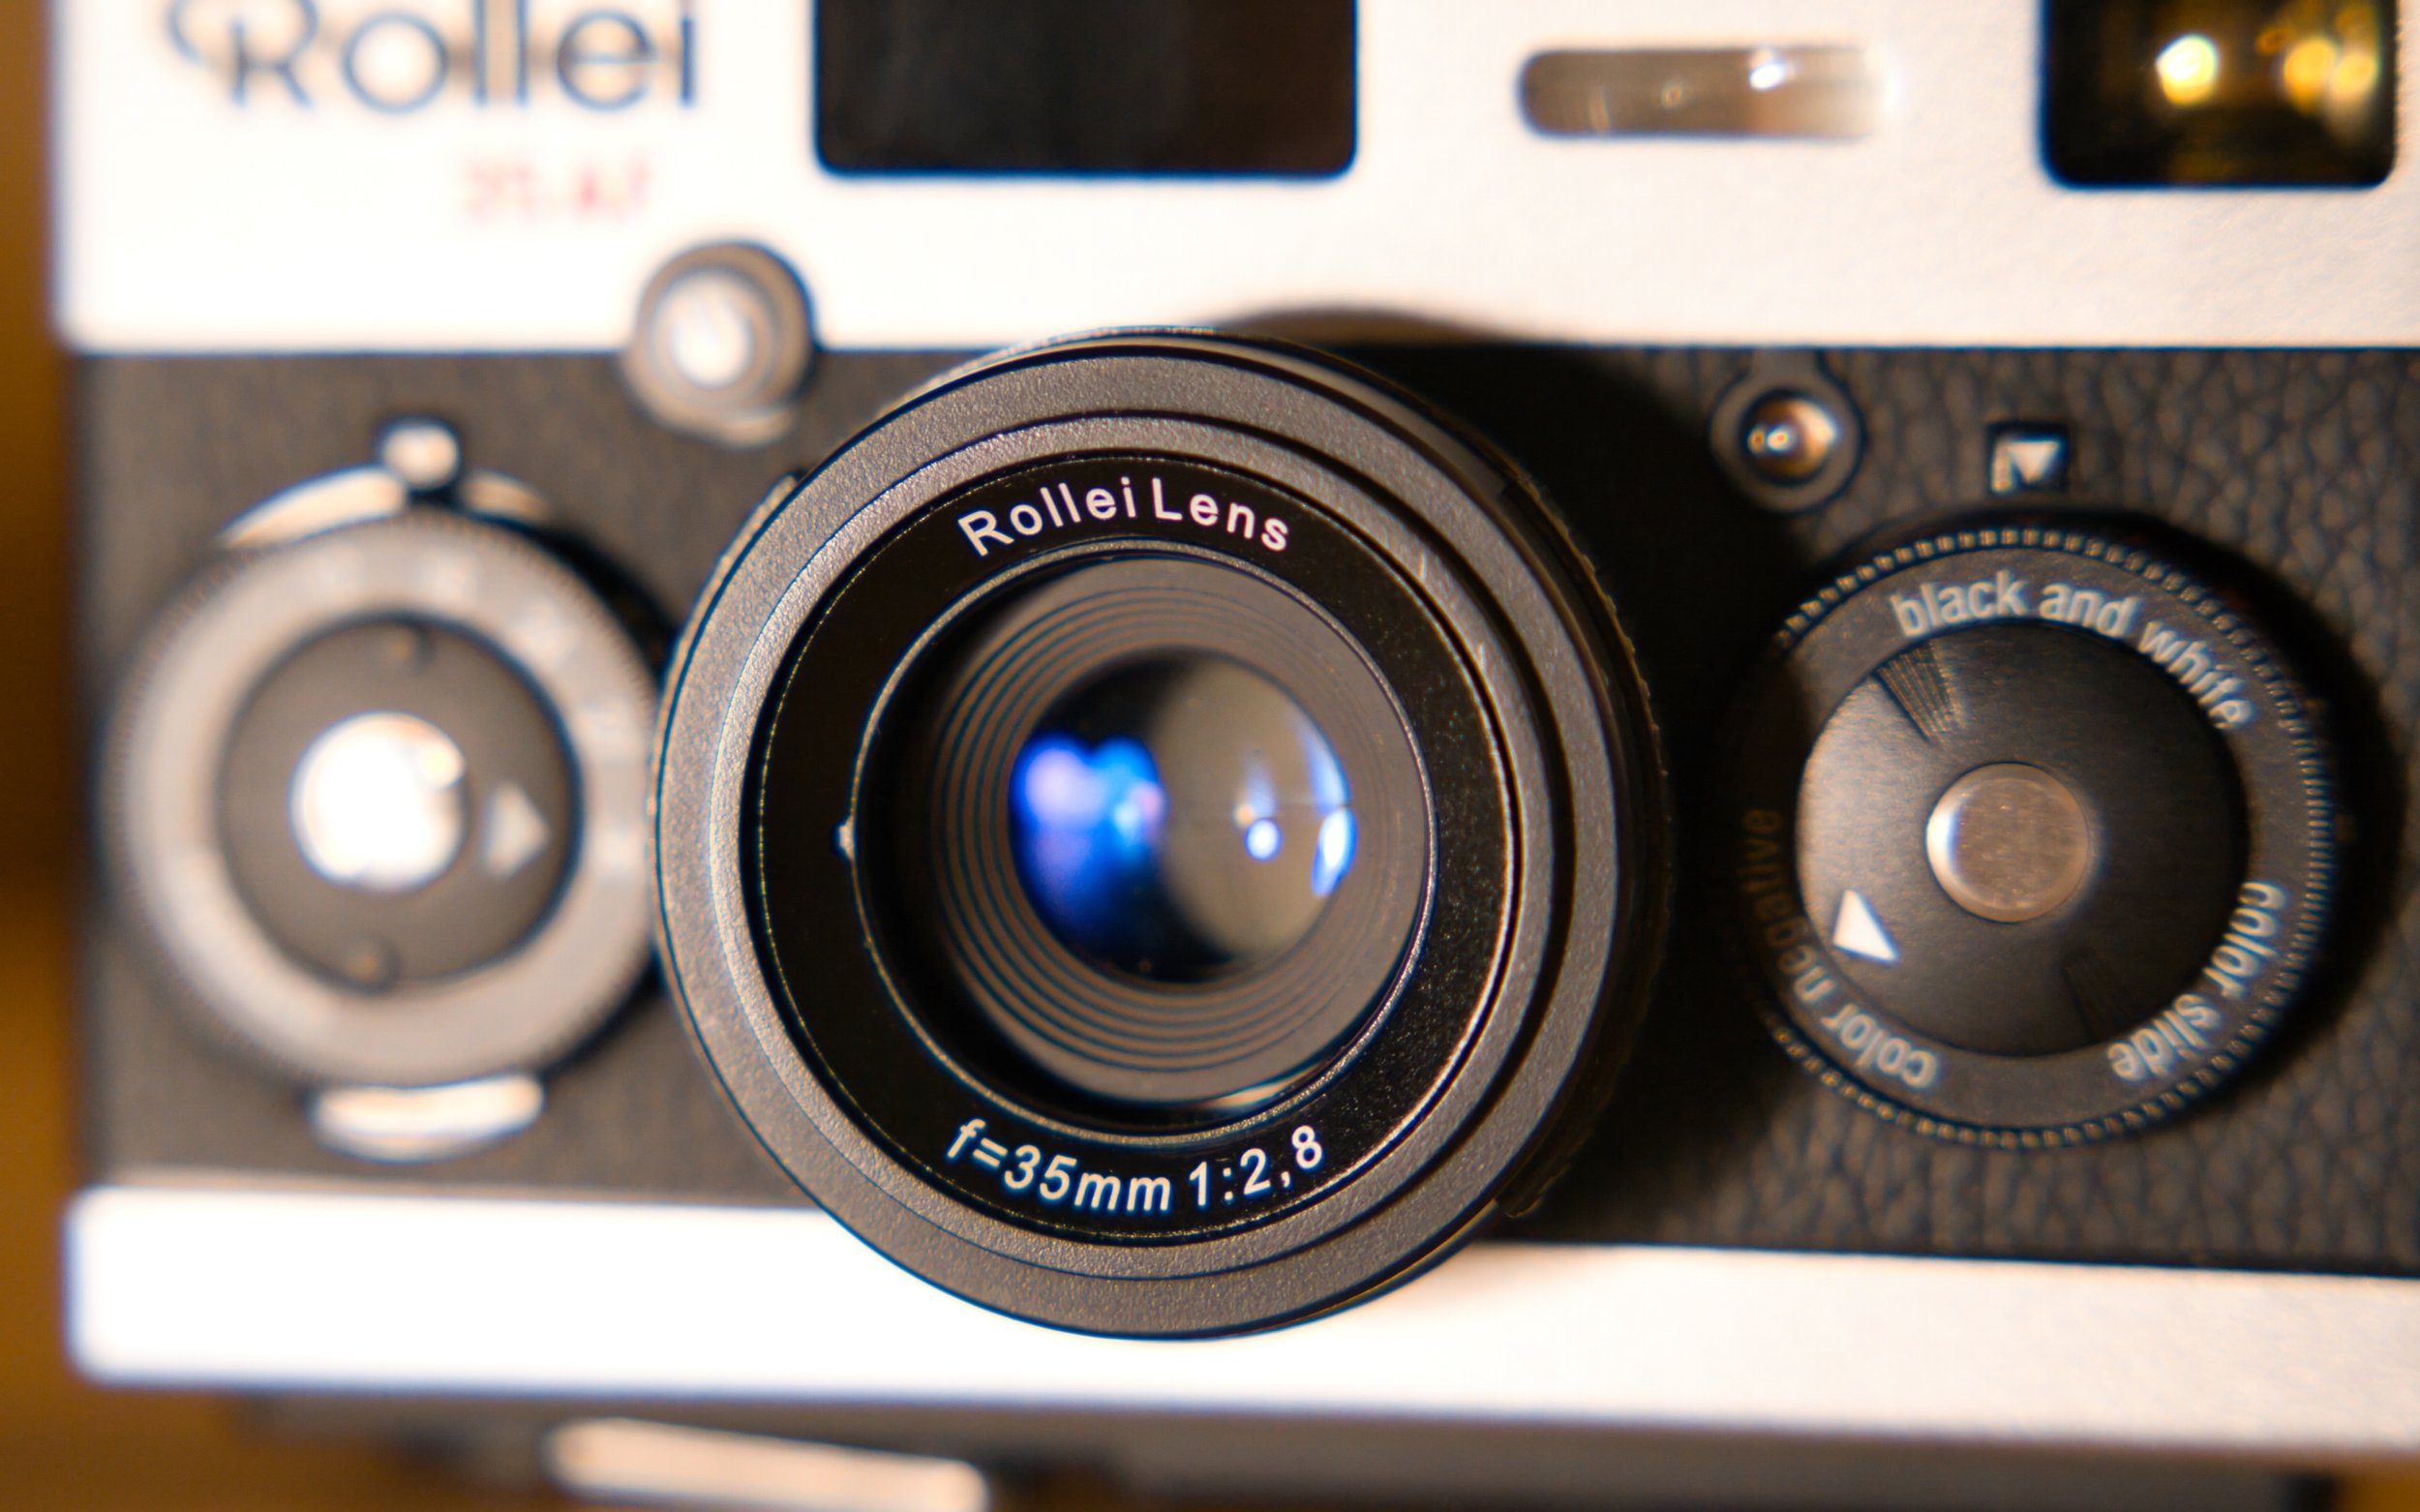
This tiny 35mm lens is constructed of 5 glass elements and has a f/2.8 max aperture. I believe this lens was designed by former Pentax engineers and the lens on this Rollei produces perfectly acceptable photos with a bit of character. The front of the lens is an odd design. It mimics the original Rollei 35 but lacks any filter threads to use any colored filters for black and white photography. The lens cap is also constantly falling off and will slowly lose even more grip over time. I’m hoping MiNT is in the process of creating some accessories to replace the stock lens cap. Otherwise, I wouldn’t even bother carrying the lens cap around since it’ll end up in the bottom of your bag.
The Rollei 35 AF relies on a LIDAR beam which reflects back to the camera body to indicate focus distance. The large black rectangular window is where the LIDAR sits. Next to the LIDAR window is the built-in flash and the optical viewfinder window.
There’s no manual zone-focusing like the older Rolleis but the exposure controls for the camera are much like the originals, with two knobs on the face of the camera. The aperture wheel indicates a range of f/2.8 to f/16 and the shutter wheel indicates LT (Long Exposure) to 1/500s. The exposure compensation and Aperture Priority mode functions are also selected via the shutter wheel.

Shutter Wheel, Aperture Priority Mode, Exposure Compensation
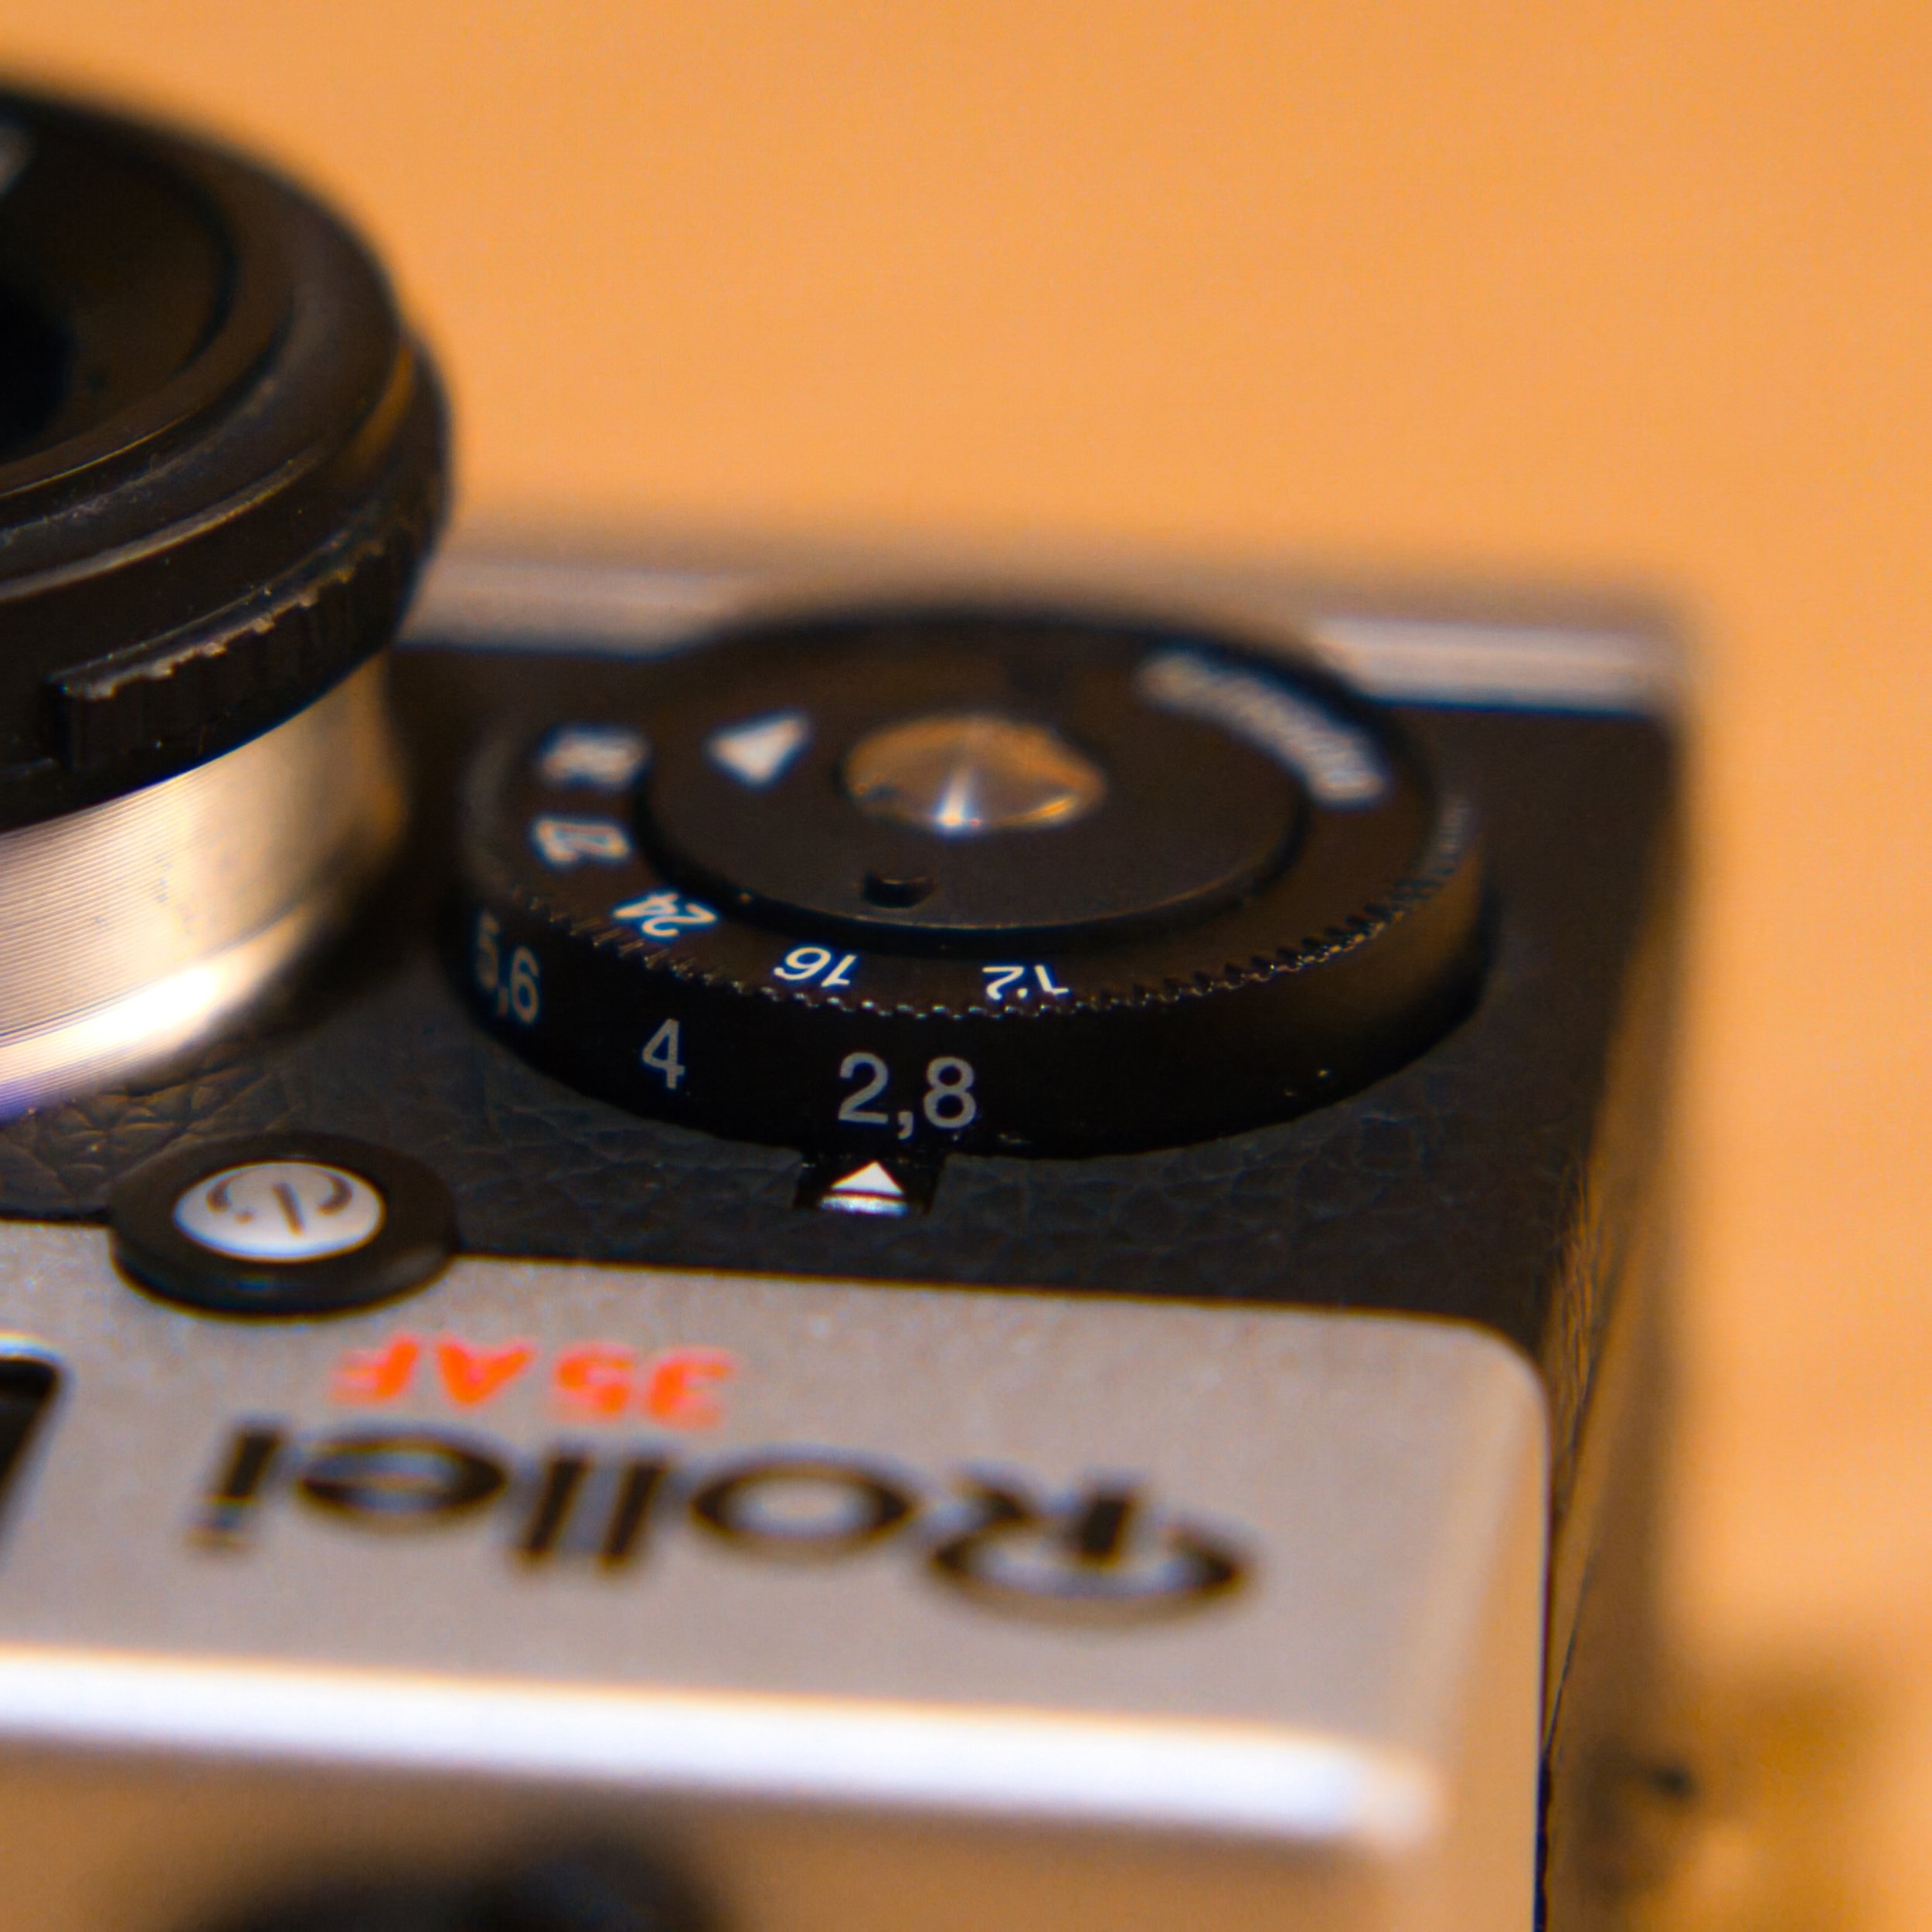
Aperture Wheel
The faces of the control wheels are purely film reminders, to indicate to the photographer what type of film stock they have inside the camera and the number of exposures. The tiny circular window next to the shutter wheel is actually the film metering window so it’s vital not to cover this window with your finger or the camera will be fooled into thinking it’s shooting in pitch-black. The self-timer button is above the aperture wheel and has an unadjustable 10 second countdown timer.

Exposure Count Reminder

Film Type Reminder
The camera is turned on by selecting the mode selector switch into Flash-Off, Flash-On, or ISO Selection. The ISO is automated via the DX Code Reader built into the camera or you can manually adjust this setting by using the Self-Timer button to switch from ISO 25 - 3200. This manual selection is useful since the camera doesn’t always select the proper ISO.

The OLED screen is next to the shutter button and will indicate shutter count, ISO, or your exposure if you’re under or over-exposed.
The film advance lever is on the left and rather uncomfortable to use. It has sharp edges and has a jarring haptic feedback when the film is advanced into the take-up spool. While the original Rollei 35 also had a identical film advance lever, MiNT Camera really missed the mark with their design. The film advance sensation feels like the film sprockets inside are tearing apart as you’re moving the film.

The rear of the camera is very minimal and only has the optical viewfinder with no LED readout, the rewind activation switch, and the battery compartment which houses a standard CR2 battery which can be found in almost every major store.

Viewfinder markings are hard to see without daylight
Unfortunately, the optical viewfinder of the Rollei 35 AF doesn’t contain any information besides a dimly lit center oval. There’s no further information given from MiNT Camera but it’s safe to assume that the exposure and the autofocus is aligned to the target center markings. The viewfinder has 90% coverage with a .5x magnification so the entire viewfinder indicates your composition.
I really had hoped that MiNT would incorporate small LED digital readings here to indicate some information like shutter speed, aperture, distance, and under/over-exposure. The viewfinder window is really underwhelming you’ll quickly notice the framelines are more of an estimation to where your final composition will be. The viewfinder is not coupled to the lens so there’s no parallax correction or any real way to see what the final shot will look like. I had noticed from my photos that the framing in the camera is about 80-90% correct to the final shot.
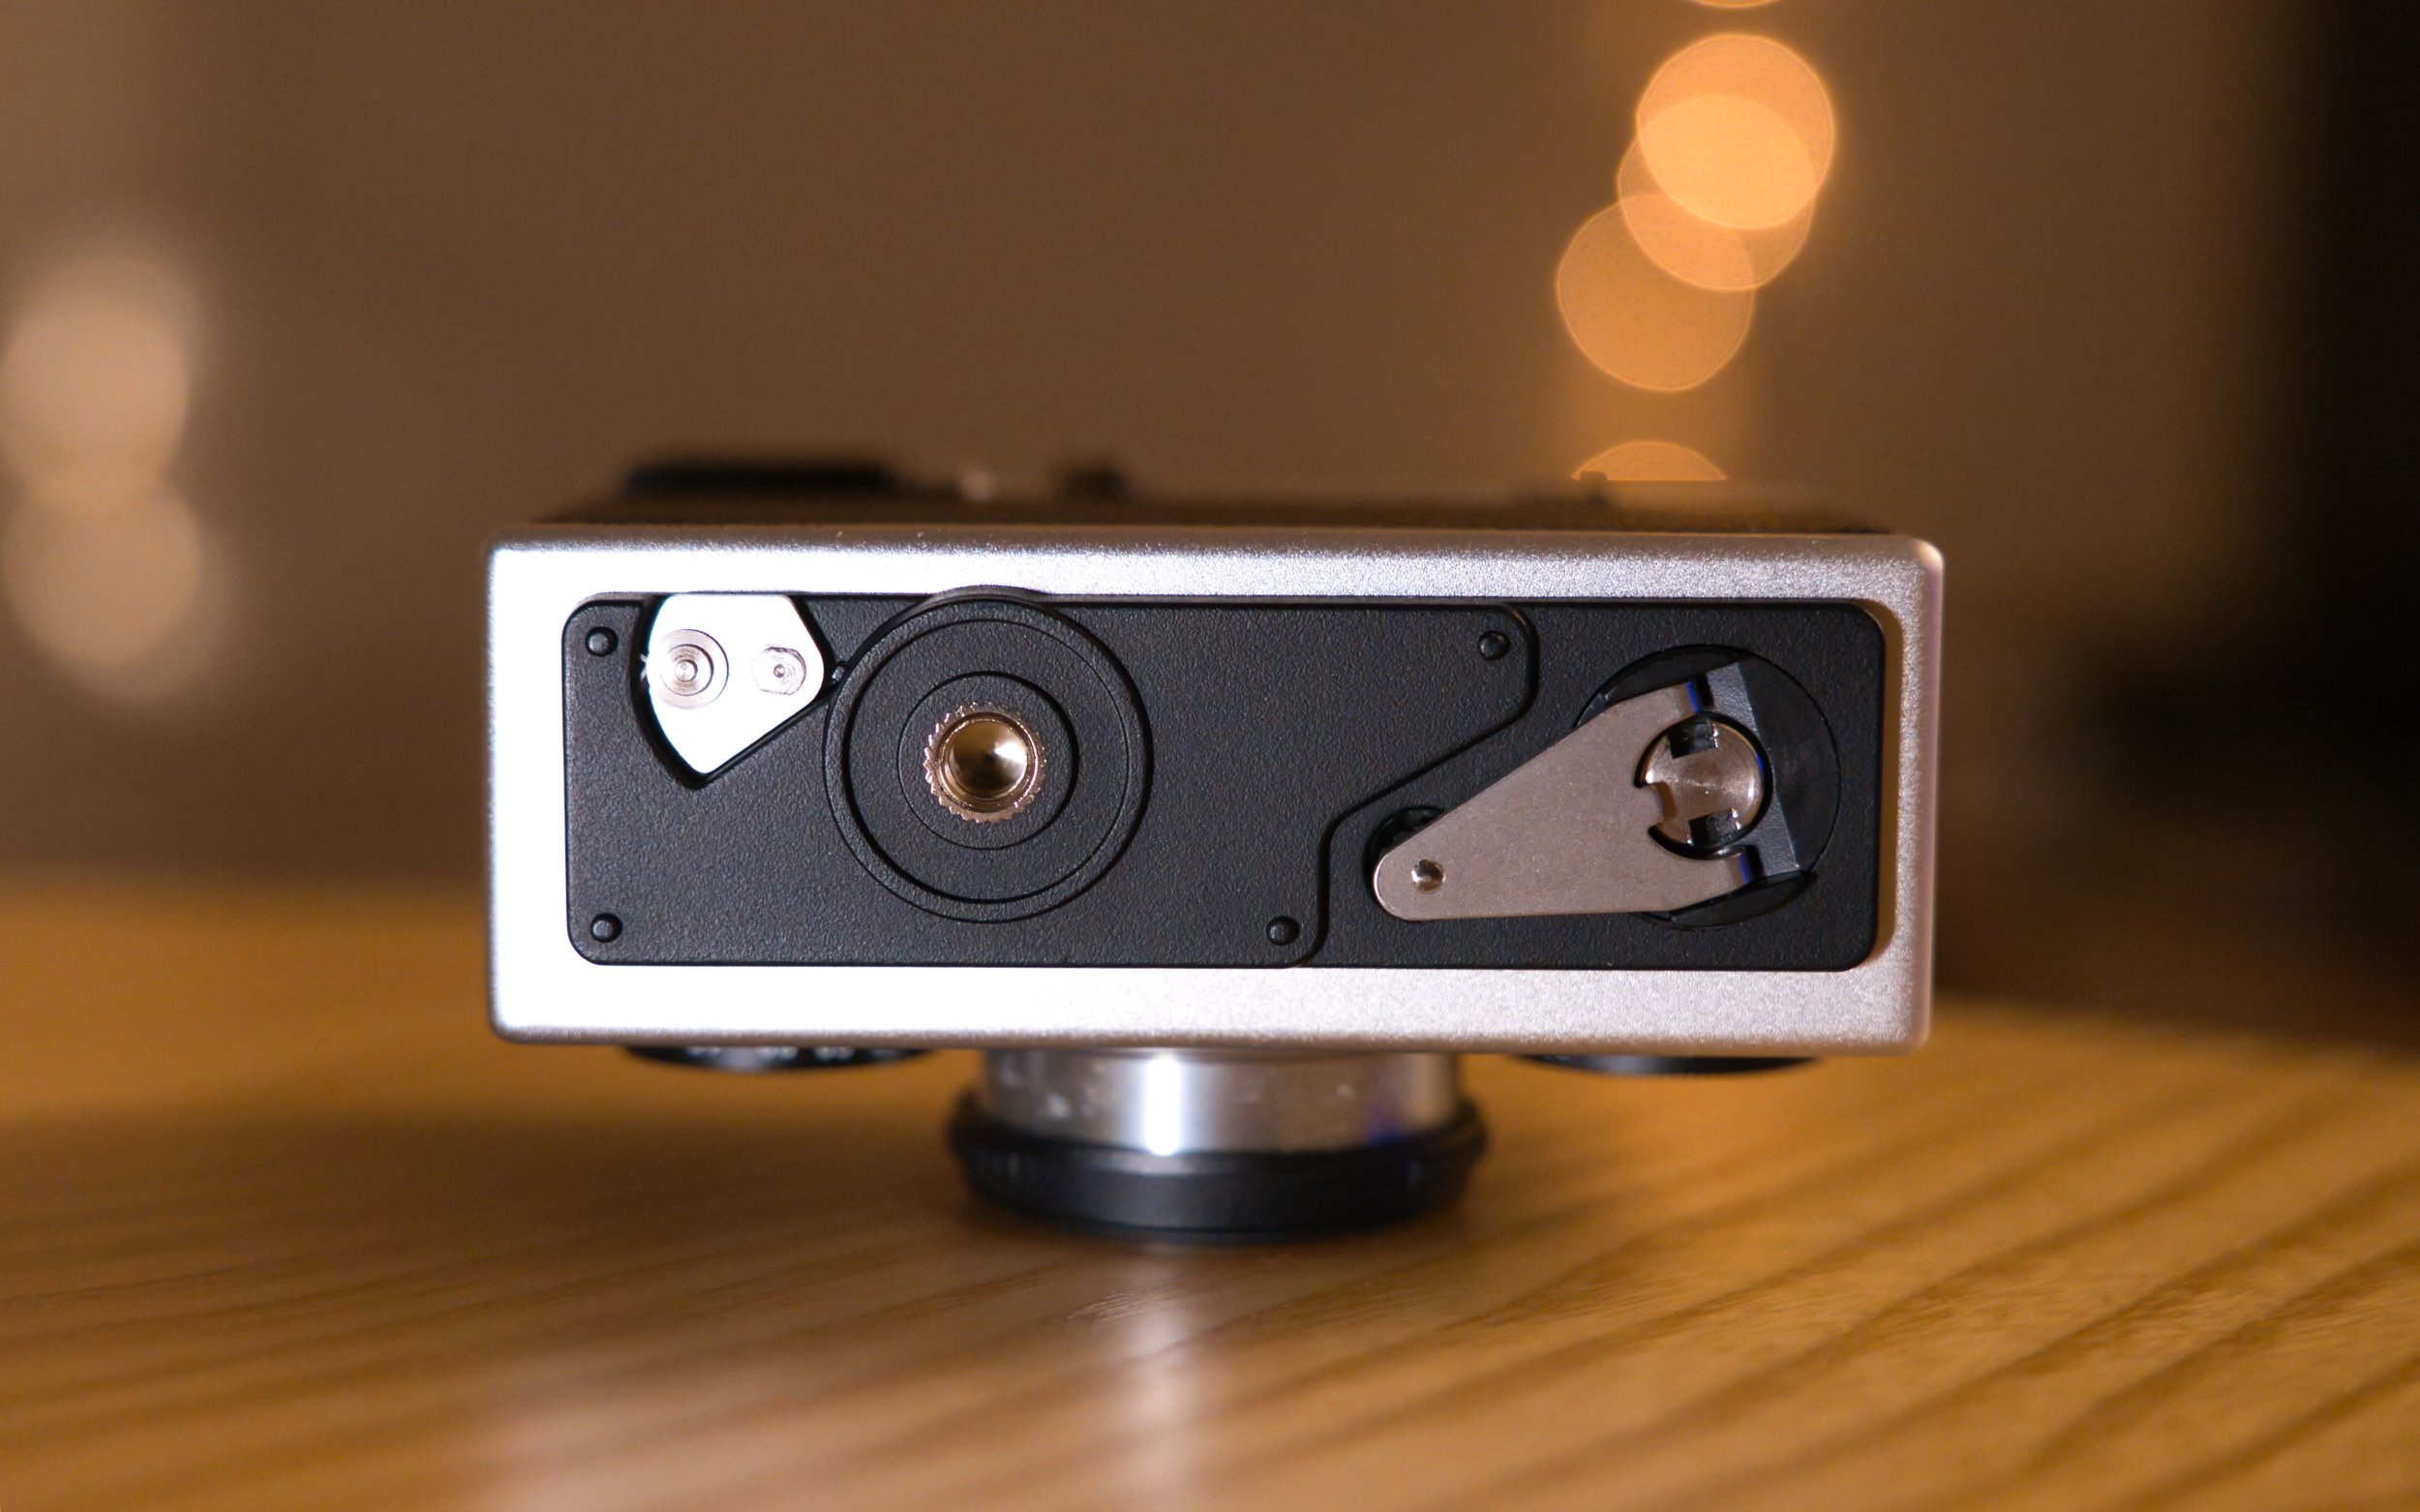
Latch on the left allows the bottom sheath to come off. Right is the rewind crank.

Bottom sheath removed
The functional use of the Rollei 35 AF is otherwise acceptable up until the moment you have to load or rewind the film. I’m not sure how this passed Quality Control, but loading and removing the film have to be the most unpleasant experiences I’ve had with any film camera.
In order to load film, the bottom “sheath” of the camera needs to be removed. The bottom half is so tightly designed to the top half that the pressure plate of the camera ends up slowly grinding scratches to the interior of the sheath.
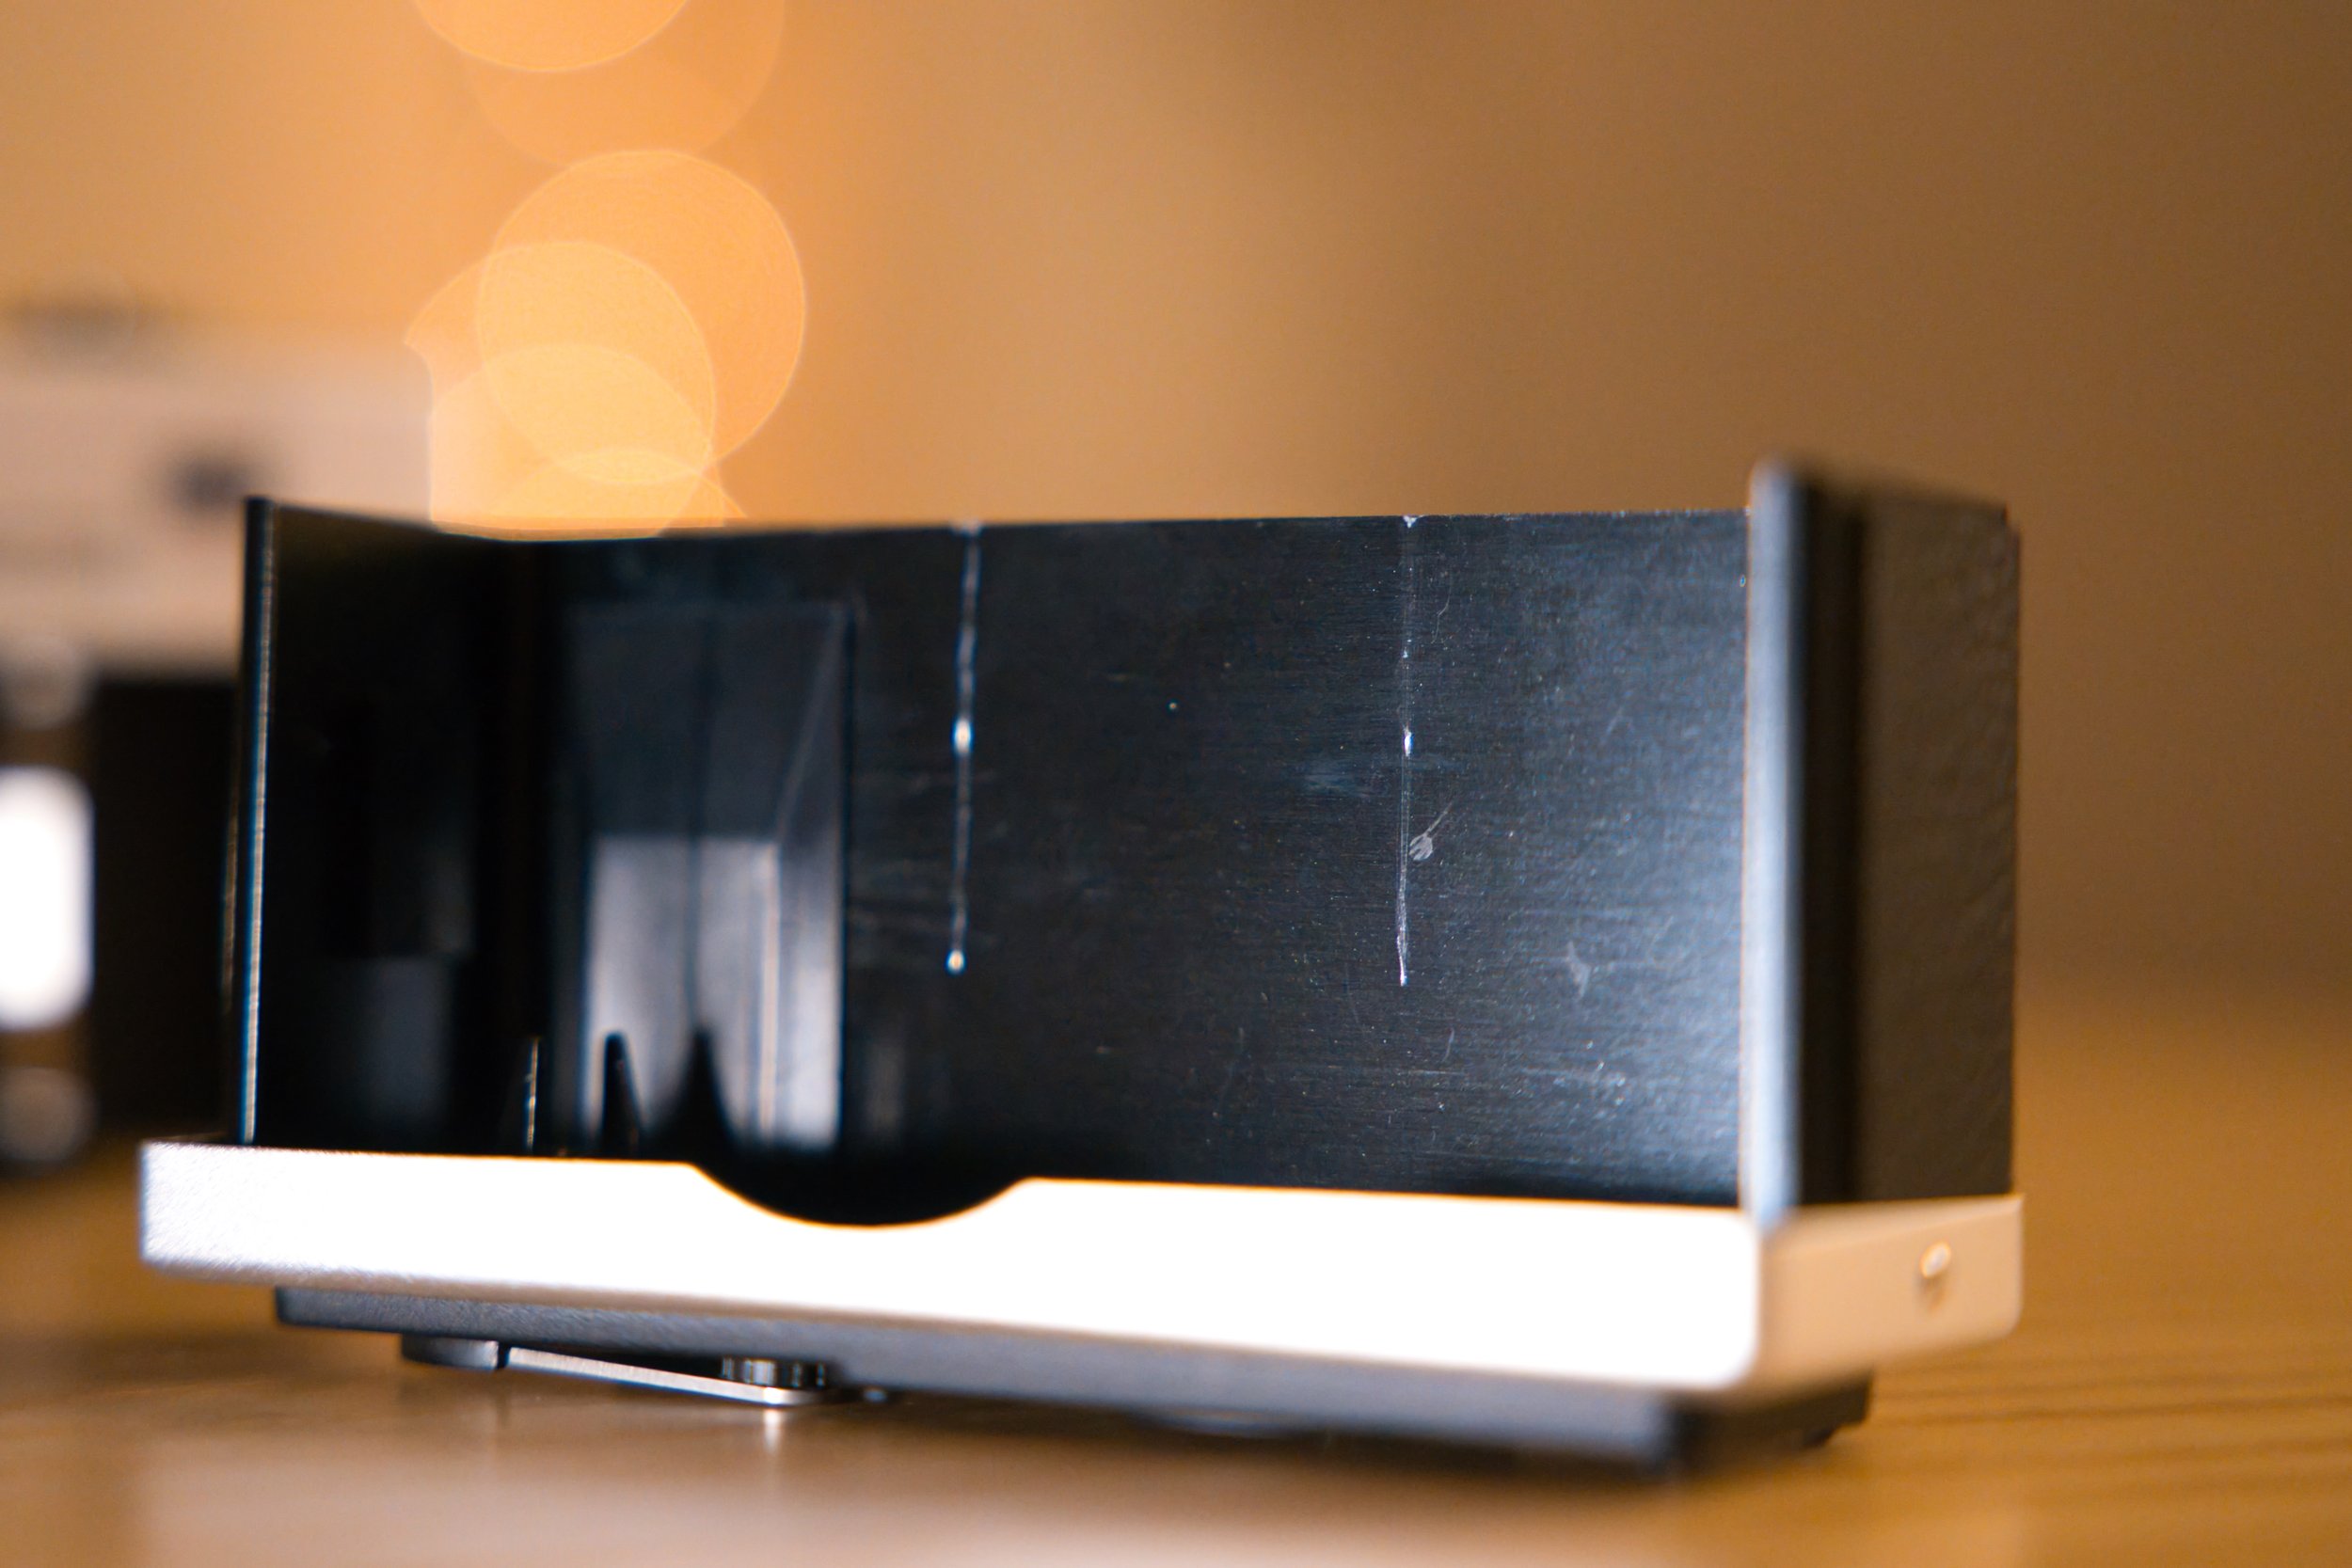
Scratches on the camera body from the film pressure plate

The metal plate in this photo scratches the bottom sheath
Once you have the bottom half removed, you have to flip the pressure plate down and load the 35mm film leader across and into the take-up spool. However, I ran into some issues…


The images above are several different rolls that accidentally created multiple exposures since the film did not advance properly.
The only reliable method of loading the film was to ensure that the film is inserted into the take-up spool, and then wrapped back around into the spool again. Then turn on the camera, fire the shutter, and advance to your first frame. Observe the film properly advancing into the take-up spool before covering the camera body with the bottom sheath.

How MiNT Camera says to load film
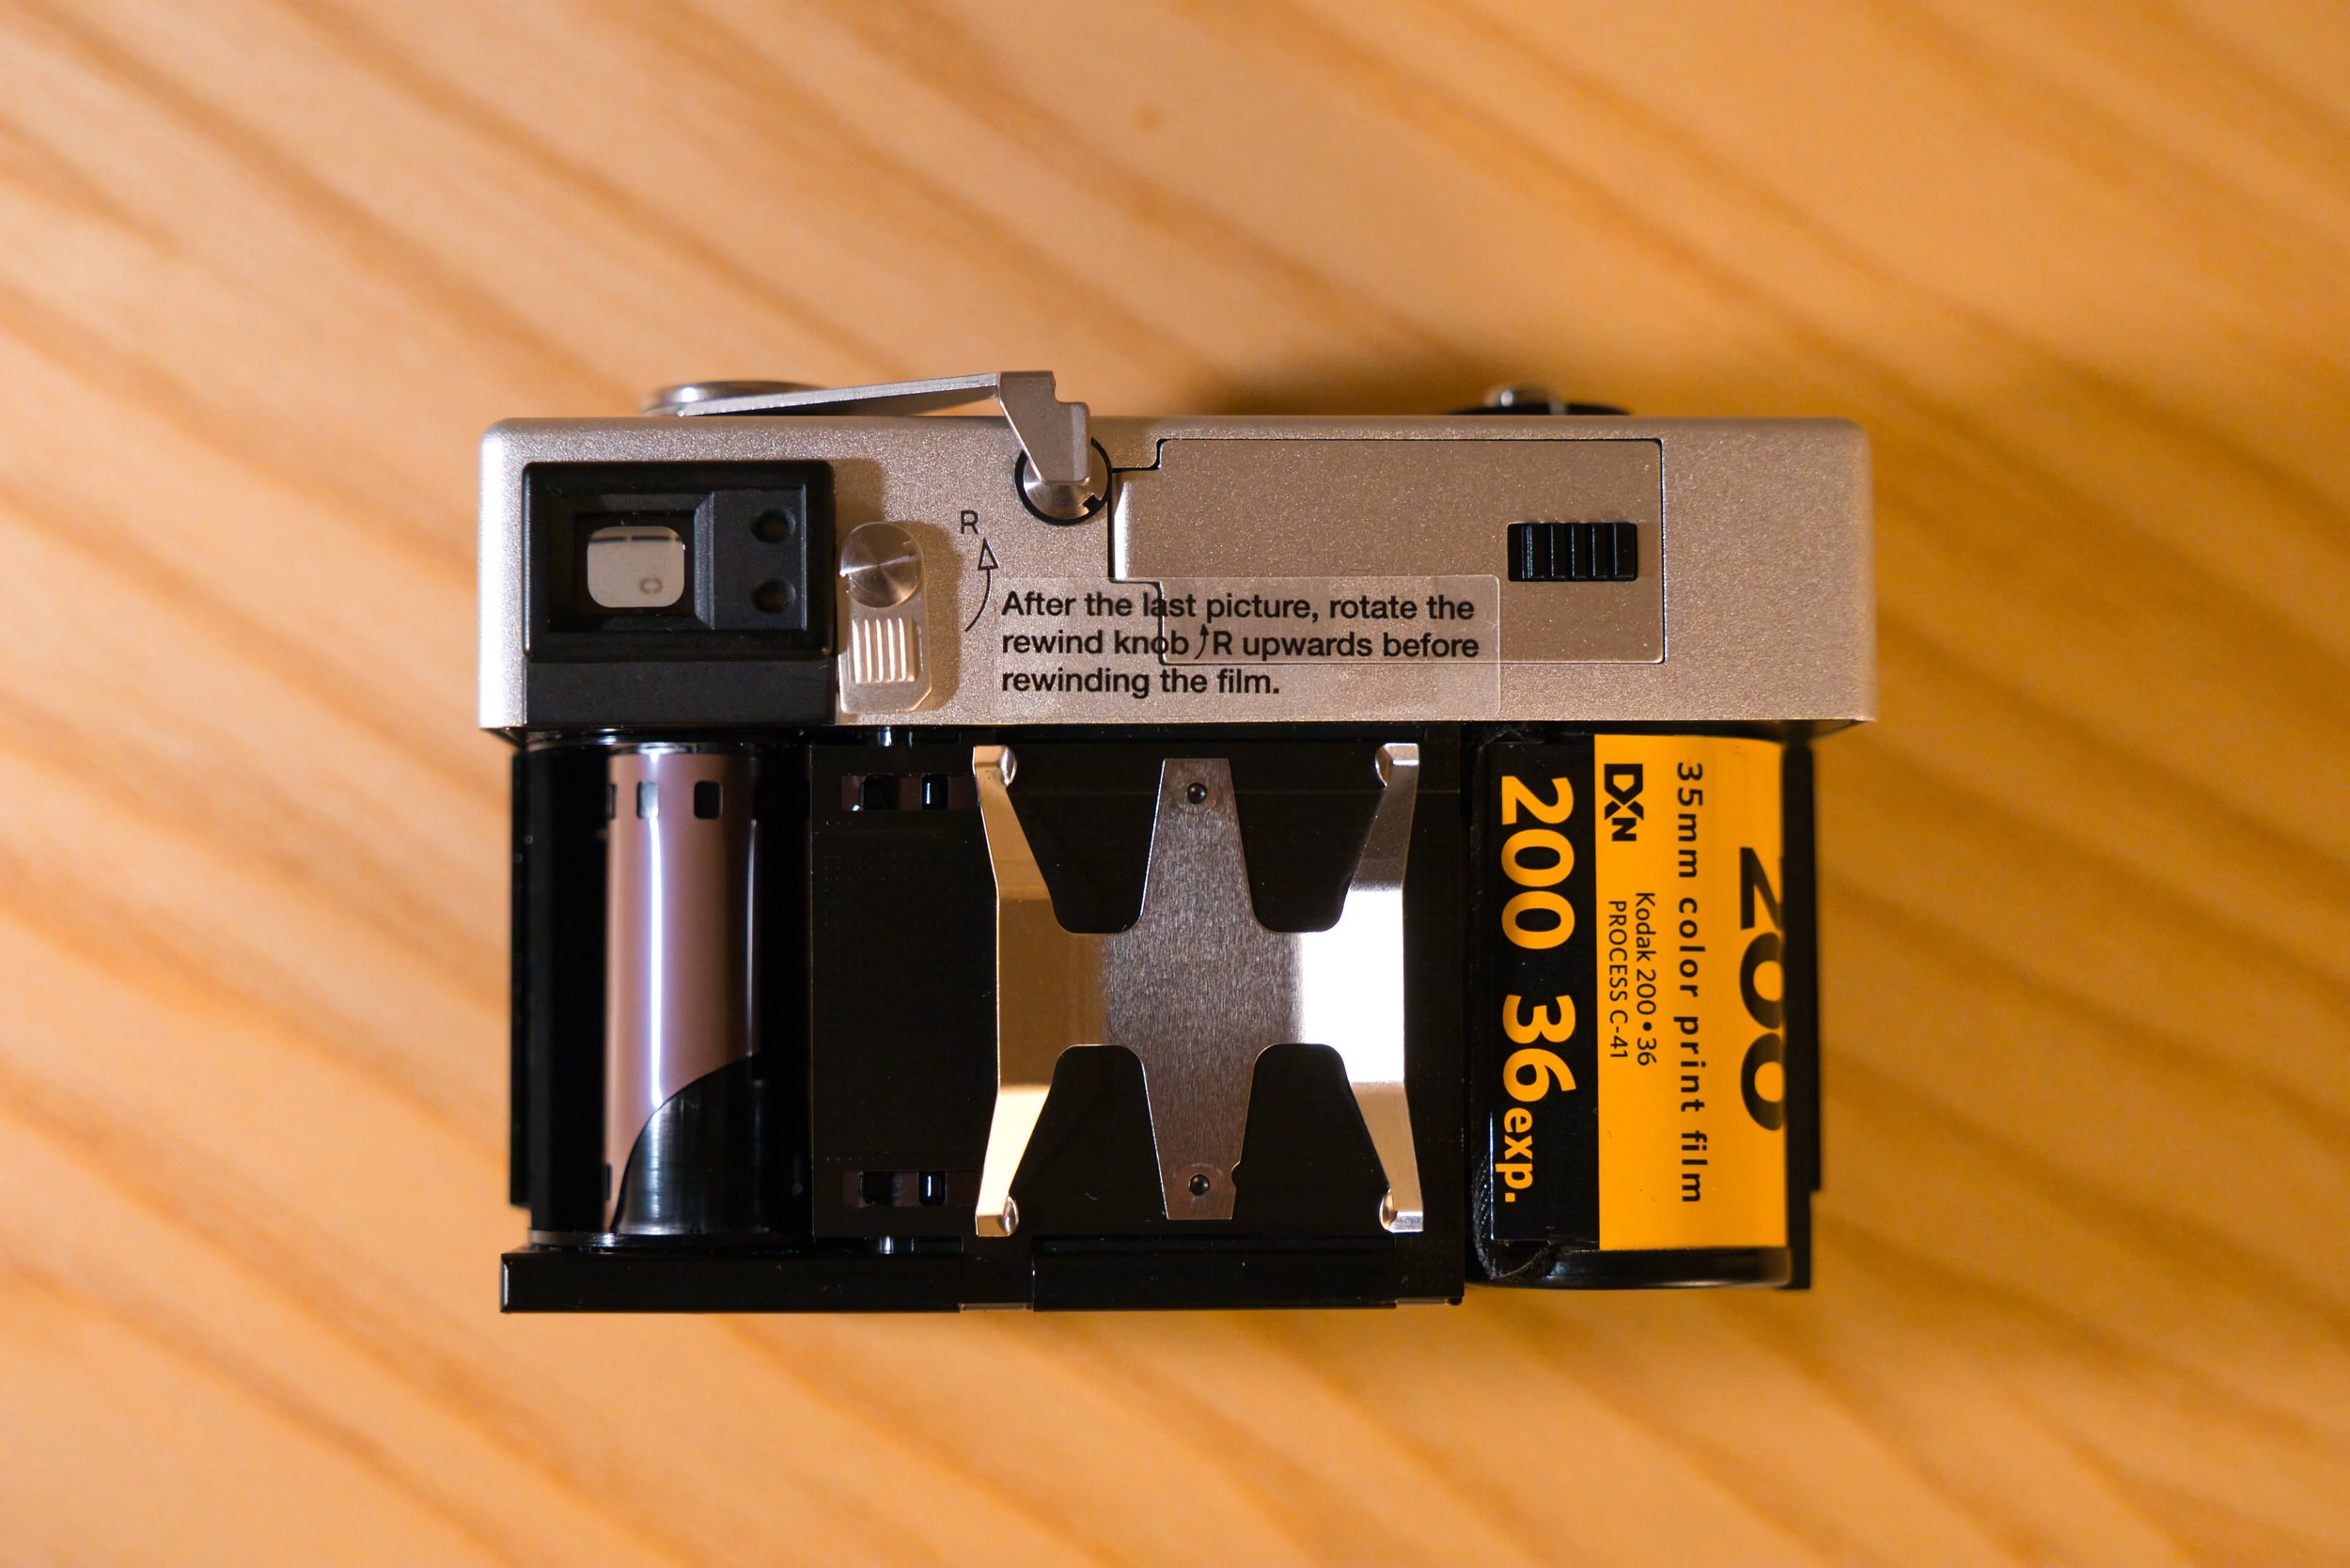
Make sure the film leader is securely tucked into take-up spool
As I’ve mentioned before, the film advance lever has a feeling like you’re “tearing” or “grinding” the film into the take-up spool. No matter how you load the film, this camera will always have this dissatisfying physical feedback. I find this to be a huge miss from MiNT by not smoothing out the gears in the camera body or by inserting an automated film advance motor. The film advance lever might seem like a small moment of the user experience, but psychologically the film advance motion is forever tied to the moment the photographer takes a photo. So every time the photographer takes a photo, they’re conditioned to experience this terrible feeling of “tearing” film.
They really should’ve looked to install an automatic film advance motor or install a quick-load system like the original Canonet QL17s which had an extremely simplified system.

Rewind crank
Once you’re done with a roll, the next unfortunate user experience is the rewind lever. It’s cleverly tucked into the camera body via a small magnet so the handle doesn’t fall out during use. The familiar “grinding” experience of the film advance lever is also present in the rewind crank but it’s amplified by the fact that you have to use your entire arm to ensure the crank is caught onto the internal film cartridge. You end up digging the rewind crank into your fingers and the film is incredibly slow to reel back into the film cartridge.
There’s a lot of negative aspects of the camera functions that I’m writing here, but let’s finally move onto the image quality…
Images
Click to expand images.


The frustrating duality of this camera is that the images you can get out of this lens are suprisingly sharp and well exposed. The light meter on this camera is almost always getting the intended exposure and the autofocus sticks to the center frame even in low-light due to the LIDAR technology. The only times the AF will miss is if the LIDAR hits a glass window and assumes it’s a wall. If you’re shooting through a glass window you’ll have to point the camera at an object further away and then recompose the framing back through the window. Keep in note, the exposure will not adjust once you reframe to the window.
While the resulting images of the Rollei 35 AF can be incredible and surprisingly sharp, the user experience is so frustrating that it makes this camera’s $800 USD price not worth the cost at all. For $800 you can get a beat up Contax T2, a real Rollei AFM35, a Fuji Klasse, Konica Hexar AF, or almost any other premium point-and-shoot 35mm film camera.

Gold 200. Rollei 35 AF’s light meter is a center-weighted average.
I think the problem with this camera is that there were so many specific purposeful design choices to recreate the original Rollei 35, that it actually worsened the user experience. The high price point of this camera should promise a luxury point-and-shoot camera with a premium build and some ease-of-use upgrades from the 40 year old classic Rolleis, but it actually makes me appreciate the original build quality from vintage cameras and how well those cameras have held up over time.
However, I don’t want to be completely negative and I do want to appreciate MiNT Camera’s R&D and willingness to create a new 35mm full frame film camera. I think they’re going through the growing pains of expanding beyond recreational instant cameras and into the industry of complicated electronic point-and-shoots. I just don’t think the first edition of the Rollei 35 AF is worth the cost. I do have hope that the second iteration of this camera is going to bring huge improvements to the design and user experience and I have high expectations that the Rollei 35 AF Mark II will correct the design flaws of this first edition.
But that second iteration will most likely not arrive until 2026 or 2027 at the earliest so for now we have the Rollei 35 AF, a modern 35mm film camera packed with exciting new tech but held back by some frustrating design flaws.
Final Thoughts
Pros:
Compact
LIDAR Autofocus is accurate
Light meter is surprisingly accurate
Lens is a glass construction
Built-In Flash
2 year warranty
Cons:
No manual focus option
No filter threads; lens cap won’t stay on
Film advance lever is temperamental and has a long throw
Internal design has flaws, pressure plate scratches the body
Loading film can be tedious
Rewinding the film is an incredibly tedious process
If film isn’t loaded 100% correctly, resulting roll will have multiple exposures
Expensive
Other Comments:
The flash operates properly but doesn’t have a long reach. This is expected with the flashes on small point-and-shoots, they don’t have enough power to light up an entire room.
Support from MiNT Camera can be questionable considering how small the team is.
Rating: 1.5/5
The electronic functions of this camera and the lens are extremely accurate and produce some wonderful images. Ironically the analog experience holds back the Rollei 35 AF from even being a usable film camera.

Review: Lomography Atoll 17mm f/2.8 Art Lens for Leica M
A comprehensive review of the Lomography Atoll 17mm f/2.8 Art Lens for Leica M Mount.
Lomography Atoll 17mm f/2.8 Art

Intro
Lomography is a company dedicated to analog and experimental photography. They’re primarily known for instant cameras, film stocks like Lomo Metropolis and Lomo 400/800, and vintage lenses.
It was to my surprise that this company forayed into creating premium ultra-wide optics with the Atoll 17mm f/2.8 Art Lens. This lens was initially a kickstarter campaign that eventually became a full-time product on Lomography’s shop.
The Atoll 17mm f/2.8 Art lens is specifically designed for Leica M-Mount rangefinders and mirrorless cameras such as the Canon RF, Nikon Z, and Sony FE cameras. The lens is a native Leica M mount lens so a separate adapter is necessary to use with your mirrorless camera, which is widely available and in-stock on Lomography’s shop. I used my Voigtlander M-E Close Focus Adapter for this review.
The Atoll Ultra-Wide 17mm f/2.8 is significant and quite unique considering that there aren’t any Leica M mount lenses that matches the profile of this lens. It’s rangefinder coupled, ultra-wide at 17mm, and has a max wide aperture of f/2.8. You won’t find a lens that has all these qualities for the M Mount and definitely not at the pricepoint of $499.00 USD!


Worth mentioning that the lens comes in amazing packaging. You’ll want to hold onto the box it comes with as it contains some very cool booklets. Rather than just supplying warranty or manual pamphlets, Lomography included a booklet containing photos by other professional photographers and even provided tips on how to effectively use this lens.
Specs
Focal Length: 17mm
Leica M Mount (Full Frame) Can be adapted to Canon RF, Nikon Z, and Sony FE with an adapter.
Minimum Focus Distance: 25cm/.25m (10cm/.10m with a Close Focus Adapter)
Max Aperture: f/2.8
Minimum Aperture: f/22
Optics: 13 multicoated elements in 10 groups; 8 Diaphragm Blades
Weight: 445.6g (Without Lens Cap)
Dimensions (Diameter x Length) 73mmx79mm
Filter Size: 67mm
Weather Proofing: None
Price: $499.00 USD


Build Quality
As with most wide lenses that can open up to f/2.8, the Lomography Atoll 17mm f/2.8 Art lens is quite hefty. It’s not the heaviest ultra-wide lens I’ve ever used, but it’s quite large by rangefinder lens standards. The lens has an all metal construction consisting of anodized aluminum. It has a built in petal-style hood, clickless aperture ring, and a buttery-smooth focus ring. Overall, I’m quite impressed with the build quality that Lomography committed to here. They easily could have gone with cheaper material, but the construction rivals other Leica M rangefinder lenses out there.
There is a marked “hyperfocal point” indicator with a sharp red line that is intended to line up with f/5.6 to indicate hyperfocal distance. This just means that anything at .9 meters to infinity will be in focus. Quite handy if you’re doing street photography or just looking to get rapid shots without having to focus through the viewfinder. Personally, I kept this lens at the hyperfocal point for 75% of shots that I took , except for some late-night portrait shots.
The aperture ring is “clickless”, meaning that it won’t stop at each demarcated aperture number. This is useful for any video creators out there, but tends to get quite annoying since it’s very easy to accidentally bump the aperture ring without noticing.
The focus ring is incredibly smooth and dampened. The lens hood is built in (like many ultra-wide lenses) and seems to do a decent job at preventing flaring.
There is a slim 67mm filter thread for any filters you might want to use, but I don’t think it’s of any practical use. The filter threads are very thin and none of my 67mm filters could fit within the diameter of the lens hood. Even if you manage to fit a filter in there, it might be impossible to unscrew or turn your filter if you’re using a VND or CPL. I’d advise against using a filter with this lens. The filter thread is there as an option but it seems like it wasn’t built with the idea of proper spacing for a filter.
Overall, surprisingly well built and not too many complaints here.


Since most rangefinder cameras don’t have framelines as wide as 17mm, Lomography was kind enough to supply an external viewfinder that comes with the lens. If you’ve read other reviews about this lens and viewfinder, you’ll hear some complaints that the viewfinder is cheaply made. It definitely doesn’t have the premium build quality of the lens itself, as it’s build out of cheap plastic. I don’t have too many comments here as I think it gets the job done in terms of providing a field of view. I had the lens on my Voigtlander Bessa R4A, which can go as wide as 21mm in the rangefinder window, so I just guessed the approximate frame lines without the external viewfinder.
Performance


This lens is best used for dramatic architectural shots or environmental portraiture. Focal lengths below 20mm will naturally have abnormal distortion in all areas of the frame, so you have to be a bit more cognizant of your composition and subject matter.
I took this lens to The Metropolitan Museum in New York as the museum has very dramatic architecture and incredible open spaces. The lens performed quite well and I wasn’t disappointed with the shots I was getting. I shot with my Sony A7IV and a Voigtlander M-E Close Focus Adapter and turned on Focus Peaking to aid manual focusing.
I also attempted some environmental portraiture in the evening which proved to be a bit more difficult. At f/2.8, the aperture is wide and great for relatively low-light situations, but I still had some noise in my images. Struggling to focus at f/2.8 informed me that peak sharpness is most likely achieved at f/4 or f/5.6 as there was quite a few soft and out-of-focus images wide open.
I’m typically shooting landscape at ultra-wide focal lengths, but trying architectural shots and dramatic ultra-wide portraits was an incredibly fun experience. I’d highly recommend anyone that likes to shoot wide street or travel photography to try out this lens.


The images shown above are from the portrait session and there were many photos that surprised me (in a good way!). Although I was at a high ISO for the outdoor shots, the images very much exceeded my expectations. The image is sharp in the center and encounters blurriness and vignetting toward the edges but that’s to be expected when shooting ultra-wide focal lengths. The only optical performance that was “disappointing” was the flaring when shooting against backlit subjects. They aren’t the most egregious lens flares I’ve seen, but I’m mentioning them here since I should talk about some drawbacks of this lens.
You’ll see some flaring occurring in the corners of the frame. They only occurred in a few photos so I didn’t think it was much of a big deal. Overall, the lens actually has a decent coating on the glass elements.


Sample Images
Click on the photo to view a larger image.


Final Thoughts

This is the most unique Leica M Mount lens in the ultra-wide focal lengths. No other M Mount rangefinder lens in the 10-20mm range has the same qualities as the Lomography Atoll 17mm f/2.8 Art lens. Most M Mount lenses in the ultra-wide range are f/4.5 or f/5.6 on the wide end and the closest lens to the Lomo Atoll is the Zeiss Distagon 15mm f/2.8 ZM. This lens comes in at a whopping $4750 USD and isn’t even rangefinder coupled.
If you’re looking for an ultra-wide M Mount lens that provides an external viewfinder, look no further and pick up the Lomography Atoll 17mm f/2.8 Art lens.
Pros:
Focal Length
Rangefinder Coupled
All-Metal Construction
Dampened focus ring and aperture ring
Decent image performance
Built-in Lens Hood
Premium Packaging, supplied with helpful guides
Cons:
Focus might be hard to achieve at wide apertures
Clickless aperture ring means you’ll be accidentally moving your aperture
Large and metal so it’s heavier than standard rangefinder lenses
External Viewfinder is cheap plastic
Other Comments:
I love to test more affordable lenses and I’m quite serious about money spent on gear actually providing quality images. This lens is currently $499 USD on the Lomography store and the Close Focus Adapter is $120. This is a very affordable wide angle M Mount option considering the closest lens that can compare to the Lomo Atoll is the Zeiss Distagon 15mm f/2.8 ZM which is almost $5000 USD.
Rating: 4.5/5
I give this lens a very high score due to it’s unique lens profile, premium build quality, and decent optical performance.

Review: TTArtisan 35mm f/1.4 for Sony E
A definitive review of the TTArtisan 35mm f/1.4 for Sony E-Mount.
Intro
I generally avoid recommending lenses for the Sony E mount system that fall on the cheaper side. Typically they have shoddy build quality and glaringly bad image performance. Come to my surprise when I got my hands on the TTArtisan 35mm f/1.4 for Sony E lens, it was quite usable at only $73.00 USD!
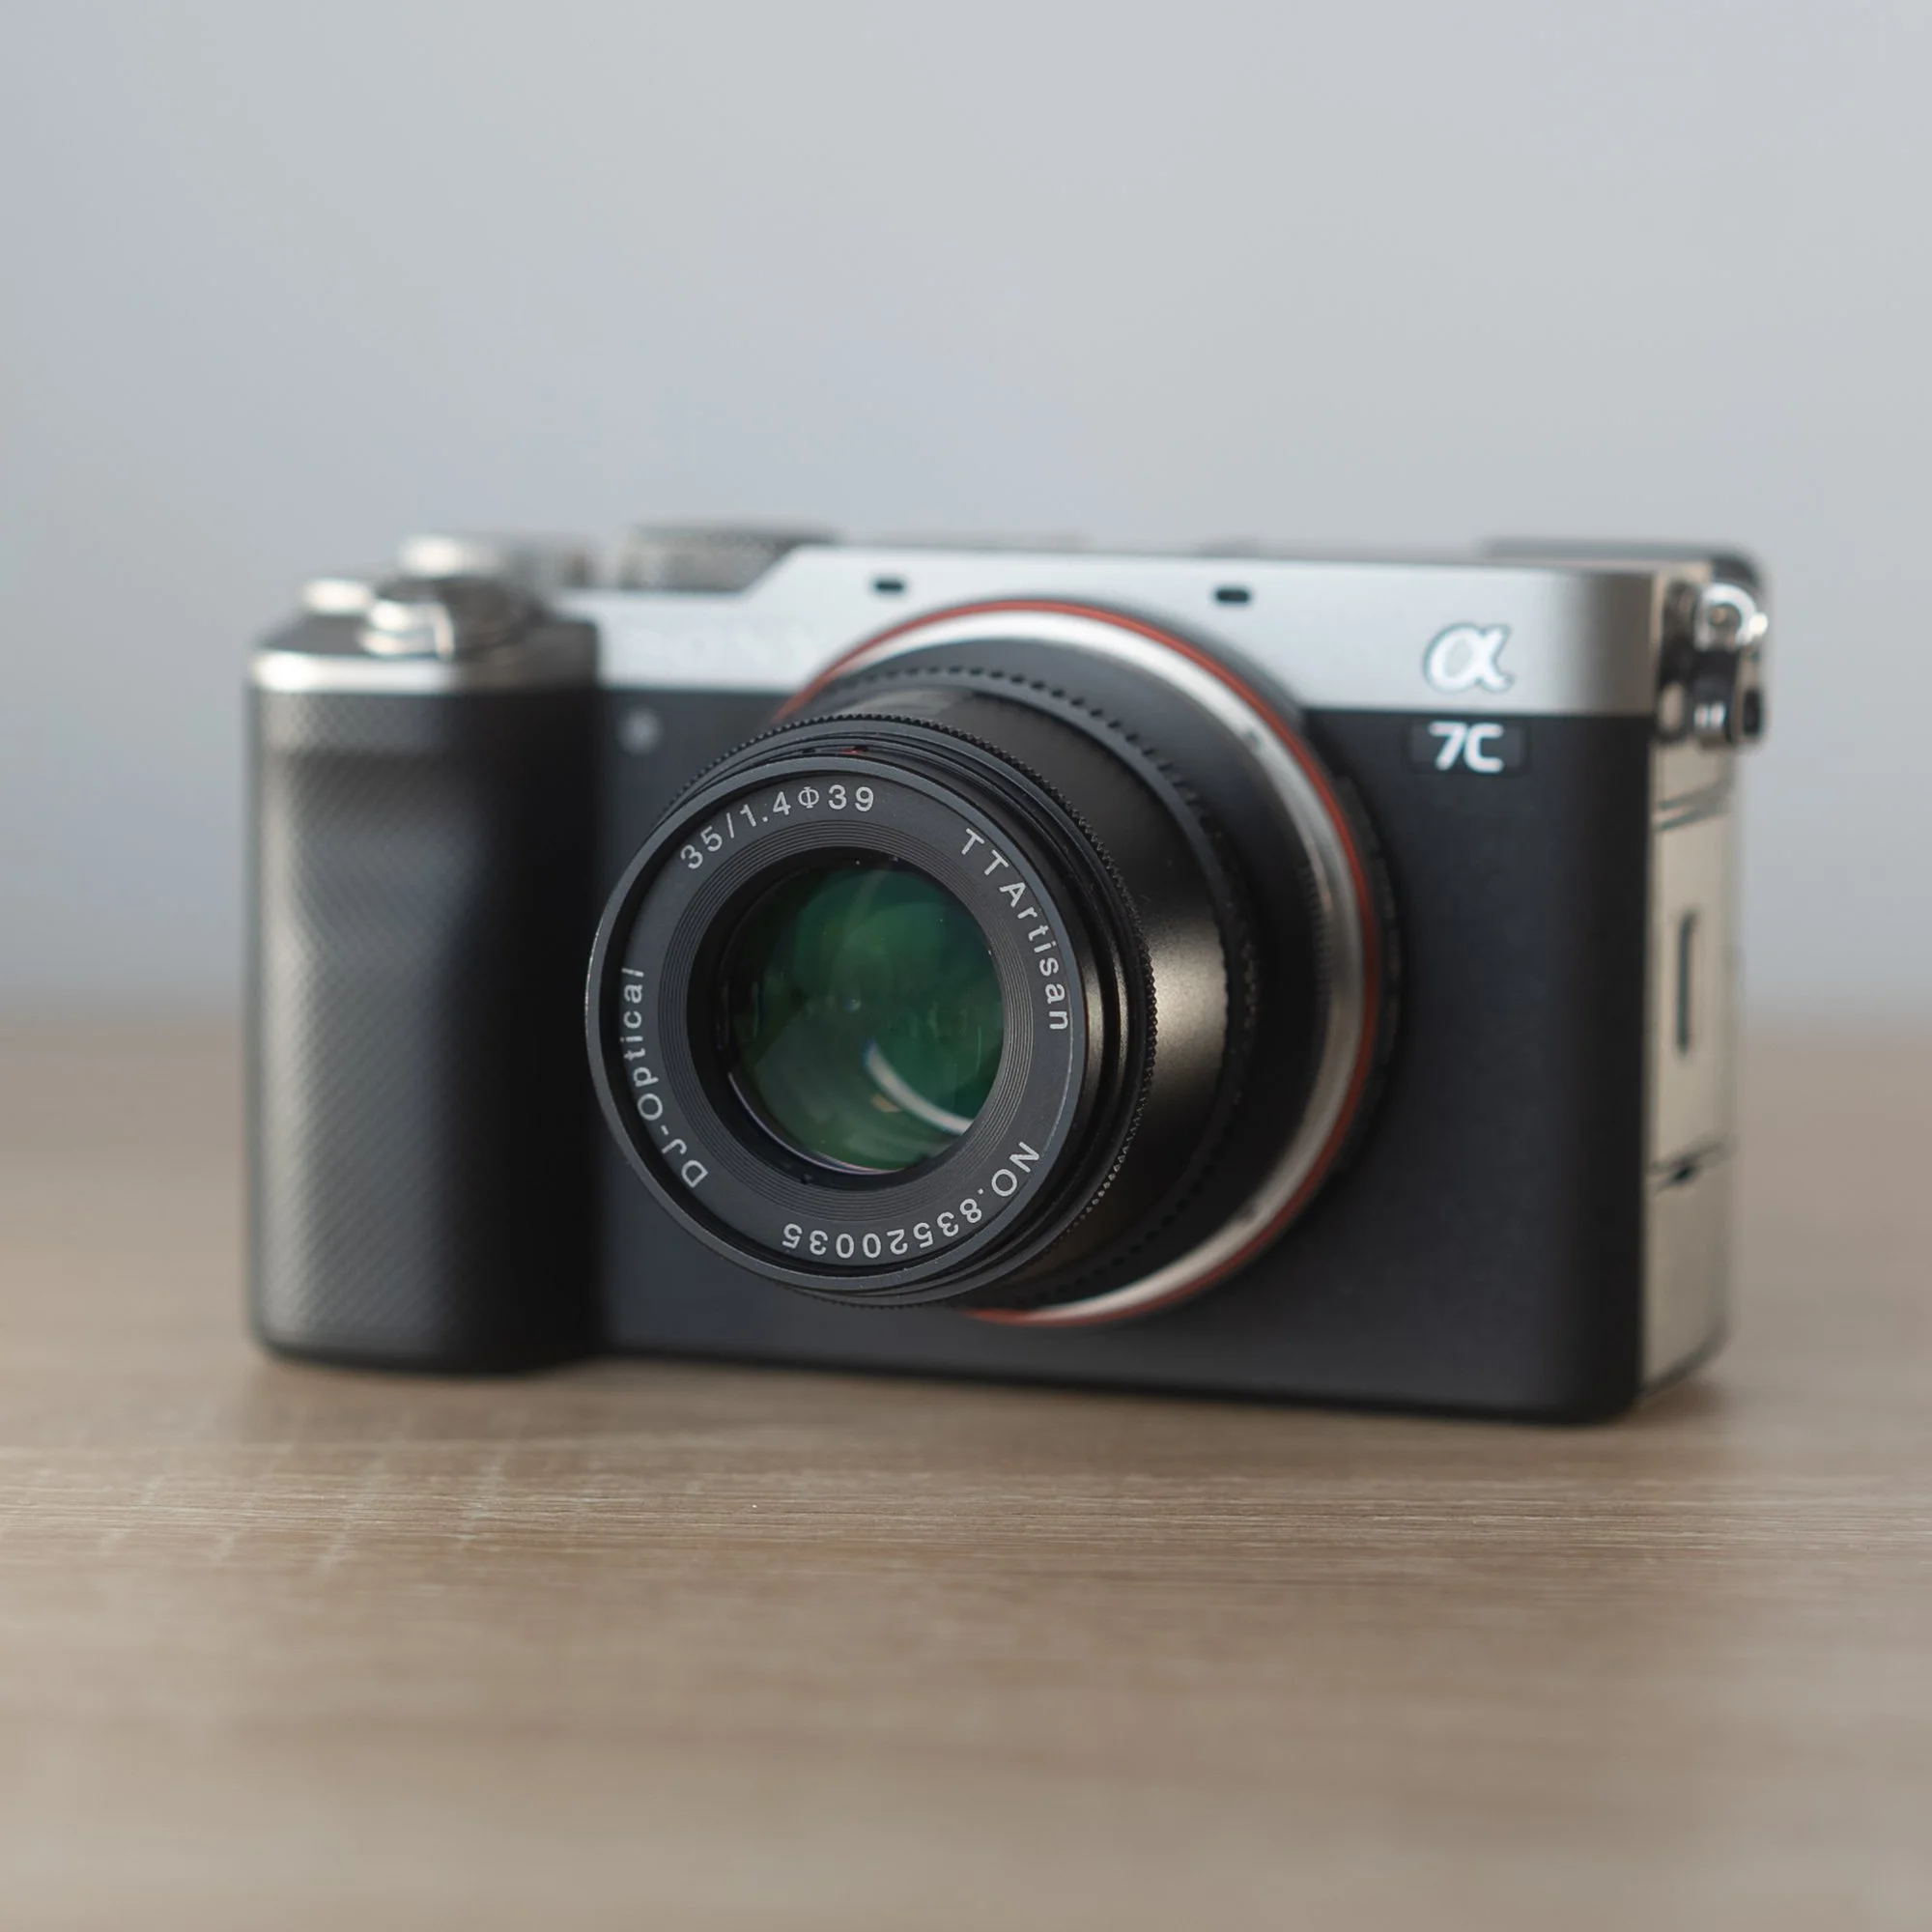
The TTArtisan 35mm f/1.4 is designed for Sony APS-C (crop sensor) cameras like the Sony A6xxx cameras. It’s incredibly compact and has decent handling with the very smooth focusing ring. I tested this lens for over a year with a Sony A6600, Sony A7C, and my trusty Sony A7SIII. For full transparency, TTArtisan sent me this lens to review but they had no influence on my judgement of this lens. If anything I took almost a year to fully produce an in-depth review of their product.
To test the full capabilities of this little lens, I filmed a short documentary/profile video of fellow street photographer Simon Shim.
Filmed entirely on the TTArtisan 35mm f/1.4
Specs
Focal Length: 35mm (52.5mm Full Frame equivalent)
Sony E Mount (Crop Sensor) Also comes in Fuji X, Leica L, M43, Nikon Z, and Canon EF-M mount
Minimum Focus Distance: 28cm/.28m
Max Aperture: f/1.4
Minimum Aperture: f/16
Optics: 7 Elements in 6 Groups; 10 Diaphragm Blades
Weight: 180g
Dimensions (Diameter x Length) 56mm x 44mm / 2.2" x 1.7"
Filter Size: 39mm
Weather Proofing: Unknown (Safe to assume none)
Price: $83 USD on B&H

Build Quality
The lens is built out of a sturdy metal construction, which is surprising considering how many modern mirrorless lenses are generally plastic. It weighs more than the Sony 40mm f/2.5 G I reviewed last. To be quite honest, I was surprised at the build quality considering it’s a sub-$100 lens.
It is completely manual focus and has a very well dampened focus ring close to the lens mount that telescopes and then a very clicky aperture ring. The aperture ring is a little quirky at first to use. The aperture control is very thin and a little hard to adjust since there’s very little to grip. The ring moves in half-stops from f/1.4 - f/4 before it goes in full stops between 4, 5.6, 8, and 16. This aperture ring has to be the biggest complaint I have about the otherwise decent lens body. I wish TTArtisan had expanded the grip/gears on the aperture and focus ring.


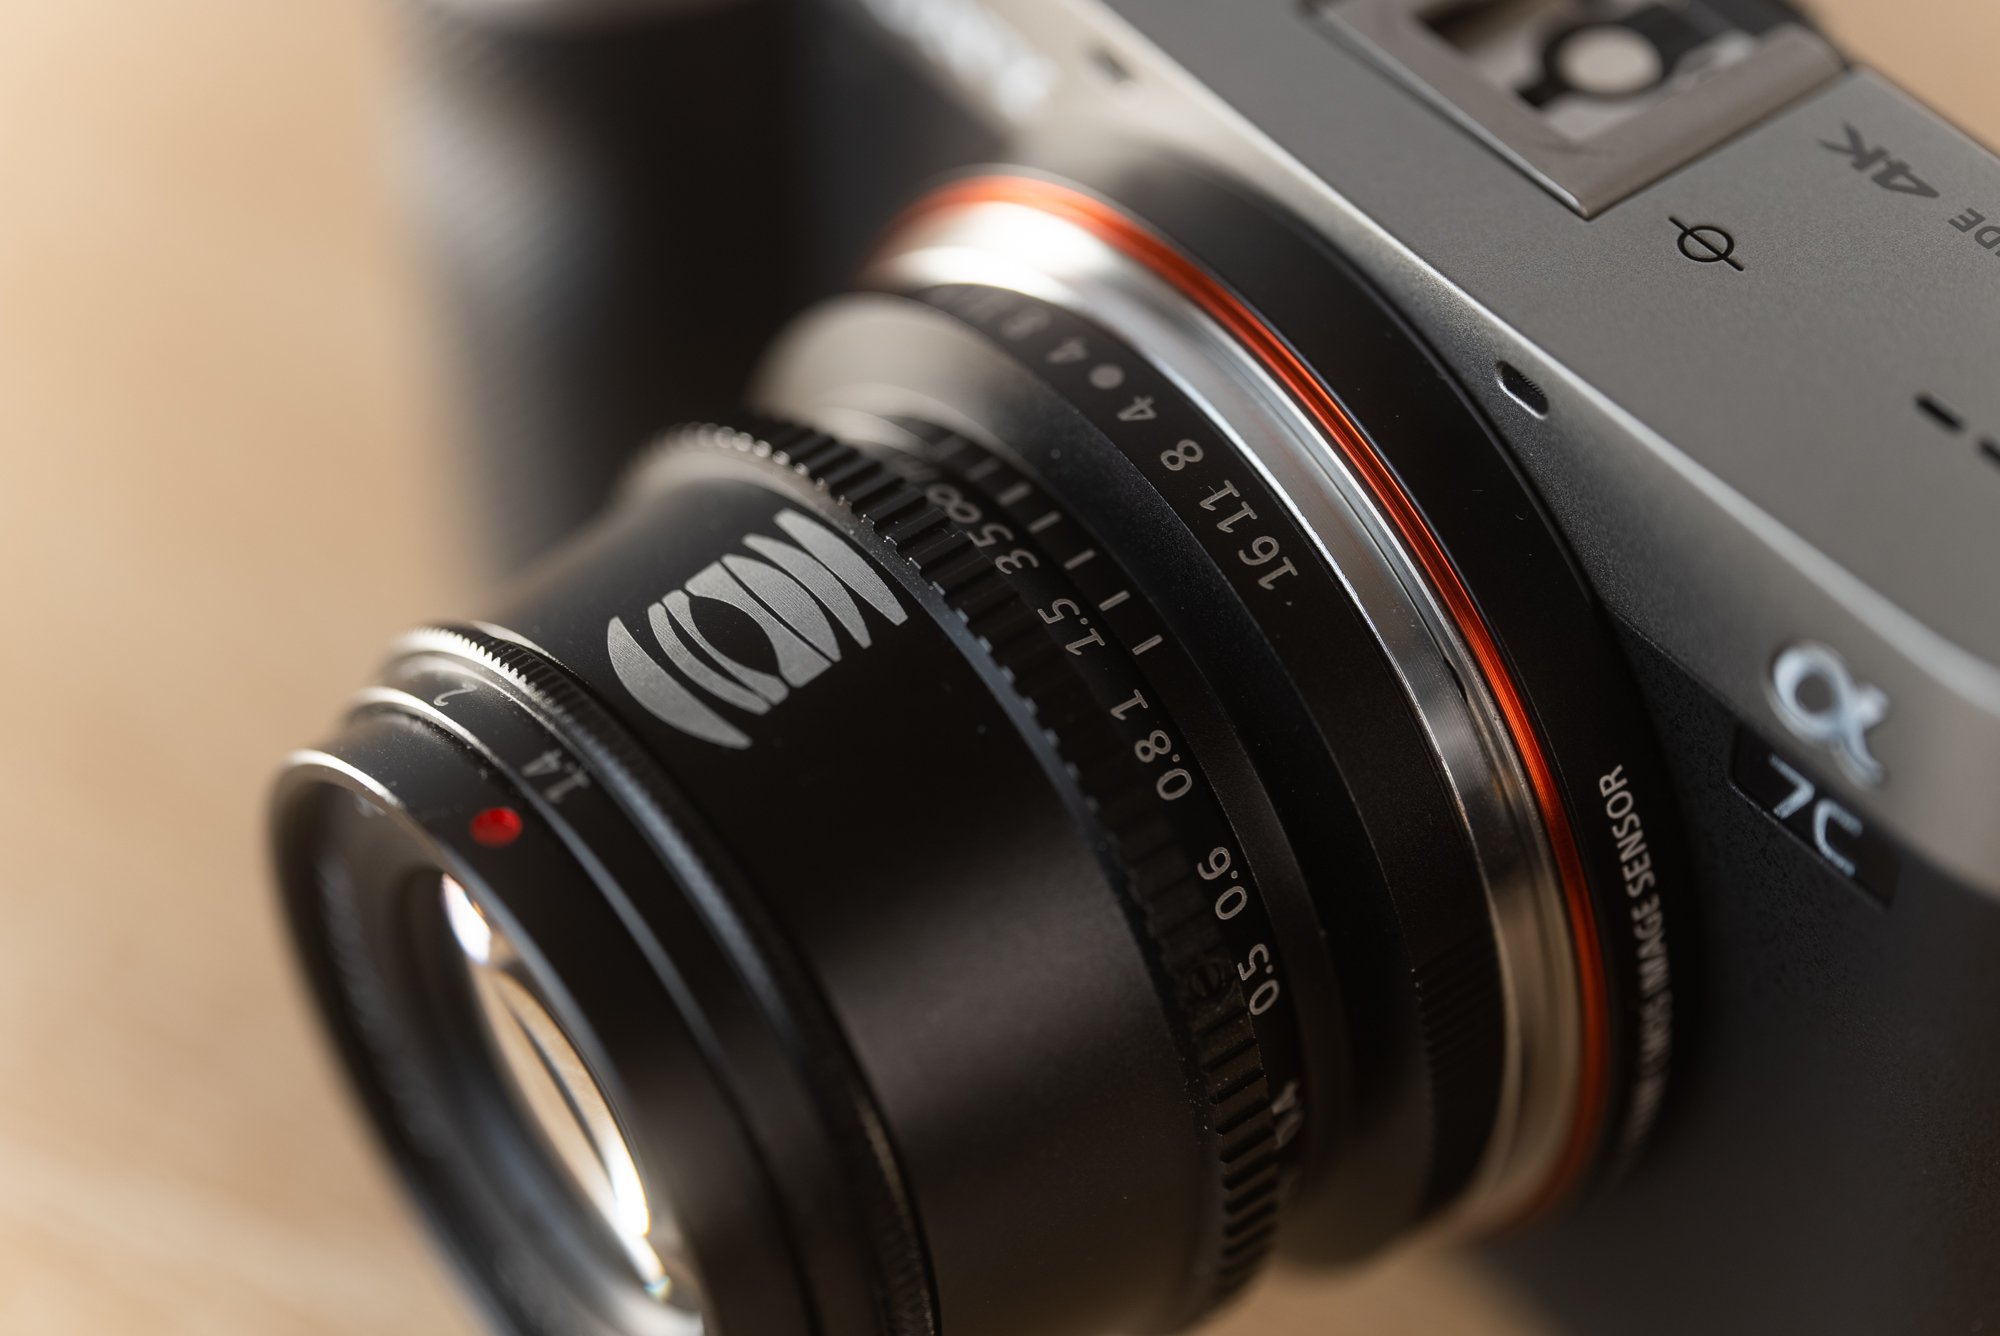
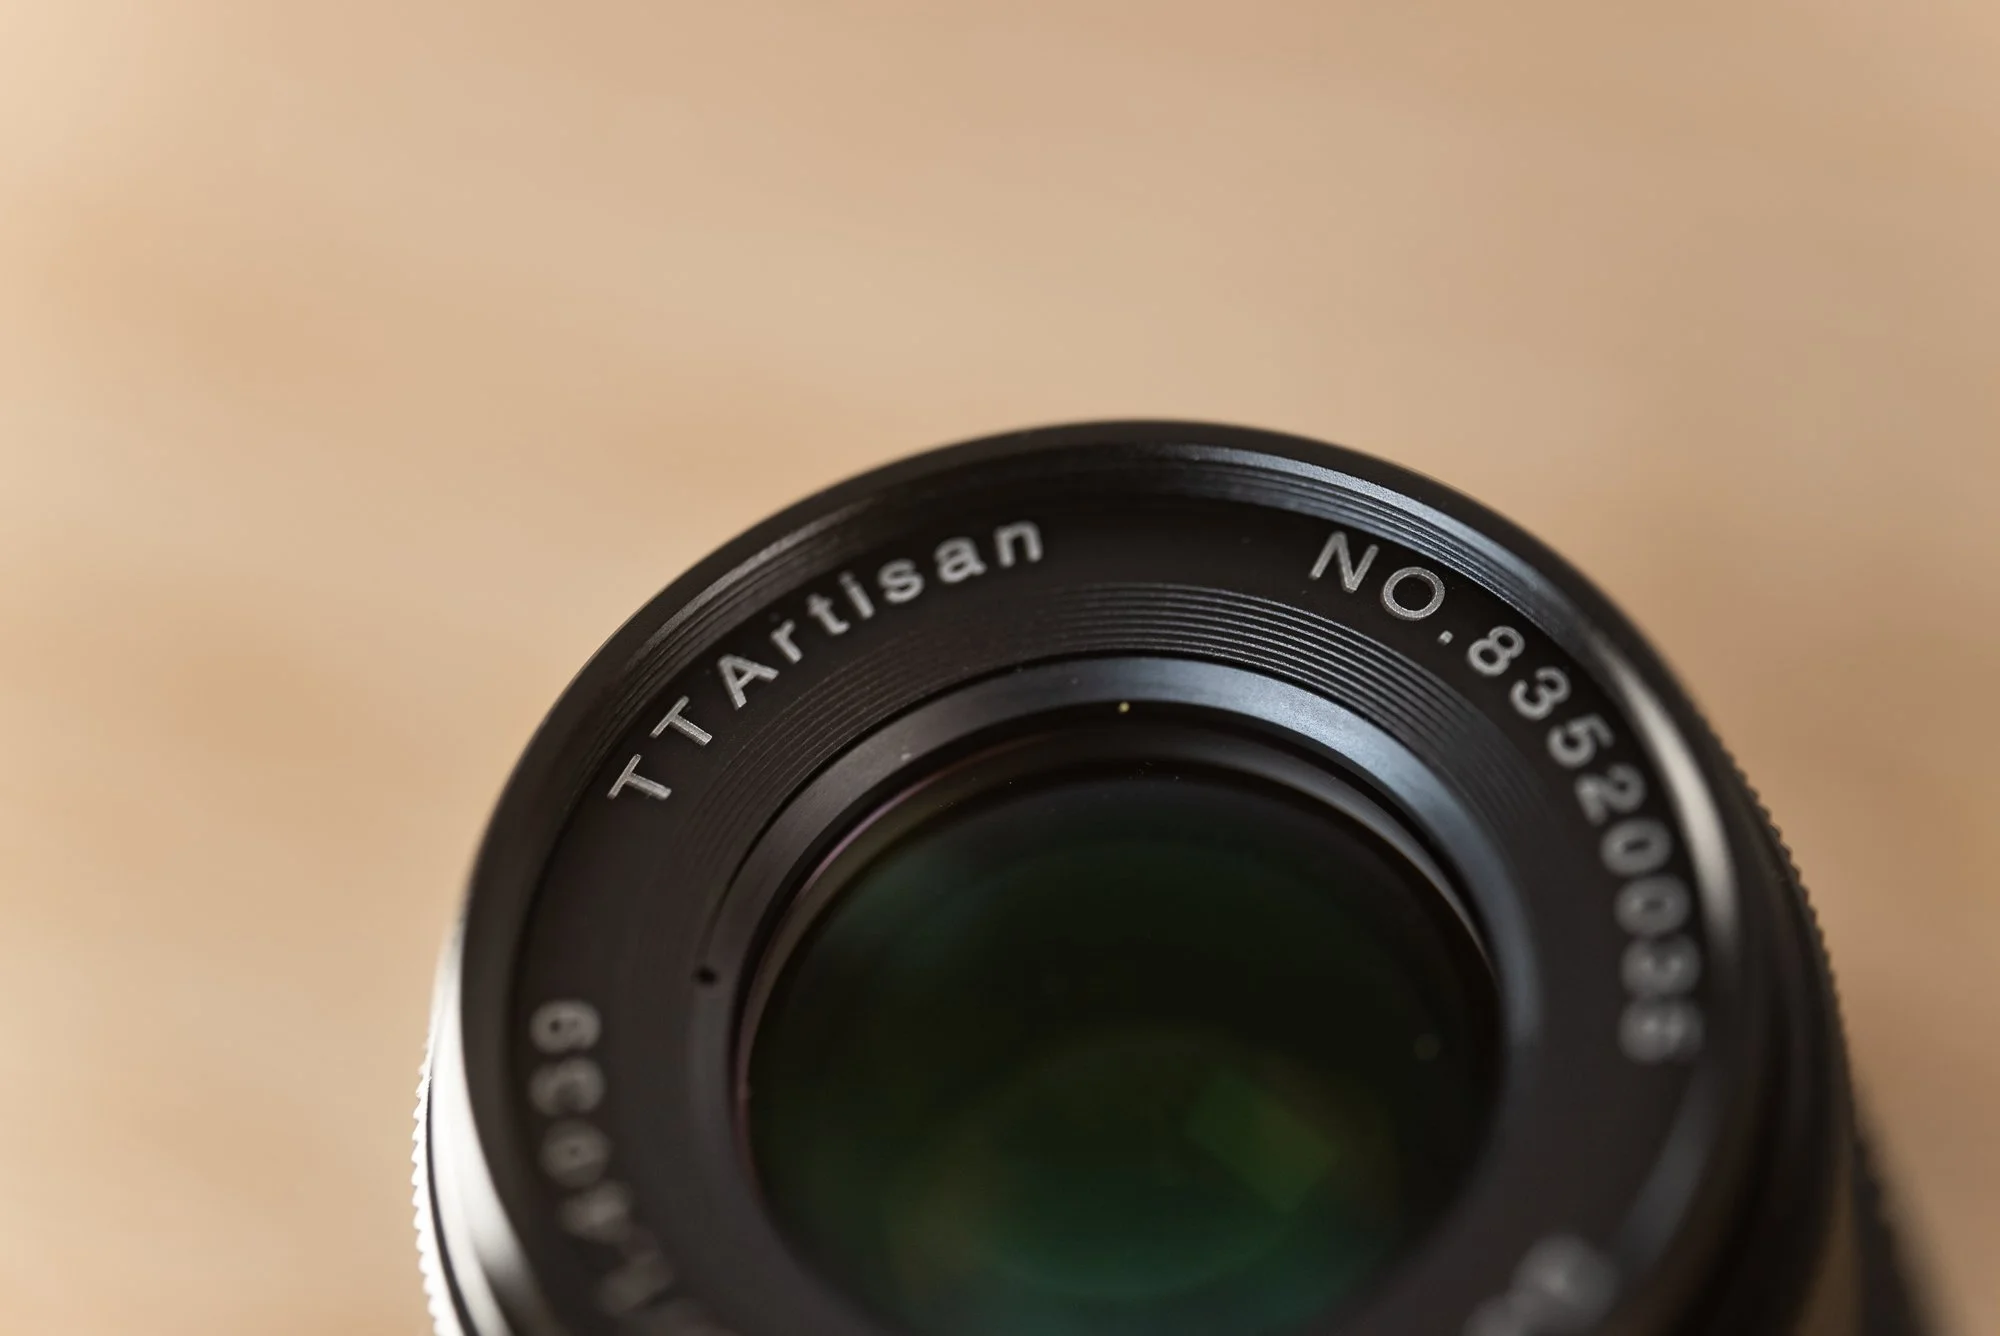
The glass element construction diagram is shown on the top of the lens barrel and is quite unique. There’s nothing that screams beautiful about this lens , but it does remind me of manual focus film camera lenses from the past. The design seems like an ode to the vintage manual focus lenses from the analog era.
The lens cap is a screw-on metal cap which lends to security of your front element but is quite cumbersome to screw on and off when you want to quickly take photos. The front of the lens also has threads for 39mm filters.

The optical design of this lens consists of 7 glass elements in 6 groups with 10 diaphragm blades which produces decent bokeh. This lens most likely does not have any weather sealing so use with caution in wet or sandy weather conditions. There’s no rubber gasket to protect your camera sensor in the event of rain.
Performance

The TTArtisan 35mm f/1.4 also comes in multiple camera mounts if you have a Fuji X, Canon EF-M, Leica L, M43, or Nikon Z camera. The compact nature of the lens and slim profile of the A7C makes it a fabulous option for discreet street photography. This lens is completely manual so it will slow down your shooting process for better or for worse.


The lens is very soft and almost “dreamy” until you stop down to f/2.8 or f/4. Focusing might be difficult when opened up at f/1.4 but with focus peaking on the modern cameras, this problem can be avoided. This is a 35mm lens for APS-C/Crop Sensor cameras so the Full Frame equivalent is about a 50mm lens.
Vignetting and distortion are problems for this lens, but expected for something so small and affordable. Surprisingly, flaring wasn’t an obvious issue when I used this lens but definitely flared more often than expensive lenses with anti-flare coating.
If you're very strict with your bokeh, you’ll be surprised to see very pleasing bokeh balls in out of focus elements. Now this isn’t saying this is on par with the top of the line lenses, but you’ll get relatively spherical bokeh balls with some obvious cat-eye bokeh in the edges. I don’t detect obvious onion ring effects going on, but there is some “soap bubble” effect happening to the dimmer bokeh balls.


You could probably convince people that these images were from a lens that was 4x or 5x the cost of the TTArtisan 35mm f1/.4
Sample Images
Click on the photo to view a larger image.


Final Thoughts

Overall, this lens surprised me in many ways. The all-metal construction, dedicated aperture ring, max aperture of f/1.4, and decent image quality were all factors that pleased me when shooting.
You’ll appreciate this lens even more if you have experience shooting manual 35mm film cameras that feel and shoot similar to this TTArtisan lens. It’s an obvious ode to vintage metal film lenses of the past and if you shoot photos understanding the image-taking process requires a bit more time, you’ll thoroughly enjoy shooting with this.
Pros:
All metal build quality
Manual aperture ring
Smooth and dampened focus ring
Great focal length for street photography
Opens to f/1.4
Small profile
Cons:
Image quality is decent but not great
Chromatic aberration & sharpness is lacking
Aperture ring is very thin and difficult to use
Mounting and un-mounting this lens is difficult with the small grips
Rating: 2.5/5
I gave the final rating a rather harsh score even though I’d ultimately say I was surprised at the performance of this lens. It felt just ok in the hands, considering the annoyingly small aperture ring. I managed to film a short documentary with this lens so it’s obviously useable in the real world, albeit it takes some time getting used to. If you don’t have much money to spend on lenses and don’t mind shooting on manual lenses, I’d say you should go ahead and try shooting with the TTArtisan 35mm f/1.4. You’re not making a huge commitment spending $83 USD on this lens if you’re not aiming for professional photos!
Providing a B&H Photo Affiliate link if you’d like to purchase the lens so I can use the funds to run my reviews. Thanks!
TTArtisan 35mm f/1.4

Review: Sony 40mm f/2.5 G for Sony FE
A definitive review of the new compact Sony 40mm f/2.5 G lens for Sony FE Mount.

Intro
With smaller mirrorless cameras dominating the market, there has been a surge of popularity for compact street photography bodies. In the last several years, the usual cameras I'd recommend to someone in this area of photography would have been the Ricoh GR series, Fuji X100 cameras, and the amazing Leica Q2 with its beautiful 28mm Summilux lens and astounding 47megapixel sensor.
Recently, companies like Sony and Sigma have been releasing new compact lenses. These lenses bridge the gap between the original cheap and plastic Sony FE lenses and the incredibly expensive Sony GM and Sigma Art series for professionals.
Sony released an interesting trio of lenses: the 24mm f/2.8 G, 40mm f/2.5 G, and 50mm f/2.5 G lenses. Oddly, Sony opted to release a 40mm lens instead of a 35mm. Not wanting to spend thousands of dollars on switching to a new camera system, I picked up the 40mm f/2.5 G and mounted it on my Sony A7C for my new EDC (everyday-carry).
Specs
Focal Length: 40mm
Sony FE Mount (Full Frame)
Minimum Focus Distance: 28cm/.28m
Max Aperture: f/2.5
Minimum Aperture: f/22
Optics: 9 Elements in 9 Groups; 7 Diaphragm Blades
Weight: 173g
Dimensions (Diameter x Length) 68mm x 45mm / 2.7" x 1.8"
Filter Size: 49mm
Weather Proofing: Dust and moisture sealed
Price: $598 USD


Build Quality
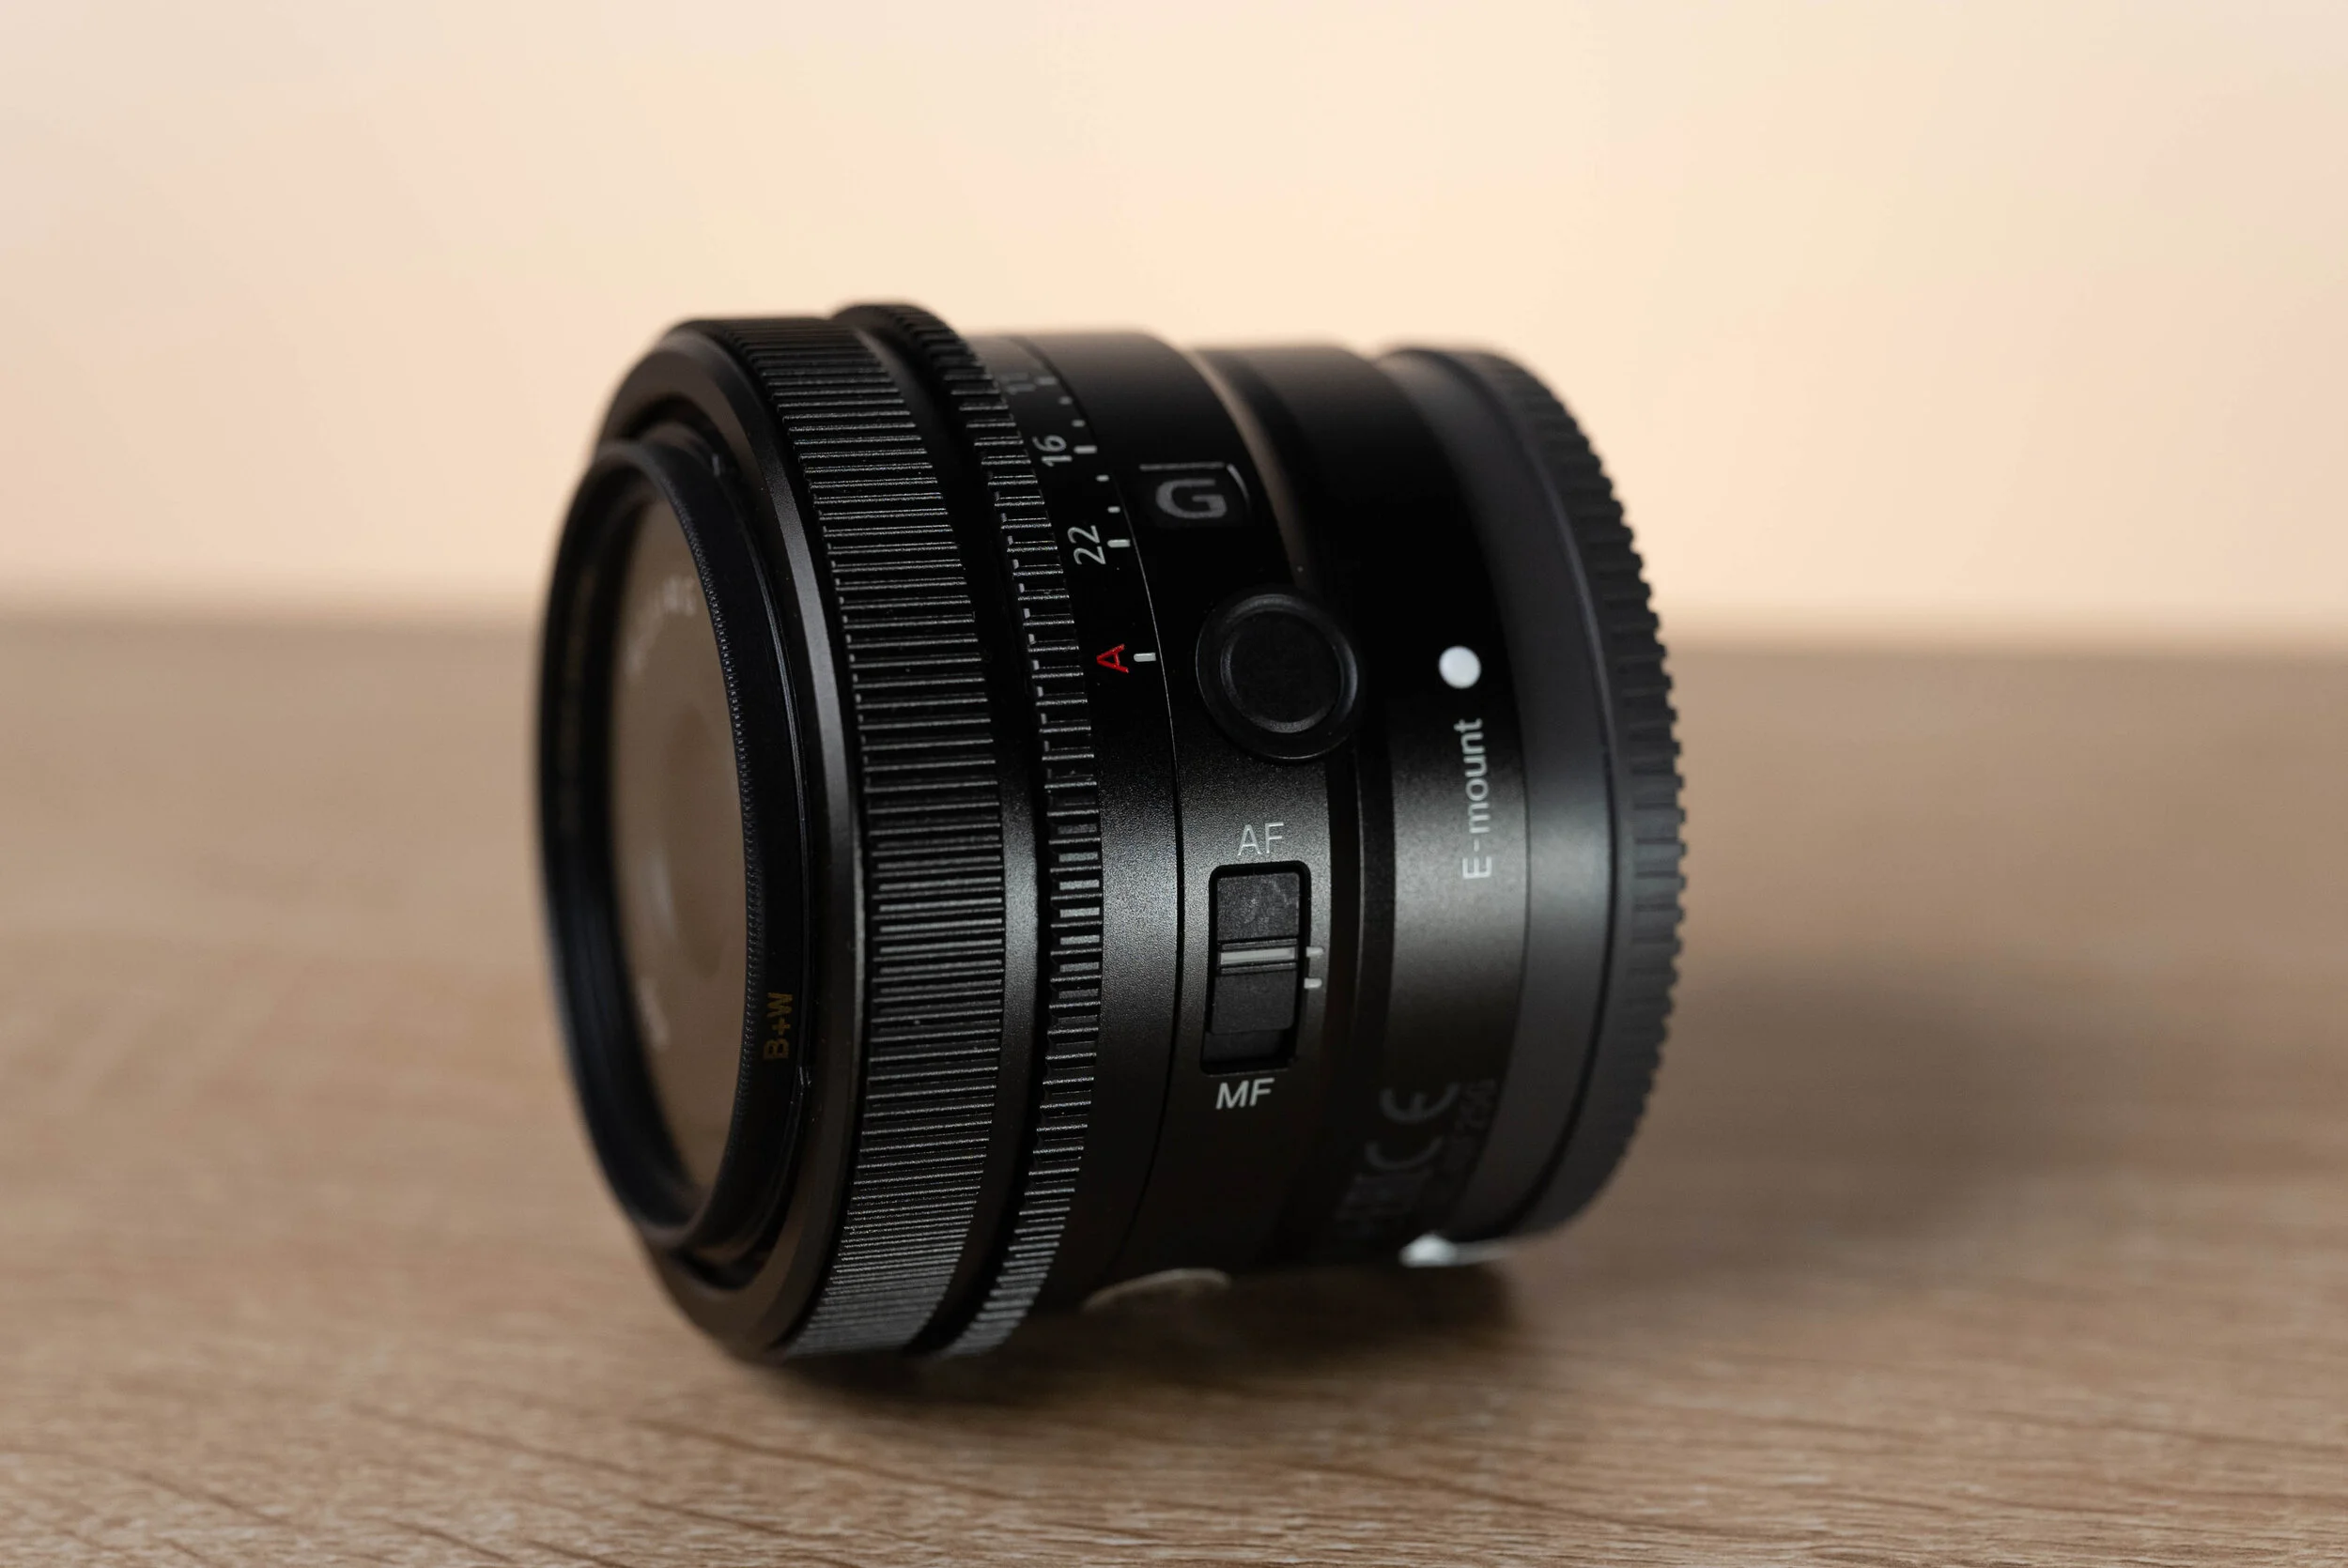
The 28mm, 40mm, and 50mm all share the same outer lens construction. If you placed all three lenses side-by-side, they'd look virtually identical until you read the focal length indicator. The 40mm f/2.5 G lens has a very solid metal build quality which is a huge improvement over the plastic on the Sony Zeiss prime lenses that tend to scratch very easily. The only odd part of the lens is not even an issue with the actual lens build itself but with the flimsy plastic lens hood.
Personally, I really desired something that looked sleek like the square hoods on the Fuji X100V and Leica Q2 so I found a square hood online and filed down the plastic mount so it would fit onto the Sony lens. The setup resembled the Leica Q2 Summilux lens in the end and I have to say that I think this looks much better than the stock lens hood that Sony decided to provide.


The lens has a slew of manual controls including a manual aperture ring with a de-click switch, a custom function button, and a AF/MF switch. Having all these controls when shooting street photos is invaluable when you want full control of your photo in the moment. I found myself using the manual aperture ring and AF/MF switch quite often and never felt like I was going to damage the lens if it accidentally bumped into something. Sony claims the lens is dust and moisture sealed and it has a thin rubber ring at the mount to prevent anything leaking onto the sensor.

The optical design of this lens consists of 9 glass elements in 9 groups with 7 diaphragm blades which might show slightly disappointing bokeh (if bokeh is a priority to you). Unlike the Sony 24mm G and 50mm G, this lens does not have ED (Extra-low Dispersion) glass elements to reduce chromatic aberration. This doesn't mean the lens has horrible chromatic aberration, but it won't be able to avoid purple and green fringing in certain situations where the 24mm and 50mm might have been able to perform better.
Performance

The 40mm f/2.5 G looks like it was specifically designed to live on the Sony A7C. The compact nature of the lens and slim profile of the A7C makes it a fabulous option for discreet street photography. The lens has two linear focusing motors for fast focus and, more importantly, virtually silent autofocus. You'd have to put the lens up to your ears to hear the motors operating at all and I love that there was no sacrifice to the autofocus speed for this attribute.


The lens is quite sharp, but I can't say this is the sharpest Sony FE mount lens I've ever used. It won't rival something like the amazing Sony Zeiss 55mm f/1.8 or the Sigma 24-70 f/2.8, but having the sharpest details in a lens like this isn't necessarily the best image quality to have. You definitely don't want muddy details, but for general street photos or everyday-carry, usability is the most important trait to have. With the 40mm, getting a great (and not amazing) image quickly, is the most important factor to me. I even attached a Moment 10% Cinebloom filter to create some diffusion and remove some of the digital sharpness. A lot of my resulting images had clarity but had more flattering results for people and bright lights.
Vignetting nor distortion are problems for this lens, considering you have automatic lens correction on in your camera. Flaring isn't an issue either but the fact that the Sony 40mm f/2.5 G lens is missing the Extra-low Dispersion glass elements means that chromatic aberration can be apparent in some images. I don't believe it's significant enough that I wouldn't use any image, but you might want to consider it if you're using this lens for professional purposes.


If you're very strict about your preference in bokeh quality, you'll be quite disappointed with the 7 aperture blades. The bokeh isn’t the most spherical and has some obvious onion ringing going on. That said, it's not the worst bokeh I've seen but you might want to avoid the Sony G trio if creamy out-of-focus areas are your thing.


I will say this lens can still produce suitable portraits if you're careful with the background depth of field. It's not a f/1.2 or 1.4 lens but in traditional street photography it's generally better to be shooting at lower aperture values like f/8 or f/11 to capture deep focus of all subjects in your image.
Again, I think it's important to know that the Sony 40mm f/2.5 G is very good at general purpose photography but most multipurpose lenses won't excel at one area of photography.
Sample Images
Click on the photo to view a larger image.


Final Thoughts

Overall, this is one of the most practical and well-built Sony FE lens that has been released. Excellent build quality, great sharpness, useful focal length, and quick autofocus are all obvious signs that this lens is a must-have for any Sony street photographer or someone looking for an everyday-carry setup.
I didn't have any similar focal length lenses like the 50mm f/1.4 or 35mm f/2.8, but my intention was specifically to pair this lens with my A7C to create a sleek and efficient setup whenever I wanted to have a small camera while on the go.

Pros:
Excellent build quality
Manual aperture ring, custom function button, AF/MF switch
Very fast and quiet autofocus
Useful focal length
Great sharpness
Dust and moisture proof
Cons:
7 aperture blades produces unappealing bokeh
Chromatic aberration at times
Rating: 3.5/5
It feels unfair to give this lens the same grading system as any other lens I've experienced considering it is very purpose-driven. I won't be taking this lens for portraits or landscape projects, but it'll definitely live on my Sony A7C when I want convenience, but more than just an iPhone camera. I'd highly recommend any Sony shooter who's looking at street photography options to check out the Sony 40mm f/2.5 G lens. You can save yourself a considerable amount of money by having a relatively affordable and proficient lens instead of having a separate camera system by switching to something like the Fuji X100V or Leica Q2. The Sony 40mm f/2.5 G is quietly one of the best lenses that Sony has released for the everyday photographer.

Review: Voigtlander 50mm f/2 APO-LANTHAR VM for Leica M
A definitive review of the new Voigtlander 50mm f/2 APO-LANTHAR VM for Leica M Mount cameras.

Intro
If you've been looking for budget friendly alternatives to classic Leica lenses, then Voigtlander is a brand you've probably come across. Voigtlander lenses (distributed by Japanese company Cosina) have been very popular choices for photographers looking to save a couple thousand dollars on Leica M glass. Most modern Voigtlander lenses have excellent optical and build qualities that rival Zeiss and Leica lenses. This 2021 release is no different and is quite possibly the best lens that Voigtlander has released to date. The Voigtlander 50mm f/2 APO-LANTHAR VM is finally here for the Leica M mount after appearing on the Sony FE system in 2019.
Specs
Focal Length: 50mm
Leica M Mount
Minimum Focus Distance: 70cm/.7m
Max Aperture: f/2
Minimum Aperture: f/16
Optics: 10 Elements in 8 Groups; 12 Diaphragm Blades
Weight: 288g
Dimensions (Diameter x Length) 55.6mm x 53mm / 2.2" x 2.1"
Filter Size: 49mm
Weather Proofing: None
Price: $999 USD on B&H Photo

Build Quality
This lens feels amazing to operate with. Modern Voigtlander lenses have a great build quality to them and the 50mm APO-LANTHAR is no different in this regard. The focusing ring is incredibly smooth and it creates a pleasant experience when obtaining focus on portraits. There is no focusing tab on this lens but personally I prefer a standard focusing ring on lenses of this length. Another thing to note is that this lens does not come with a lens hood. Purchasing a lens hood (Voigtlander LH-13) will cost another $129 USD.
The aperture has defined clicks and adjusts in half stops from f/2 to f/16. The markings and text on the lens barrel are a little difficult to read at times. The text is rather thin and the crimson font color they chose for the feet distance indicator is a bit too dark and might blend in with the black color of the lens barrel at times. It's a small complaint but it becomes quite noticeable how pleasant the distance indicators on the Zeiss Planar 50mm f/2 and Leica 50mm f/2 Summicron are in comparison to the Voigtlander.
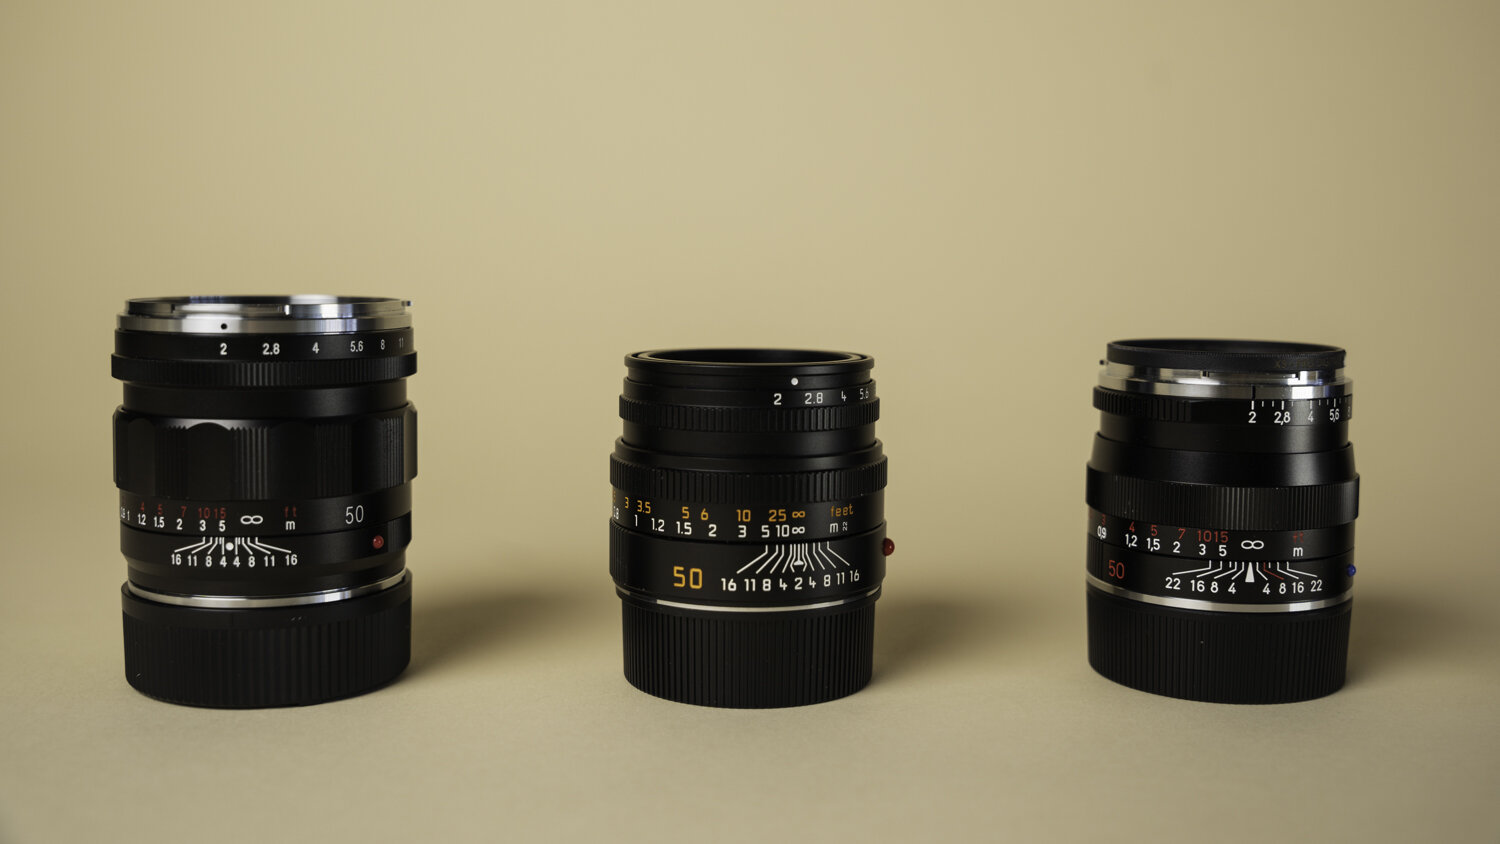
In the following photos you’ll see that the Voigtlander is larger than the Leica Summicron and Zeiss Planar and the weight difference is noticeable. This isn’t enough to be cumbersome but it is something to keep in mind if you consider weight a priority when carrying your equipment around.
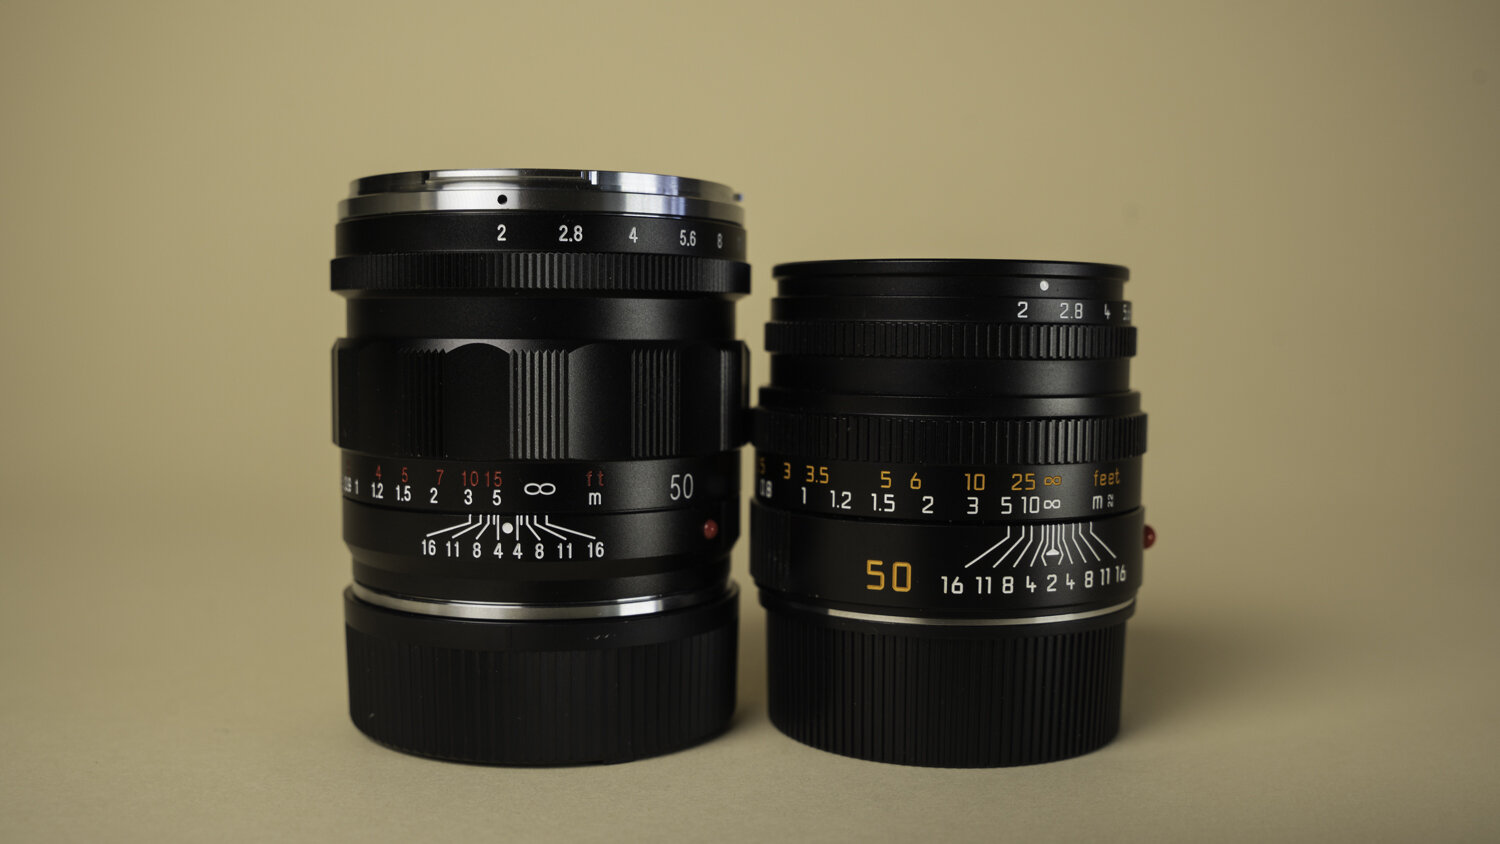
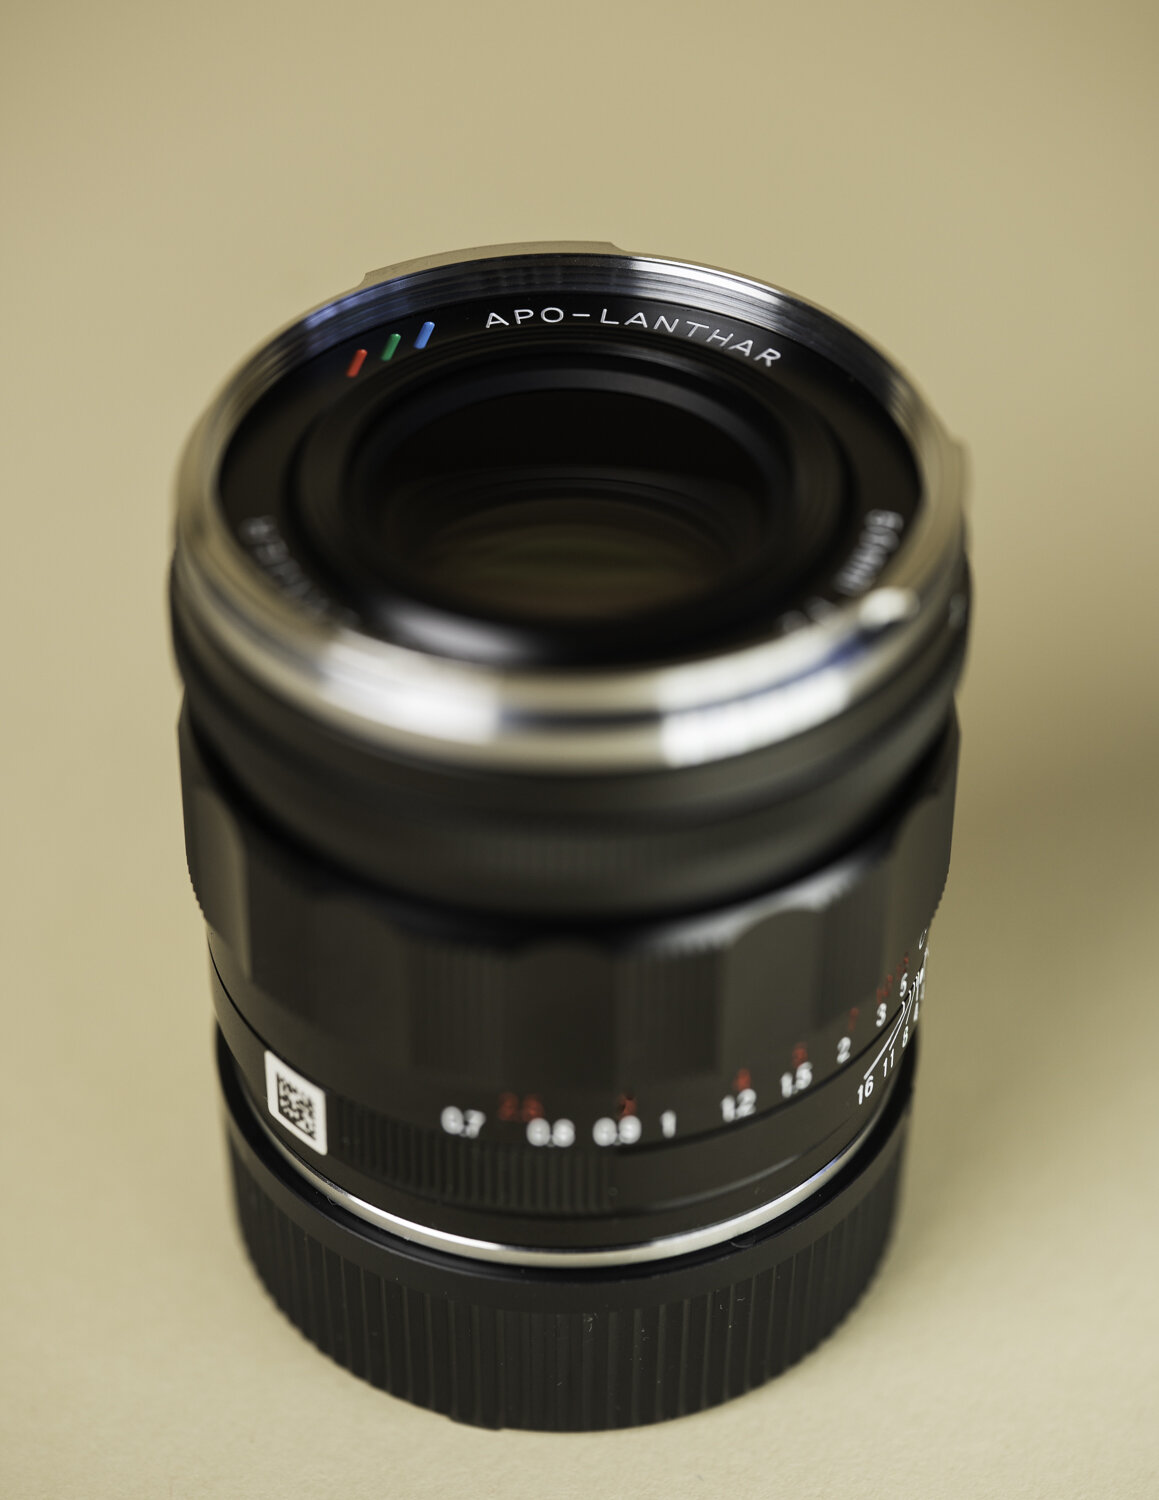
The optical design of this lens consists of 10 glass elements in 8 groups with 12 diaphragm blades which aid in bokeh quality. This lens has an APO classification in its name, indicating that the lens has an apochromatic design which drastically mitigates color fringing and chromatic aberrations. The RGB colored lines near the front element are a nice touch in tribute to its design. This overall glass construction is excellent and you can see the amazing performance of this lens in the next section.
Performance
I used the Voigtlander 50mm APO-LANTHAR f/2 on my Voigtlander Bessa R4A and my Sony A7c. I must preface that the quality of your image will be significantly better if you're shooting with a digital Leica M body since the Sony sensor is not optimized for M mount glass. However, you can see the relative difference in quality and performance when I compare the images of the APO-LANTHAR with other 50mm M lenses in the same category. Personally, I use most of my M mount lenses on my R4A and my Leica M5 and certain lens qualities aren't as pronounced on film.


The first impression you will receive from this lens is that it is incredibly sharp. It definitely has a more modern rendering but the sharpness of this lens isn't overwhelming. Contrast is strong and saturation is very bold at f/2. It's hard to deny the claim others have made that this is quite honestly the best performing Voigtlander lens to date.
One important thing to note is that vignetting is quite apparent at f/2 if you're adapting this lens to other digital bodies like a Sony mirrorless camera. The vignetting is less apparent with my film photos but it's definitely more noticeable compared to the standard Leica 50mm f/2 Summicron. Distortion is quite minimal and both vignetting and distortion are easily adjusted if you apply a Lightroom correction with the Sony FE profile of this lens.


Test Images
True to the apochromatic design of this lens, chromatic aberration is minimal or practically non-existent. The photos below have not been corrected for chromatic aberrations within Lightroom nor have they been adjusted with a profile to correct for vignetting or distortion.


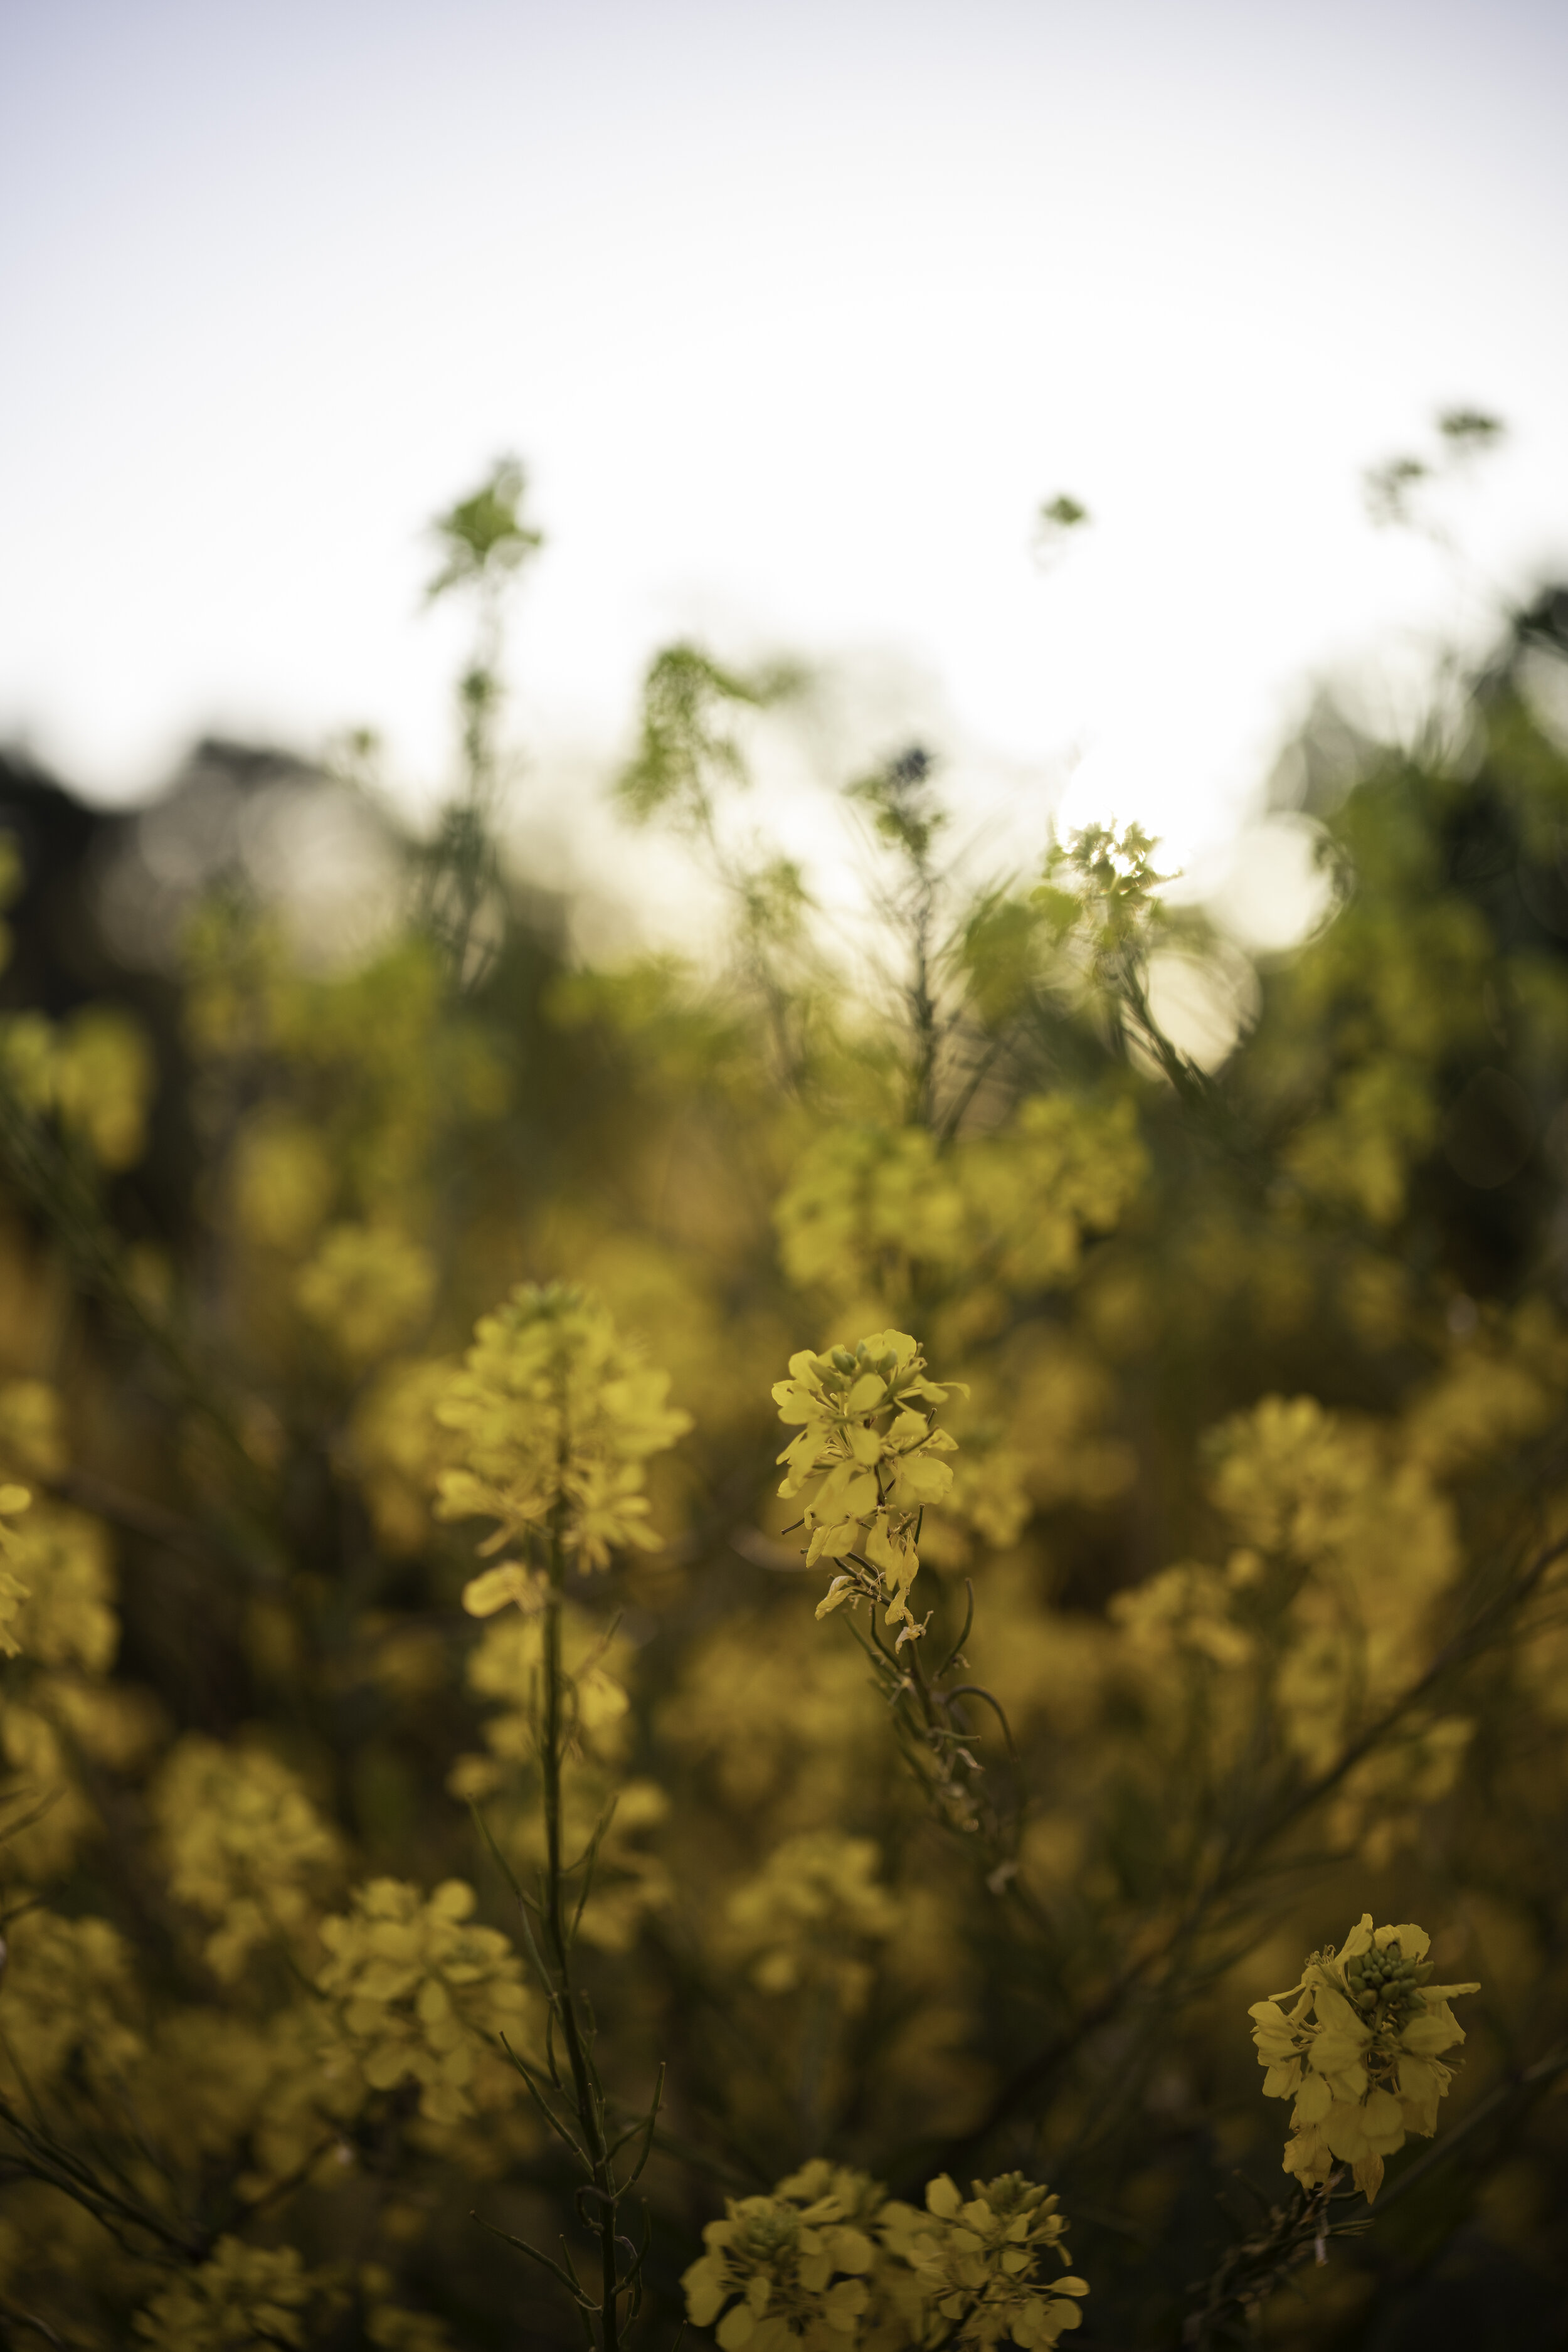
If you're very strict about your preference in bokeh quality, you'll be happy to see just how beautiful the out-of-focus areas are with this lens. The rear bokeh quality of the Voigtlander has the smoothest transitions between out-of-focus elements in the image. No other 50mm f/2 lens that I tested against the Voigtlander came close to having such pleasing rear bokeh rendering. What's very odd is that objects that are in front of the focal plane have slightly distracting bokeh qualities compared to objects that are in the distance.
The images below demonstrate the difference in out-of-focus elements between the Leica Summicron (Top) and the Voigtlander APO-LANTHAR (Bottom). Click on individual images for a larger view.


Notice how smooth the out of focus area is in the rear for the Voigtlander compared to the Leica but the bokeh nearest to the camera is more defined and sharp on the Voigtlander. It's not the biggest deal breaker and to be quite honest I don't think most people will notice this unless if you're pixel-peeping every out of focus element near the camera.
Both lenses have a swirly cat-eyed bokeh with the Leica having more spherical shapes to its bokeh balls.
Here are shots of the Voigtlander 50mm f/2 APO-LANTHAR at f/2 against other popular 50mm f/2 lenses:


Something interesting to note is that the Voigtlander has a slightly wider field of view than the Leica Summicron. The Zeiss Planar has the widest field of view with very little vignetting at f/2. I threw my Konica M-Hexanon 50mm f/2 in the mix as a budget choice to compare to the other popular 50mm lenses.


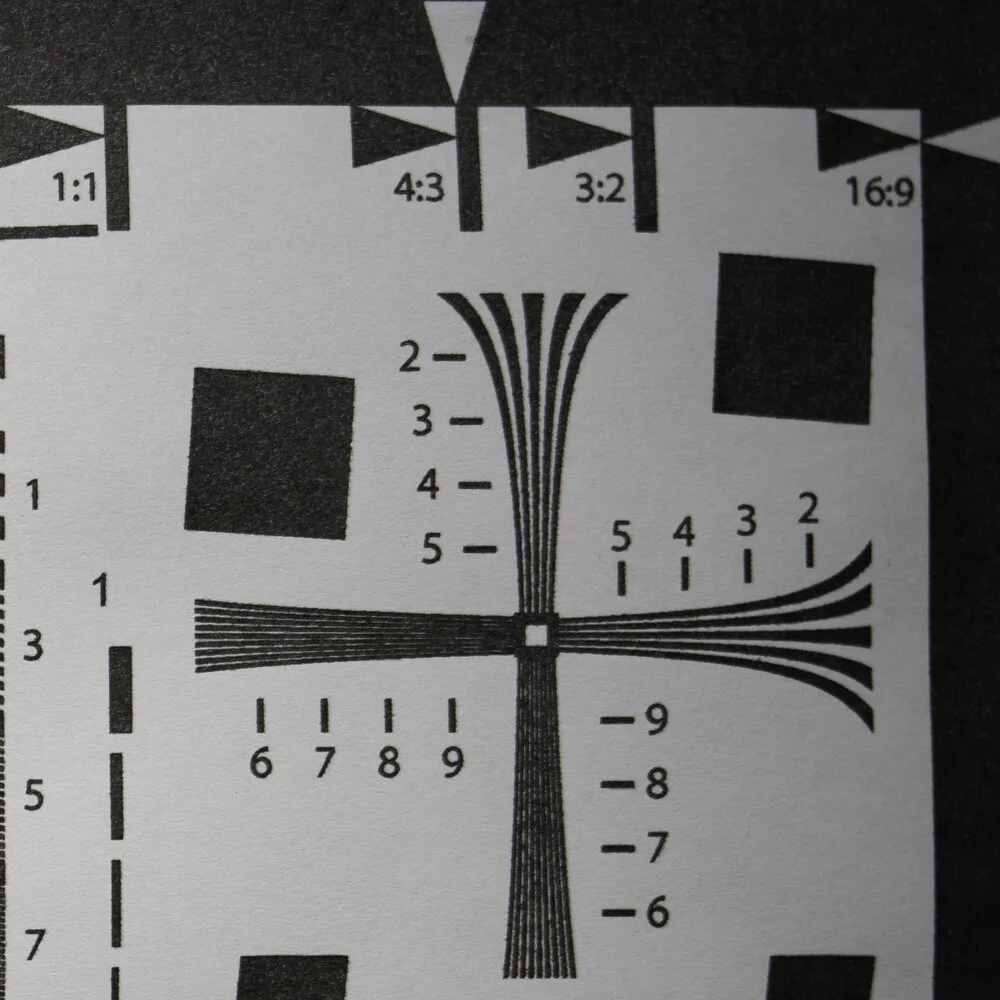
Test chart images at f/2 for center sharpness, corner sharpness, and levels of chromatic aberration.


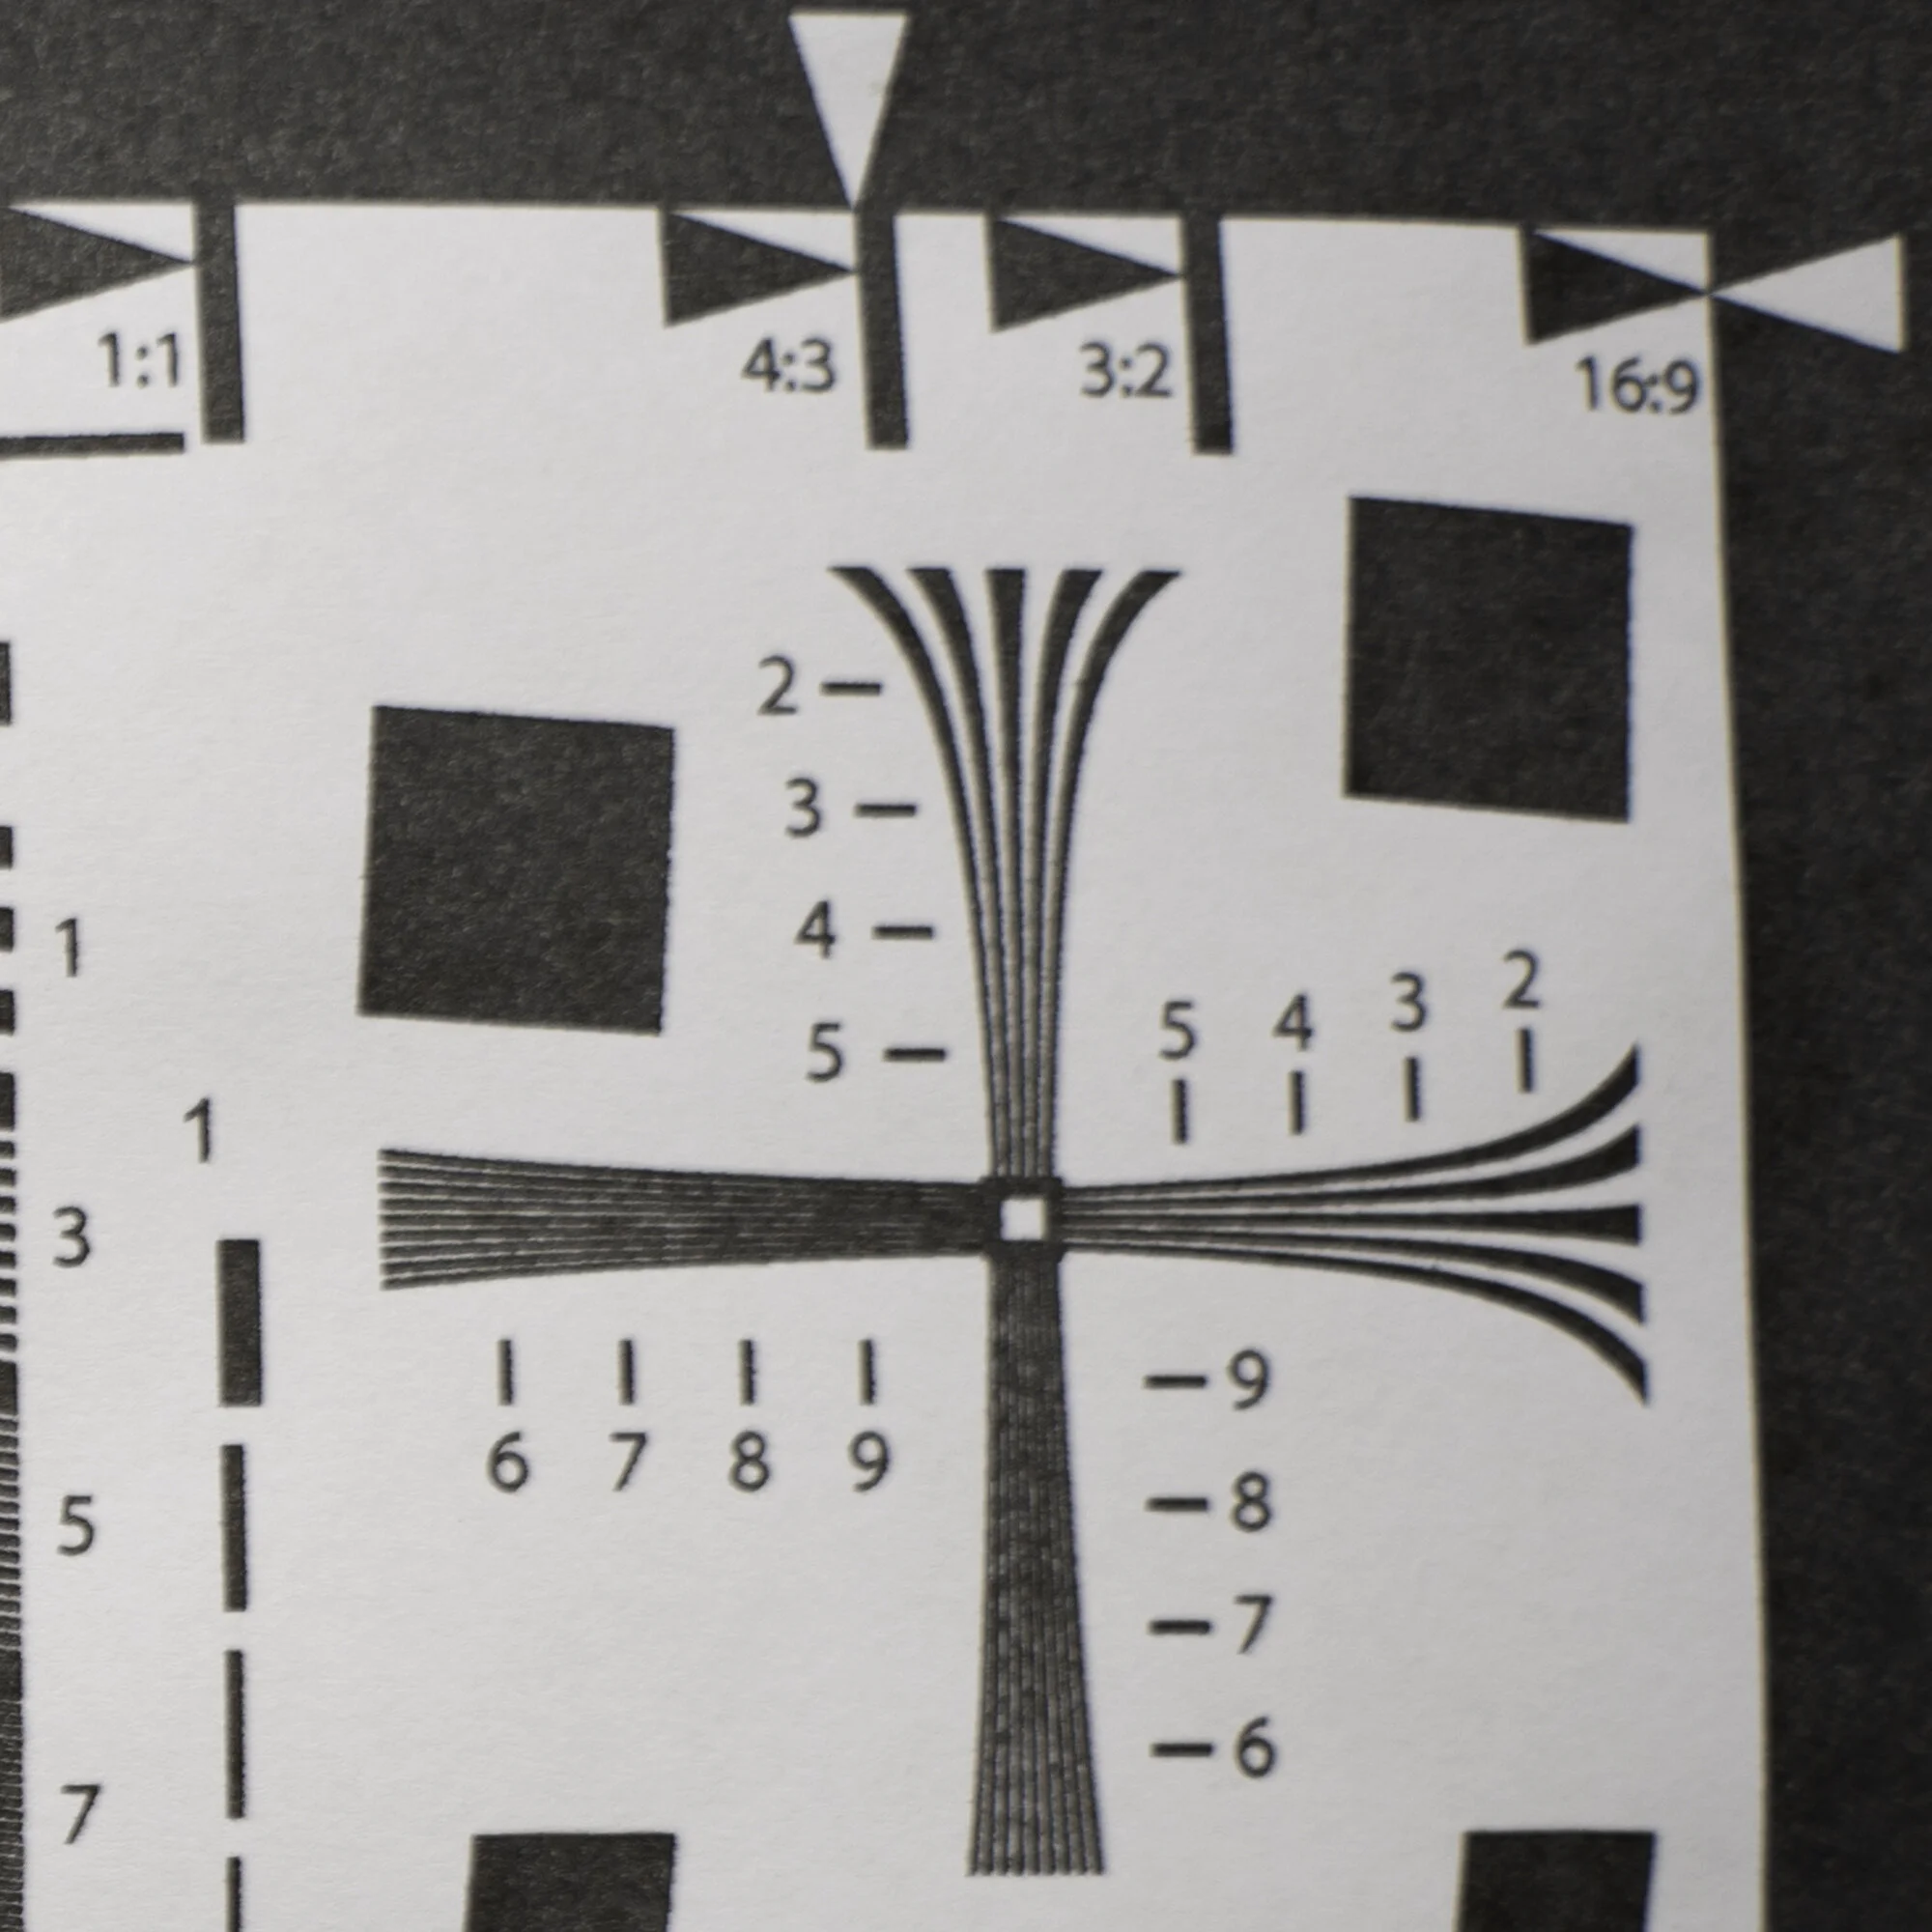


My order of rankings for performance purely from this test chart is:
Voigtlander APO-LANTHAR
Leica Summicron
Zeiss Planar
Konica M-Hexanon


The Voigtlander had superb sharpness and consistent image performance across the frame. The Leica is a little softer on the corners, but I’d expect the corner softness to disappear on a true Leica digital camera. The Zeiss Planar has some color fringing in the corners and the Konica has obvious chromatic abberation going on the edges of the image. Overall, the Voigtlander, Zeiss, and Leica produce amazing images and the Konica holds up relatively well. However, it does speak volumes when I can instantly spot just how much cleaner the images out of the Voigtlander are.
Sample Images
Click on the photo to view a larger image.


Final Thoughts

This is quite simply one of the most sophisticated Leica M mount lenses that has been released. Minimal color fringing, excellent sharpness, amazing bokeh quality, and solid build quality are all obvious signs that this lens is a must-have for any photographer looking for a Leica M mount standard prime lens.
Unfortunately I didn't have the Leica 50mm f/2 APO version to compare this lens to, but comparing a $9000 lens to a $1000 lens doesn't make much sense to me, personally. The differences in optical quality become so minute that a ~$8000 price difference is hard to justify unless if you're a purist who prefers Leica glass on Leica camera bodies. From my experience with the Voigtlander, it outperformed the Leica 50mm f/2 Summicron, Zeiss Planar 50mm f/2, and my Konica M-Hexanon 50mm f/2 in every aspect asides from the moderate vignetting. If you've come down to any of these lenses while deliberating on your next 50mm prime lens, then the difference in build quality is probably your main factor to consider.
Pros:
Sharpness
Bokeh quality
Near zero color fringing
Solid build construction
Well dampened focus ring
Cons:
Moderate vignetting at f/2
Slightly hard-to-read distance indicators
Larger than comparable 50mm f/2 M mount lenses
No included lens hood
Other Comments:
At $999 USD, the Voigtlander isn’t cheap but the Leica Summicron costs ~$2800 USD and the APO-Summicron costs ~$9000 USD. So you’re saving a significant amount of money for a lens that has image quality near the level of Leica glass.
Rating: 5/5
Providing a B&H Photo Affiliate link if you’d like to purchase the lens so I can use the funds to run my reviews. Thanks!
Voigtlander 50mm f/2 APO-LANTHAR for Leica M.

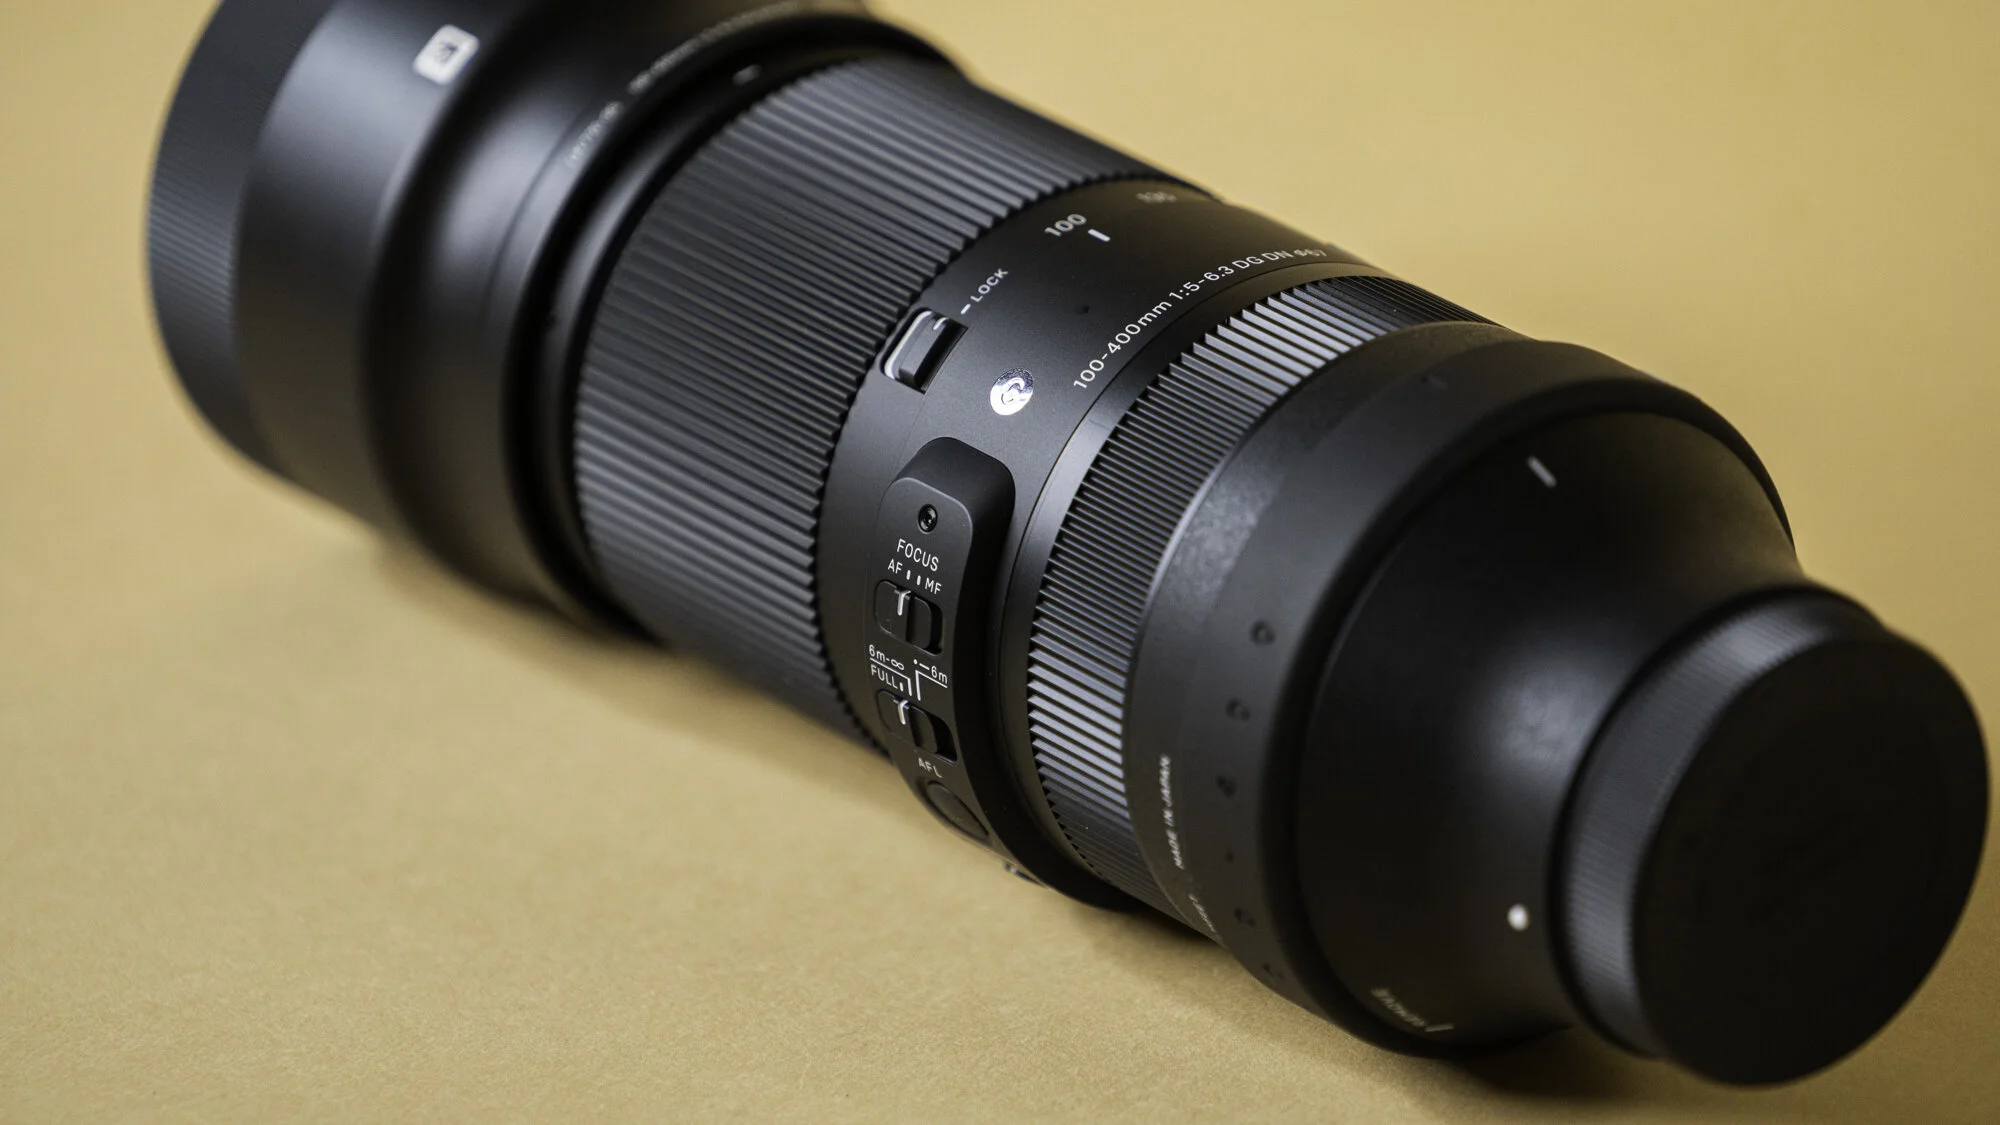
Review: Sigma 100-400 f/5-6.3 DG DN OS for Sony E
Intro
Sigma has been a popular alternative to the expensive Sony G and GM series lenses. Sigma’s recent mirrorless options have been great for their affordable price without sacrificing too much image quality. Their newest addition to their mirrorless lineup is the 100-400 telephoto zoom.
This is Sigma’s first foray into mirrorless telephoto options for the Sony E and Leica L mount. This zoom range does exist in their DSLR version, but Sigma has claimed that this lens has an entirely new glass construction to optimize image quality for mirrorless cameras.
Specs
Focal Length: 100mm-400mm (APS-C Equivalent: 150mm-600mm)
Minimum Focus Distance: 112cm at 100mm, 160cm at 400mm
Max Aperture: f/5-6.3 (f/5 from 100-125, f/5.6 from 125-350, f/6.3 from 350-400)
Weight: 1140g
Dimensions (Diameter x Length): 86mm-199.2mm
Filter Size: 67mm
Diaphragm Blades: 9
Weather Proofing: Splash & Dust Resistant
Price: $949 USD
Build Quality
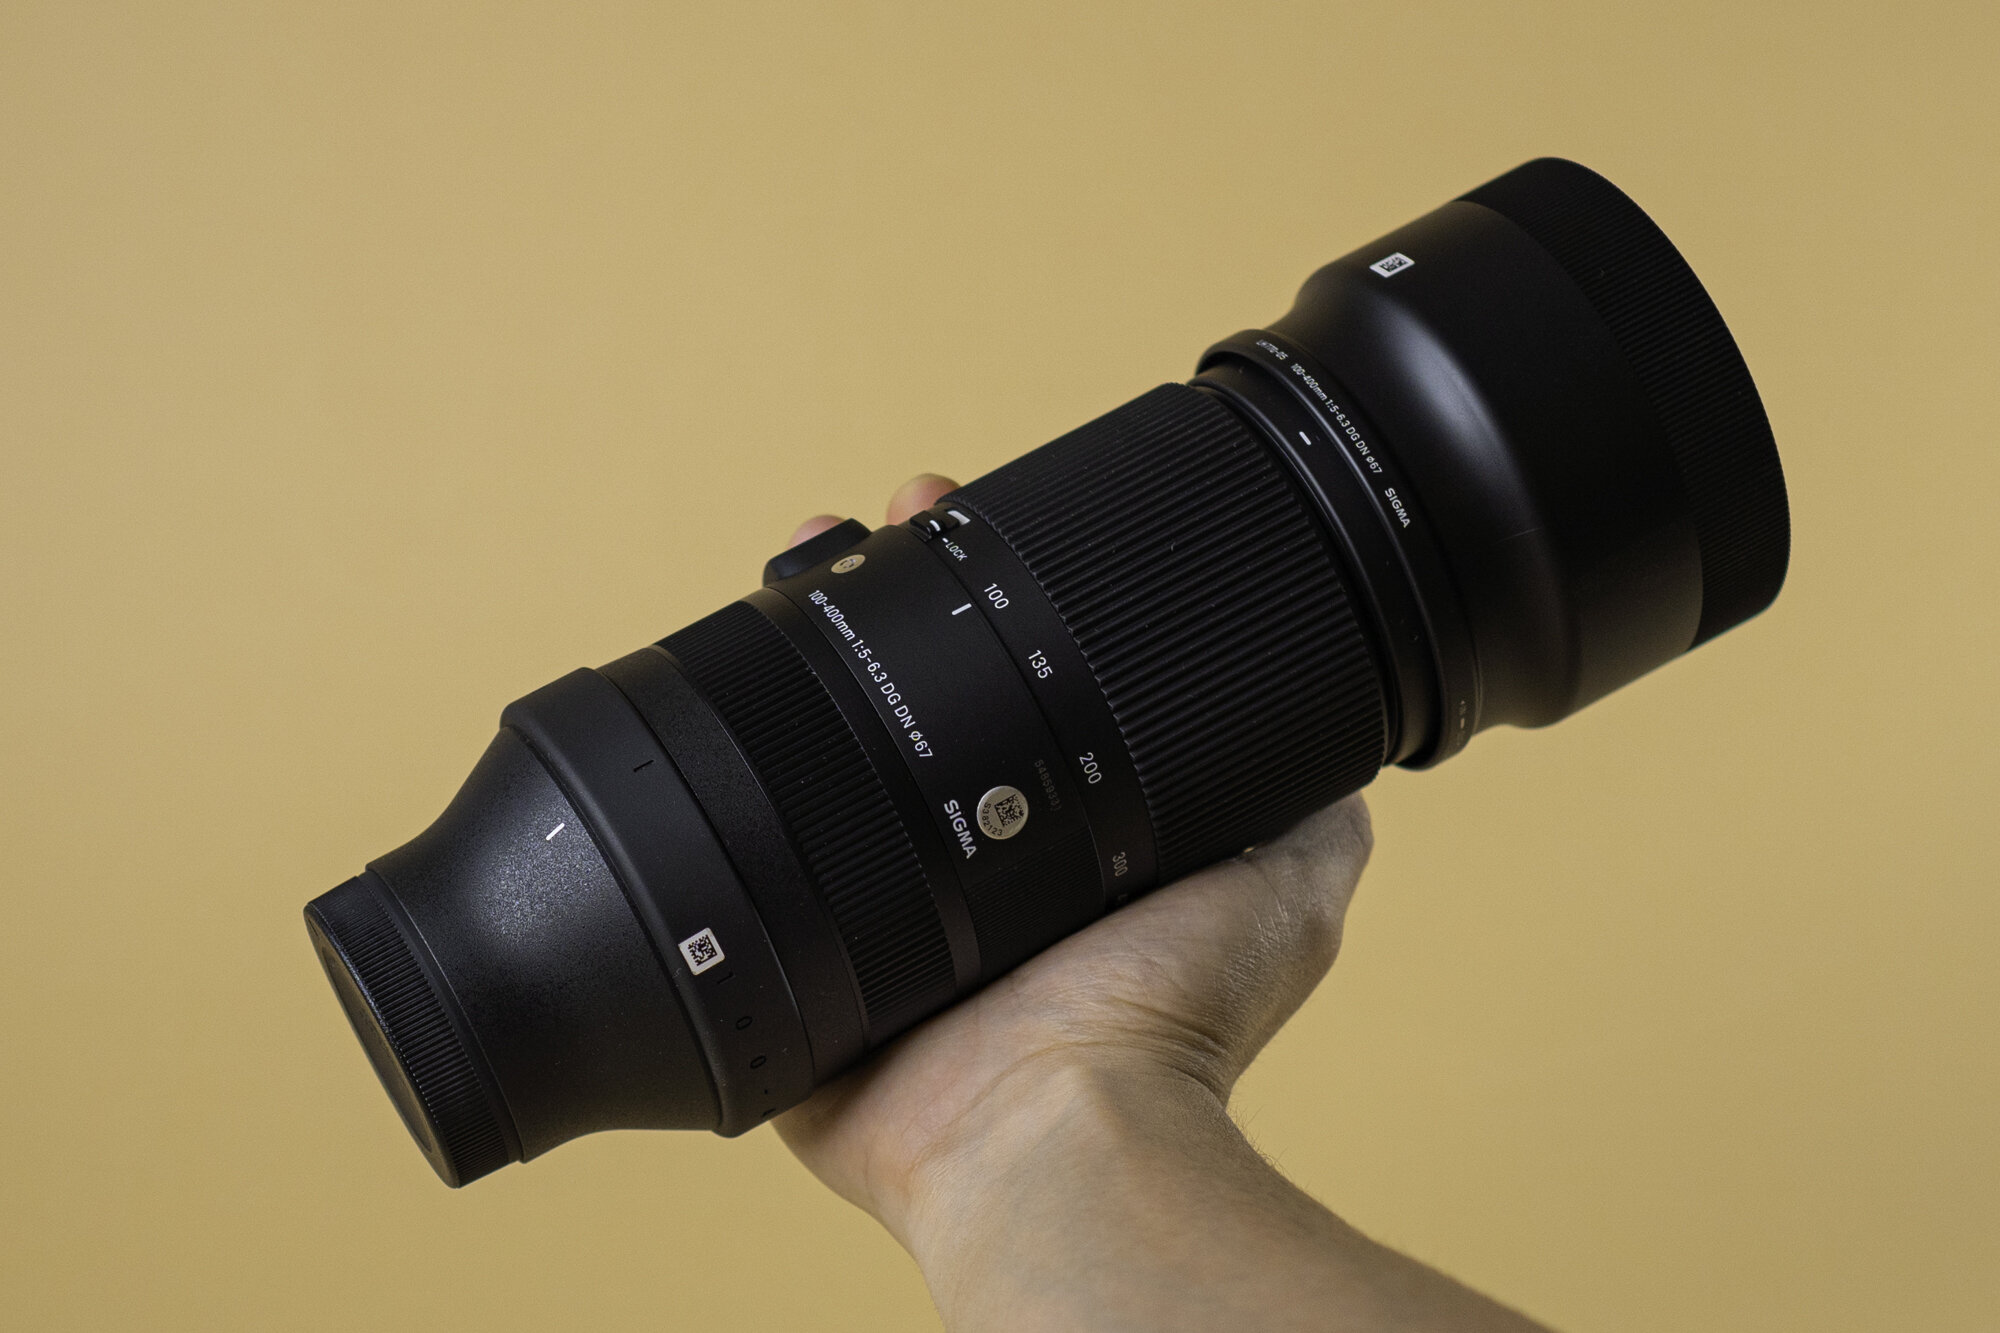
If you’ve ever held a Sigma lens before, you’ll know how heavy and robust they can be. I’m happy to say that this 100-400 feels incredibly comfortable in the hands and is definitely portable. This lens feels more like a large midrange zoom than a long telephoto.
This lens does not come with a tripod collar and alternatively has a rubber band covering where the tripod collar would mount. I usually carry my telephoto lenses with one hand on the tripod collar for stabilization but this lens has its weight distributed so well that it felt fine to carry around all day without one.
The Sigma 100-400 is comprised of mostly plastic but also some metal. Most of the weight is distributed toward the mount, even when the lens is zoomed all the way out to 400. This allows the user to not have to deal with constant weight shifting as you zoom back and forth. I’ve personally have had no problems hand holding this lens and I honestly believe this is the most comfortable zoom lens I’ve ever held.
On the side of the barrel, you’ll find a AF/MF switch, Focus Distance switch, Function button, and an Optical Stabilization switch. There’s also a nifty little Lock switch to prevent lens creep when storing the lens away in your camera bag


Performance
Compared to the Sony GM 100-400, you’re losing 1/3 stop of light on paper when switching to the Sigma 100-400 DG DN. However, I’ve found that this lens has more of a maximum aperture of f/5.6-6.3. 1/3 stop of light sounds like a small sacrifice until you realize the lens has a maximum aperture of 5.6 with a short turn of the zoom ring from 100mm-125mm. So functionally, you’ll find yourself at 5.6 or 6.3 for a majority of your photos.
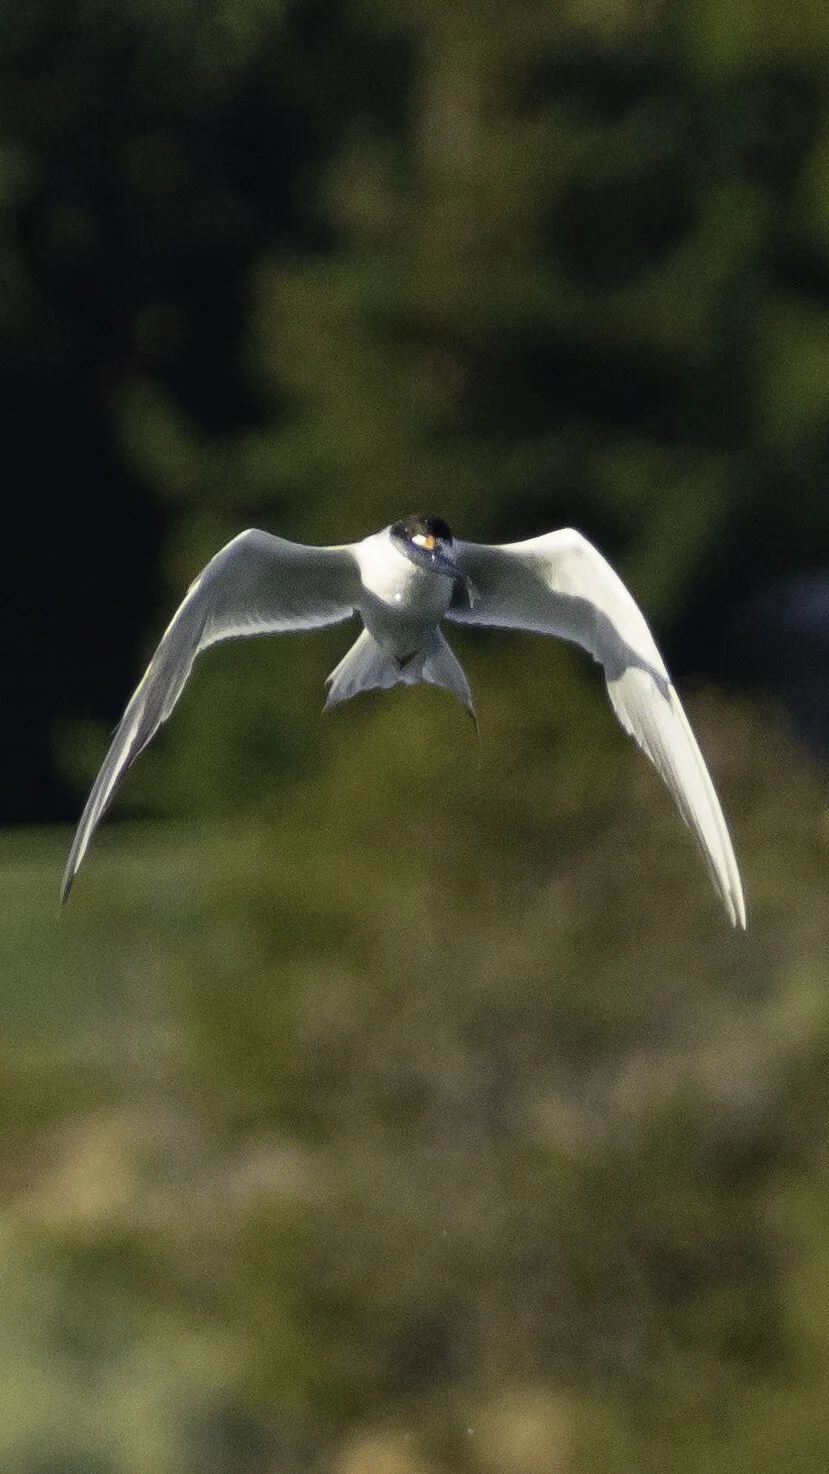
I’m happy to say that the autofocus performance of this lens has been satisfactory. I lost focus while tracking some birds in flight but I attribute that to user error over the lens not performing. Otherwise, it locked onto birds’ eyes and was snappy when switching targets. I’ve done a autofocus test on my video review if you’d like to see more.
Personally, I find it hard to find major differences in image quality when looking at my images taken with the Sigma compared to the Sony GM lens. Beside the obvious drop in maximum aperture, sharpness and contrast look very similar to me. I will say to take this portion of my review with a grain of salt since I don’t pixel peep as much as other reviewers. Vignetting is pretty apparent in photos aimed toward the sky but I’m eagerly awaiting a Lightroom profile from Adobe.


Final Thoughts
For those who are still debating between the Sony 100-400 GM and this Sigma competitor, there are several factors you should consider. Is wider maximum aperture and best-in-class autofocus speed your priority? If you’re willing to spend $2498 USD, then the Sony 100-400 GM is your best choice. If you’re looking for a relatively affordable and light telephoto zoom alternative, then you should definitely buy the Sigma at $949.
You’ll also have to consider that Sony has 1.4x and 2x teleconverter options for most of their telephoto lenses. While Sigma has released a set of teleconverters, they’re only compatible with the Leica L mount version. I e-mailed Sigma and they responded that they’re not allowed to release certain accessories like the teleconverter due to a prior agreement made with Sony.
Personally, the teleconverters aren’t a major negative and I’ll most likely end up buying my own Sigma 100-400. The main factors that influenced me were size, length, filter diameter, and of course price. I had back-to-back rentals of the Sony and Sigma 100-400s and never felt like the autofocus nor image quality was a big enough difference. The weight was definitely the most memorable factor when transitioning to the Sigma.
This will be the second Sigma lens I’ll own for my Sony cameras and I can’t wait to see what else they’re going to release in the coming year.
Blog
Welcome to my blog, where I share in-depth product reviews and insights from my personal travel experiences.